If you are worried about how much does it cost to assemble a trampoline? The cost of assembling a trampoline can vary based on a few factors. The type of trampoline you choose, including its size and style, can affect the price.
If you decide to hire a professional to assemble it for you, there will be additional costs for their services. On the other hand, if you choose to assemble it yourself, you’ll need to consider the cost of any tools or equipment required.
Additionally, there may be extra expenses if you decide to purchase safety enclosures, ladders, anchoring kits, or weather covers. Researching and comparing prices is important to make an informed decision based on your specific needs and budget.
How much does it Cost to Assemble a Trampoline: The cost of trampoline assembly varies depending on factors like trampoline type, professional services, DIY, and additional accessories. Research and compare prices for informed decision-making.
Where is it possible to have one Installed?
The price of installing a trampoline can vary depending on the size and type of trampoline you select, as well as where you choose to have it installed. Some companies may include installation in the trampoline’s price, while others may charge an additional fee.
To get an estimate of the installation cost, you can contact different companies and ask for quotes. It’s important to remember that the cheapest option may not always be the best, so it’s a good idea to compare prices and read reviews before making a decision.
What do I need to attach a Trampoline?
Attaching a trampoline requires several essential items. Firstly, you need to purchase the trampoline itself, selecting the appropriate size and type based on your preferences and available space.
The trampoline should come with all necessary components for assembly, including the frame, jumping mat, and springs.
To ensure safety, it is crucial to acquire padding specifically designed for trampolines. This padding, often made of foam or rubber, goes around the edges of the trampoline frame, providing cushioning and protection against accidental impacts with the frame or springs.
Additionally, you will need straps or cords to secure the trampoline to the ground. These anchoring devices prevent the trampoline from moving or tipping over during use, especially in windy conditions. Anchoring kits usually include straps or cords and stakes or augers that are driven into the ground.
When budgeting for trampoline attachment, consider allocating around $200 for these necessary materials, including the trampoline, padding, and anchoring devices. Remember to follow the manufacturer’s instructions and any safety guidelines provided to ensure a secure and enjoyable trampoline experience.
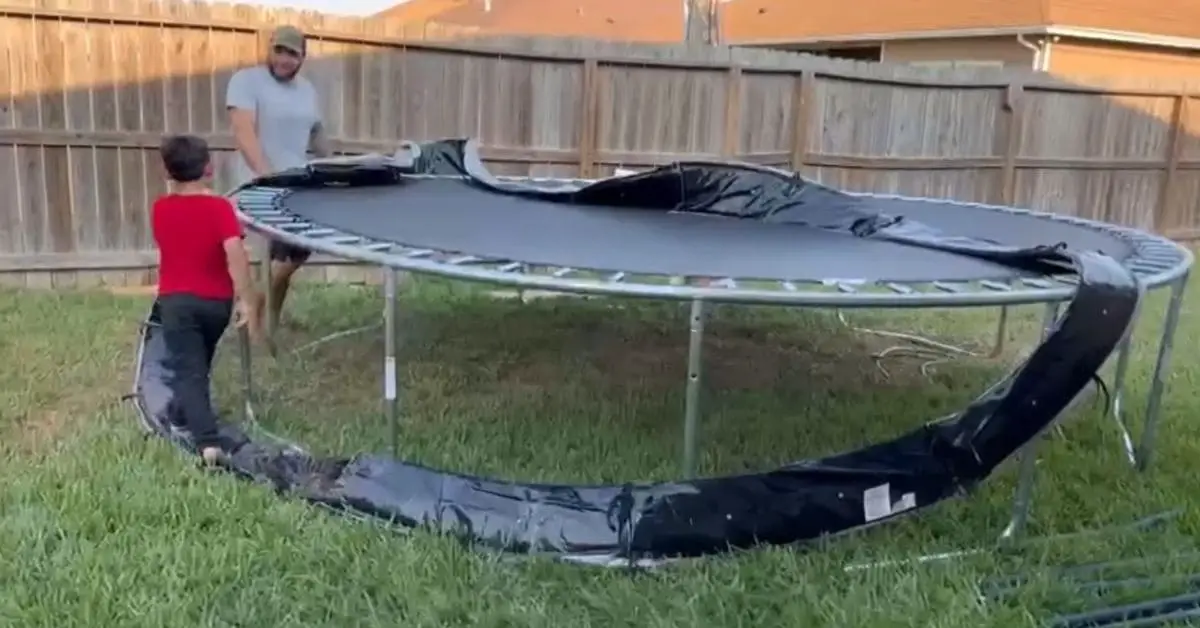
Self-Assembly Requires More Time and Effort
Self-assembly offers the advantage of being able to choose trampoline parts based on your budget, potentially saving costs. However, it’s important to consider that self-assembly may require more time and effort than anticipated.
It involves carefully following instructions, connecting various components, and ensuring proper alignment and stability. While it can be a rewarding experience, it’s essential to allocate sufficient time and patience for the assembly process to ensure a safe and well-constructed trampoline.
Proper Assembly Requires Adequate Time:

When you choose to purchase trampoline parts for self-installation, keep in mind that you might not receive detailed installation instructions. If you’re not experienced in assembling things, this could result in spending more time on the process.
Moreover, during the trampoline setup, you might face interruptions if the parts don’t fit together properly, requiring additional time for adjustments or even returning them for replacements.
It’s important to consider these factors and be prepared for potential challenges that may arise during the assembly process.
Selecting Suitable Trampoline Parts Takes Time:
When purchasing different trampoline parts, it’s unlikely that you’ll find everything you need in a single store. This means you’ll have to spend more time considering various factors and talking to different sellers who specialize in different parts.
For instance, you’ll need to consider each part’s size, appearance, and quality, ensuring they will fit perfectly with the other components. Moreover, you’ll have to dedicate time to inquire about after-sales services, such as warranties and return policies.
If, after careful consideration and consultation, you feel the parts don’t meet your requirements, you might have to start the process over again. All of this can consume a significant amount of your time.
Delivery Time for Trampoline Parts:
You may encounter variations in delivery times when purchasing trampoline parts from different sellers. Since the parts may be shipped from different locations, they may not all arrive at the same time.
If certain crucial parts have slower delivery speeds, you’ll have to be patient and wait for a longer period of time until they are delivered to you. This means you might experience delays in the assembly process until you have received all the necessary parts.
Potential Risks Associated with Self-Assembly
While opting to assemble a trampoline by yourself may offer cost savings, it is crucial to acknowledge the potential risks arising after the installation.
Lack of Security Precautions:
Apart from concerns about quality, the safety of self-assembled trampolines can be questionable. Original trampolines are professionally designed, quality tested, and have clear weight capacity and safety features. However, self-assembled trampolines’ weight capacity and safety measures may be uncertain.
If a trampoline has a low weight capacity or lacks safety features like a non-slip design or spring covers, there is a risk of injury for children while jumping. It’s important to consider these safety aspects when assembling a trampoline yourself.
Quality Concerns with Self-Assembly:
The overall quality of a trampoline depends on the quality of each individual part. However, when purchasing parts separately for self-assembly, the quality may not be consistent. If you happen to buy a low-quality part, it can affect the durability of the entire trampoline.
Moreover, the parts you buy may not fit as well as the professionally-made original trampoline parts. This can lead to a loose or damaged trampoline, posing a risk of injury to children while jumping. It’s important to be mindful of these quality concerns when assembling a trampoline yourself.
Lack of Adequate After-Sales Support:
Maintaining a self-assembled trampoline can be inconvenient. Original trampolines usually come with clear warranty periods for different parts, offering comprehensive after-sales service such as repairs and returns in case of damage during the warranty period.
However, with self-assembled trampolines, you may not have access to reliable after-sales support, and some parts may not even have warranties. Consequently, if the trampoline gets damaged, you might have to bear the maintenance costs alone.
Over time, the expenses associated with self-assembly can accumulate, making it a more costly option in the long run.
Increased Physical Effort Required for Trampoline Assembly
Compared to purchasing a complete trampoline directly, buying parts to assemble it yourself requires more work and effort. It involves additional steps such as selecting and purchasing individual parts, ensuring compatibility, and assembling them correctly.
This process demands more time, research, and physical effort from you. However, assembling a trampoline yourself can provide a sense of accomplishment and potentially save costs.
It’s important to weigh the benefits and drawbacks to determine the best approach for acquiring a trampoline for kids.
Return and Exchange Policies for Trampoline Purchases:
If you encounter issues where the parts you purchased are unsuitable, mismatched, or damaged, you will need to seek further advice and initiate product returns.
This process can be tiring and bothersome, especially for busy parents with numerous daily responsibilities.
Research and Consultation Needed:
Before attempting to assemble a trampoline on your own, it’s important to dedicate time and effort to research and gather relevant information. This includes gaining a basic understanding of different trampoline sizes, shapes, and required parts.
Consider factors such as the available space, the age, and the weight of your child, and choose accordingly. Ensuring the trampoline’s elasticity and safety requires paying attention to the number of springs and the safety design.
Having too many or too few springs can impact safety and bounce, while an unsafe design can pose potential risks for children. Being well-informed about these aspects is crucial for a successful and safe trampoline assembly.
Trampoline Requires More Energy Than Expected:
Installing a trampoline without detailed installation videos and instructions can be more challenging. For those unfamiliar with trampoline assembly, incorrect installation steps or improper tools can slow down the process and even require additional unnecessary energy.
It’s important to be prepared for potential complications and be patient throughout the installation process to ensure it is done correctly.
Trampolines Installed Above the Ground
If you choose to get an above-ground trampoline, you have a few options for installation. The simplest way is to set it up on a flat area in your backyard. This method typically only requires the purchase of the trampoline itself, without any additional costs.
Another option is to secure the trampoline by staking it into the ground. This provides extra stability and makes it more resistant to harsh weather conditions. However, it becomes less portable and can make lawn maintenance more challenging.
For this type of installation, you’ll need to buy some stakes, which can vary depending on your trampoline and yard. Visit your local hardware store to find the best stakes for your situation. Apart from the trampoline and stakes, no significant additional costs are involved.
Cost of Above-Ground Trampolines:
The price of an above-ground trampoline kit can vary from $500 to $2,000, depending on factors like size and materials used. The cost of professional installation can also differ, but in general, the total project cost, including the trampoline and installation, will likely range from $300 to $2,500.
The final cost will depend on the trampoline size and whether you decide to install it yourself or hire a professional to do it for you.
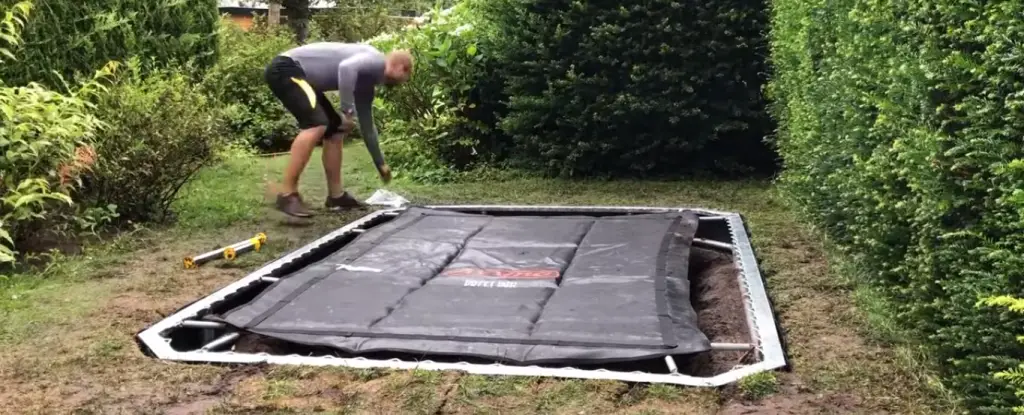
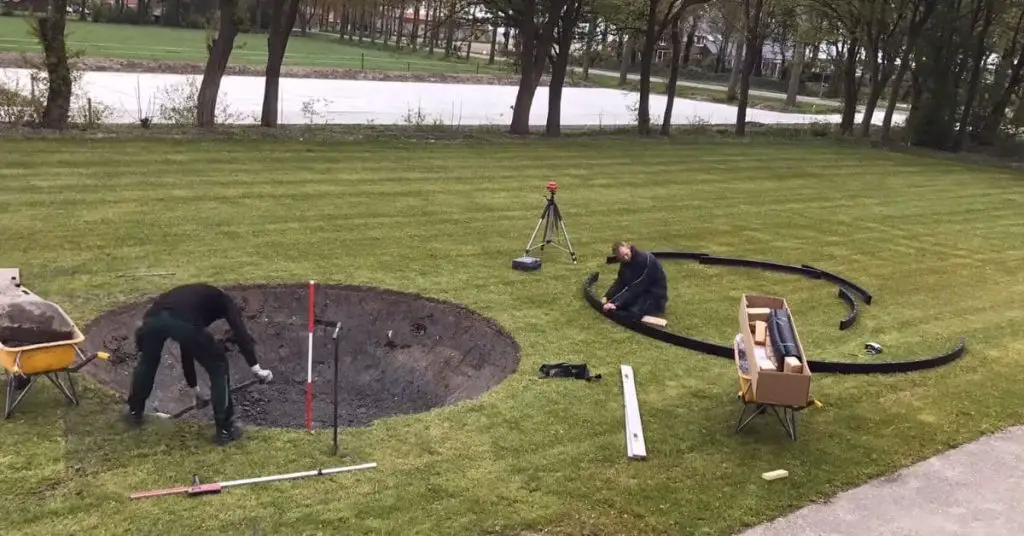
Trampolines Installed Inground
Another option is to choose an inground trampoline, which is a more permanent and relatively more expensive choice. If you’re unfamiliar with inground trampolines, they are similar to inground swimming pools.
Setting up an inground trampoline requires more work than above-ground ones, but it offers a unique and different experience.
Are Inground Trampolines Worth the Investment?
Installing an inground trampoline in your backyard can offer several benefits. Firstly, it provides enhanced security as it is firmly fixed in the ground, ensuring stability during use.
This also contributes to improved safety, as the jumping surface is level with the surrounding yard, reducing the risk of falling from a higher height. Additionally, inground trampolines can still have safety nets for added protection.
Regarding yard maintenance, having an inground trampoline means you won’t have to move it for mowing or landscaping activities. It seamlessly blends into your backyard, adding fun without creating visual distractions or obstructing your view.
Overall, investing in an inground trampoline can be worthwhile, offering increased security, safety, and a visually appealing addition to your outdoor space.
Cost of Inground Trampolines:
The cost of an inground trampoline kit is generally similar to that of an above-ground kit, ranging from $300 to $2,000. However, installing an inground trampoline involves additional expenses.
You will likely need to hire someone to dig a hole, which can cost between $400 and $1,500, with potentially higher costs if the ground is hard. Furthermore, you will need to construct a retaining wall in the hole, which typically costs around $2,000 for an average 14-foot trampoline.
These additional costs should be considered when budgeting for an inground trampoline installation.
Factors Affecting the Cost of Inground Trampolines:
Several factors can influence the cost of inground trampolines. These factors include:
Cost of Finishing Stones and Retaining Walls:
Once the area for the inground trampoline is excavated, you have options for how to finish it. Leaving it as packed dirt may result in vegetation growth over time. To create a neater and more functional space, you can fill it with gravel, bricks, finishing stones, or cement.
It is important to build a retaining wall to support the surrounding area and maintain the desired shape of the trampoline pit. The cost of the retaining wall will vary depending on the material used, with a wooden wall generally being cheaper than a concrete one.
Determining the Depth of the Inground Trampoline Hole:
When installing an inground trampoline, you must dig a hole approximately the same length, width, and height as the trampoline itself. The specific size of the hole will depend on the type and size of the trampoline kit you choose, which will also affect the overall cost.
For example, a 14-foot trampoline typically requires a hole around 3 feet deep. Remember that these measurements may vary depending on the trampoline model and manufacturer.
Potential Water Issues with Inground Trampolines:
When digging a hole for an inground trampoline, water may flood the hole. To prevent this, you need to add a drainage system that removes any standing water that may accumulate.
The drainage system can range from simple soil drainage to a more complex sewer system depending on the soil type. Additionally, it’s important to choose an inground trampoline kit with a galvanized steel frame to prevent rust and keep the trampoline in good condition.
How much does it Cost to Assemble a Trampoline: Additional Materials or accessories
The cost of additional materials or accessories for assembling a trampoline can vary depending on what specific items you are referring to. Some common additional materials or accessories for trampolines:
- Safety Enclosures:
Safety enclosures are an important accessory for trampolines as they provide an added layer of protection to prevent accidental falls and injuries. The cost of safety enclosures can vary depending on the size and quality.
On average, a safety enclosure for a trampoline can range from $50 to $200 or more, depending on the brand and features. Choosing a safety enclosure specifically designed for your trampoline model is recommended to ensure proper fit and functionality.
- Ladders:
A trampoline ladder is a convenient accessory that allows users to access the trampoline surface without straining or climbing easily. Ladders are available in various sizes and materials, which can affect their cost.
Typically, a trampoline ladder can cost around $20 to $50, depending on the quality and design. Choosing a ladder compatible with the height and size of your trampoline is essential to ensure safe and easy access.
- Anchoring Kits:
Anchoring kits secure the trampoline to the ground, providing stability and preventing it from tipping over during use. These kits usually include stakes or straps that can be attached to the trampoline frame and anchored into the ground.
The cost of anchoring kits can vary based on the type and quality. Basic anchoring kits can range from $15 to $30, while more advanced kits with heavy-duty materials or specialized designs can cost up to $50 or more.
- Weather Covers:
Weather covers are designed to protect the trampoline from outdoor elements such as rain, snow, and UV rays. They help extend the lifespan of the trampoline by preventing damage and reducing exposure to harsh weather conditions.
The cost of weather covers depends on the size and quality of the cover. On average, a weather cover for a trampoline can range from $30 to $100, with higher-end covers offering better durability and weather resistance.
It’s important to note that the prices mentioned are approximate and can vary based on factors such as brand, quality, and availability. Researching and comparing prices from different retailers or online stores is recommended to find the best deal for the specific additional materials or accessories you need for your trampoline.
Professional Assembly Costs:
Here are some things about professional assembly costs:
- Examples of Average Assembly Service Rates:
The cost of professional trampoline assembly can vary depending on various factors such as location, complexity of the trampoline, and additional services provided. Here are some general examples of average assembly service rates:
- Basic Assembly:
The average cost for basic trampoline assembly ranges from $100 to $200. This usually includes the assembly of the trampoline frame, attaching the jumping mat and springs, and installing safety pads.
- Full Assembly:
If you opt for a more comprehensive assembly service that includes attaching safety enclosures, ladders, and other accessories, the cost can range from $200 to $400 or more. This type of assembly service may also involve leveling the ground and ensuring proper anchoring.
- Additional Fees or Charges:
It’s important to consider that some professional assembly services may have additional fees or charges. These can include:
- Travel Costs:
If the assembly service provider needs to travel a significant distance to your location, they may charge additional fees for transportation.
- Customization or Repairs:
If you require specific customization or any repairs during the assembly process, additional charges for these services may exist.
DIY Assembly Costs:
Here are some things about DIY assembly costs:
- Potential Savings:
Choosing to assemble the trampoline can save you money on professional assembly fees. The exact savings will depend on the complexity of the trampoline and your own skills and experience with assembly.
- Costs of Required Tools or Equipment:
When considering DIY assembly, it’s important to factor in the costs of any tools or equipment you may need. Common tools required for trampoline assembly include screwdrivers, wrenches, pliers, and possibly a rubber mallet.
If you don’t already own these tools, you may need to purchase or borrow them, which can range from $20 to $50 or more, depending on the quality and brand of the tools.
Additionally, some trampoline manufacturers may provide specialized tools or equipment with the trampoline kit, which can affect the overall cost of DIY assembly.
Overall, DIY assembly can save you money, especially if you already have the necessary tools or can borrow them. However, it’s important to carefully read and follow the manufacturer’s instructions to ensure proper assembly and the trampoline’s safety.
Cost-Saving Tips for Trampoline Assembly
Here are some cost-saving tips for trampoline assembly:
- Compare Prices: Before purchasing a trampoline or any additional materials or accessories, compare prices from different retailers or suppliers. Look for sales, discounts, or bundle deals that can help you save money.
- DIY Assembly: Consider assembling the trampoline yourself instead of hiring professional services. With the help of detailed instructions and online tutorials, you can save on assembly costs. However, ensure you have the necessary tools and equipment for the job.
- Shop for used Trampolines: If budget is a major concern, consider buying a trampoline. Many people sell trampolines in good condition at lower prices. Just make sure to thoroughly inspect the trampoline and ensure all necessary parts are included.
- Opt for Basic Models: Trampolines come in various sizes and styles, and more elaborate designs can be expensive. If cost is a priority, choose a basic model that meets your needs without unnecessary features or accessories.
- Take Advantage of Package Deals: Some retailers offer package deals with additional accessories such as safety enclosures, ladders, or weather covers at a discounted price. These bundles can be more cost-effective compared to purchasing each item separately.
- Seek Discounts or Promotions: Look for special discounts or promotions offered by trampoline manufacturers or retailers. This can help you save money on the initial purchase or on additional accessories.
- Proper Maintenance: Take good care of your trampoline to extend its lifespan and avoid costly repairs or replacements. Follow the manufacturer’s instructions for maintenance, regularly inspect the trampoline for any signs of damage, and address issues promptly to prevent further damage.
By following these cost-saving tips, you can minimize the expenses associated with trampoline assembly and enjoy the benefits of having a fun and safe trampoline for your family to enjoy.
FAQs:
Q:1 How much does professional trampoline assembly cost?
The cost of professional trampoline assembly typically ranges from $100 to $400 or more, depending on the complexity of the trampoline, additional accessories, and the assembly service provider’s rates.
Q:2 Are there additional fees or charges for professional trampoline assembly?
Yes, there might be additional fees or charges for factors such as travel costs if the assembly service provider needs to travel a long distance, customization or repairs required during assembly, or any specific services requested beyond basic assembly.
Q:3 Can I save money by assembling the trampoline myself?
Yes, DIY assembly can save you money on professional assembly fees. However, you need to consider your own skills and experience, as well as the complexity of the trampoline. Following the manufacturer’s instructions carefully is important to ensure safe and proper assembly.
Q:4 What tools or equipment do I need for DIY trampoline assembly?
The tools required for trampoline assembly typically include screwdrivers, wrenches, pliers, and possibly a rubber mallet. The cost of these tools can range from $20 to $50 or more, depending on the quality and brand. Some trampoline kits may also include specialized tools or equipment.
Q:5 Are there any additional costs for DIY assembly?
Besides the cost of tools, there are usually no additional fees associated with DIY assembly. However, you should consider any potential costs for leveling the ground, ensuring proper anchoring, or purchasing additional accessories such as safety enclosures, ladders, or weather covers.
Q:6 How can I ensure a successful DIY trampoline assembly?
Carefully read and follow the manufacturer’s instructions to ensure a successful assembly. Take your time, involve another person if needed, and ensure all parts are securely and correctly installed. Safety should always be the top priority.
Q:7 Can I hire someone for partial assembly or specific assembly tasks?
Yes, some assembly service providers offer partial assembly or specific task services. For example, if you find certain steps challenging or time-consuming, you can hire someone to assist with those specific tasks while you handle the rest of the assembly. The cost for such services will depend on the specific requirements and the service provider’s rates.
Conclusion:
In conclusion, the cost of assembling a trampoline can vary depending on whether you choose professional assembly or DIY assembly. Professional assembly services can range from $100 to $400 or more, depending on factors such as the complexity of the trampoline and any additional fees or charges.
DIY assembly provides an opportunity for cost savings, but it requires careful consideration of your own skills and experience.
For DIY assembly, you will need to invest in tools and equipment such as screwdrivers, wrenches, pliers, and possibly a rubber mallet, which can cost around $20 to $50 or more.
It’s important to follow the manufacturer’s instructions diligently to ensure safe and proper assembly. Additional costs for DIY assembly may include leveling the ground, anchoring, and purchasing accessories like safety enclosures, ladders, or weather covers.
Whether you choose professional assembly or DIY assembly, prioritizing safety is essential. Take your time, follow the instructions, and ensure all parts are securely and correctly installed.
Remember, the cost of assembly is not only financial but also involves the peace of mind and well-being of those using the trampoline.
We hope you will be well aware of how much it costs to assemble a trampoline after reading this comprehensive article. If you have any questions, feel free to comment below!