
If that’s the case, let me tell you, building your own trampoline wrestling ring is a game-changer! Picture this: a trampoline ring right in your backyard or basement. Sounds amazing, right?
It’s a fantastic option for us amateur wrestlers to practice those killer moves without risking twisted ankles or worse. But wait, there’s more! It’s not just for wrestling – it’s the ultimate fun hub for everyone!
In this article, I’m handing over my secret blueprint on how to turn a trampoline into a wrestling ring. We’ll tackle everything – from that all-important materials checklist to the gotta-know safety measures. So, folks, lace up and get ready; we’re about to embark on a DIY adventure for the ages!
How to turn a trampoline into a wrestling ring: To create a trampoline wrestling ring, secure a trampoline within a sturdy frame, add corner posts, and attach ropes or elastic bands. Ensure safety by adding padding and establishing rules.
How to turn a trampoline into a wrestling ring?
Here are the steps to create a trampoline wrestling ring. Here’s a simplified version:
Choosing the Right Trampoline:
Choosing the right trampoline is critical for creating a safe and functional trampoline wrestling ring. Pay close attention to the type, size, materials, and safety features to ensure an optimal experience.
Types of Trampolines:
Here are the types of trampolines:
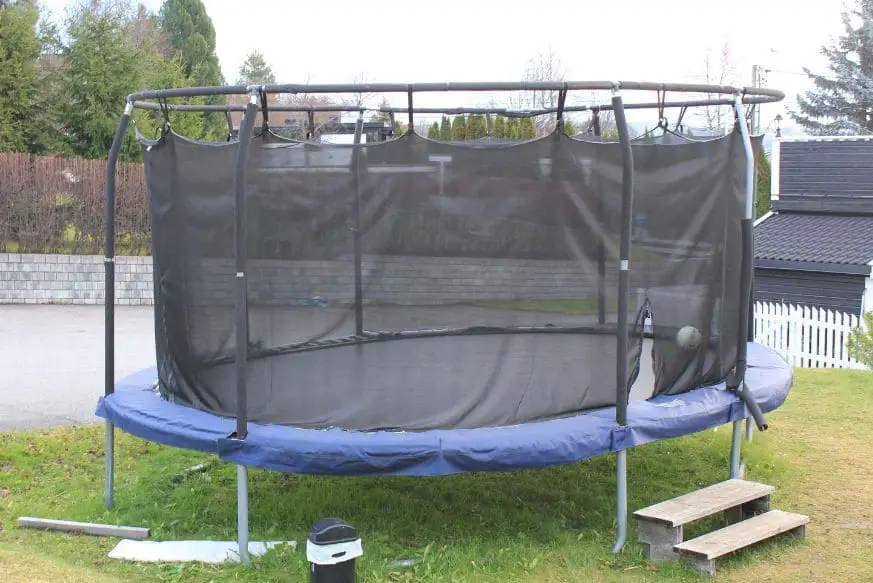
Round Trampolines:
Round trampolines are easily the most prevalent type you’ll find in backyards. Their circular design is especially good for recreational bouncing.
One significant advantage of this shape is that the springs work at the same rate, which means that anyone jumping on it will naturally be directed toward the center.
This is particularly handy for novices or children since it lowers the chances of bouncing off to the edges and potentially falling off.
However, the downside to this is that it doesn’t offer the same lift as rectangular trampolines, which might be something more experienced jumpers are looking for.
Rectangular Trampolines:
If you’re after some serious air time, rectangular trampolines are the way to go. They’re the go-to choice for gymnasts and athletes because the springs work at different rates, providing a more powerful bounce.
This shape allows for a bigger surface area, which is ideal for practicing flips, somersaults, and, of course, wrestling moves. Due to the even distribution of springs, jumpers have more control over their height and landing.
When considering a trampoline wrestling ring, rectangular trampolines are often the top pick due to the similar shape and the high lift they offer.
Square Trampolines:
Square trampolines are like the middle child, blending features of both round and rectangular trampolines. They don’t quite guide you to the center as much as round trampolines do but don’t give as high a bounce as rectangular ones.
What makes them an appealing option is that they offer a large jumping surface area, often similar to that of a rectangular trampoline, but usually fit better into smaller spaces due to their compact design.
If you’re tight on space but looking for something that still offers a decent bounce, a square trampoline might just be the perfect compromise.
In-ground Trampolines:
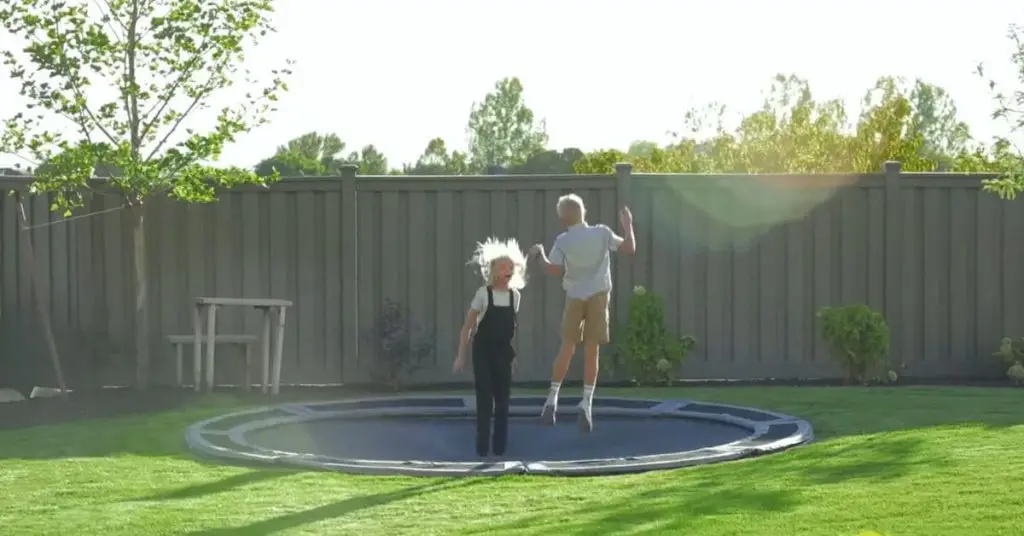
In-ground trampolines are essentially trampolines that are installed into a hole in the ground, so the surface is flush with the lawn or yard. This design significantly reduces the risk of high falls, making it safer especially for children.
It’s also more aesthetically pleasing as it blends in with the yard and doesn’t obstruct views. However, the installation process is much more involved and typically more expensive. It requires excavation and proper preparation to ensure water drainage.
Additionally, in-ground trampolines might not provide as much bounce as above-ground options due to the restriction of airflow beneath them.
Size and Shape Considerations:
- Assessing Space: Consider the space available in your backyard or indoor area. Ensure there’s enough clearance around the trampoline.
- Number of Users: Larger trampolines are more suitable for multiple users. However, it’s important to note that for safety, it’s generally recommended that only one person use a trampoline at a time.
- Purpose: If you’re specifically looking to build a trampoline wrestling ring, opt for a larger size, ideally rectangular, for ample space to simulate a real wrestling ring.
Safety Features:
- Safety Net: Though not essential for a wrestling ring, a safety net can prevent falls.
- Padding: Make sure there is ample padding over the springs and frame. This is especially important in a wrestling context to prevent injury.
- Maximum Weight Limit: Check the weight limit to ensure that it can safely support the users.
Additional Accessories and Requirements:
- Ladder for Access: If it’s an above-ground trampoline, you might need a ladder for ease of access.
- Anchor Kit: For added stability, especially in windy areas, an anchor kit can be useful.
What You Need to Make a Trampoline Wrestling Ring?
To make a trampoline wrestling ring, you will need some specific materials that match the size of your trampoline. Measure your trampoline first and then get the necessary materials. Here’s what you’ll need:
- Non-stretchable ropes.
- Four pieces of wood or PVC pipes, each 8 feet long.
- Hooks with screws and wood poles for the structure.
- Plastic fasteners and shoelaces.
- A staple gun.
- A large piece of fabric, preferably a blue cloth.
- Enough foam pads or small throw pillows.
These materials will help you transform your trampoline into a wrestling ring.
Preparing the Space
Preparing the space for a trampoline wrestling ring requires specific considerations to ensure the safety and functionality of the setup. Here are the steps involved:
Selecting a Suitable Location:
- Adequate space: Choose a location with sufficient space to accommodate the trampoline wrestling ring. Consider the dimensions of the trampoline and leave enough clearance around it to prevent collisions with walls, objects, or other structures.
- Indoor or outdoor: Decide whether the trampoline wrestling ring will be set up indoors or outdoors. Ensure that the chosen location is suitable for the selected environment, considering factors such as weather conditions, available space, and accessibility.
Preparing the Ground Surface:
- Clear the area: Remove any debris, rocks, or other objects from the ground where the trampoline will be placed. Ensure that the surface is clean and free of hazards that may cause injury.
- Level the ground: It is crucial to have a level surface for the trampoline. Use a level tool to ensure that the ground is even. If necessary, make adjustments to the ground by filling in any depressions or uneven spots.
- Provide a cushioning layer: Consider adding a cushioning layer under the trampoline to absorb impact and provide additional safety. Options include using foam padding, rubber mats, or specialized shock-absorbing materials designed for trampoline installations.
Measuring and Marking the Area:
- Measure the space: Determine the dimensions required for the trampoline wrestling ring. Measure the area to ensure that it can accommodate the size of the trampoline and leave enough space for movement and safety clearance.
- Mark the boundaries: Use visible markers, such as cones, tape, or paint, to mark the boundaries of the wrestling ring on the ground. Clearly define the designated area to avoid any confusion during the activities.
Safety Precautions for Location:
- Inspect the area: Conduct a thorough inspection of the location to identify potential hazards or obstacles that could pose a risk during wrestling matches. Remove or address any hazards, such as sharp objects, tripping hazards, or nearby obstacles.
- Secure the surroundings: If the trampoline wrestling ring is set up outdoors, secure the surrounding area to prevent unauthorized access. Consider using temporary fencing or barriers to create a designated and controlled space.
- Ensure adequate lighting: If the wrestling matches will take place in low-light conditions or during the evening, ensure that the area is well-lit to provide visibility and minimize accidents.
- Supervision and rules: Assign trained supervisors or referees to oversee the wrestling matches and enforce safety rules. Establish and communicate clear guidelines for safe wrestling practices to all participants.
- First aid and emergency preparedness: Have a well-equipped first aid kit readily available on-site. Ensure that there are individuals trained in first aid and CPR present during the wrestling activities. Establish emergency protocols and communication systems to address any injuries or emergencies that may occur.
What Materials are required for Setting up a Trampoline Wrestling Ring?
To set up a trampoline wrestling ring, you will need the following materials:
- Spring mechanisms
- Protective netting or fencing
- Fastening hardware (bolts and screws)
- Sturdy metal brackets
- Power tools for drilling and screwing
- Framework for the trampoline
- Safety padding
- Durable plywood panels
- Adjustable wrench
- Resilient trampoline surface/mat
Constructing the Trampoline Frame
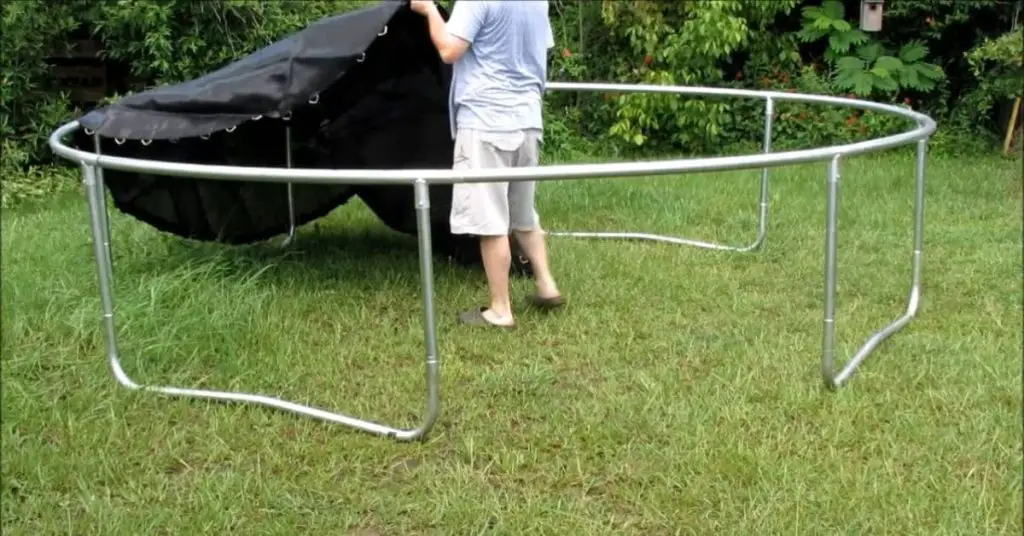
When constructing the frame for your trampoline wrestling ring, it is essential to ensure its strength and stability. Follow these steps to build a reliable frame:
- Select strong and durable materials: Choose materials like steel or aluminum tubing for the frame. These can be found at a local hardware store or purchased online.
- Measure and cut the tubing: Lay out the tubing and measure it according to your desired ring size. Use a saw or pipe cutter to cut the tubing to the correct length.
- Connect the tubing pieces: Join the tubing pieces together to form the frame. You can use metal connectors, bolts, or welding to secure the connections. Ensure that the frame is level and square during the assembly process.
- Secure the frame: Attach the frame to the trampoline legs or anchor it into the ground for added stability. Make sure the frame is securely attached, and there are no sharp edges or corners that could cause injury.
- Add safety features: Enhance safety by attaching safety pads or netting to the frame. These additions help prevent injuries and create a safer environment.
To summarize the process:
- Place the trampoline frame on a level and even surface.
- Securely fasten metal brackets to the corners of the frame using bolts and screws.
- Cut plywood sheets to fit the dimensions of the frame accurately.
- Attach the plywood sheets to the metal brackets using bolts and screws, ensuring a secure connection.
- Use a wrench to tighten the bolts and screws firmly and ensure their stability.
By following these steps and building a strong frame, you can ensure a stable and secure trampoline wrestling ring for enjoyable and safe wrestling activities.
Spring Attachment for Trampoline Wrestling Ring
Attaching the springs is a crucial step in the construction of a trampoline wrestling ring. The springs are responsible for providing the necessary tension to securely hold the trampoline mat in place, enabling safe and enjoyable bouncing and wrestling activities.
Here’s a rephrased version of the process:
- Lay the trampoline mat flat on the ground, ensuring it is centered and maintaining equal spacing between the springs.
- Begin attaching the springs to the trampoline frame, starting with the 12 o’clock position, followed by the 6 o’clock position, and then the 3 o’clock and 9 o’clock positions. This ensures the even distribution of tension and helps prevent the mat from becoming misshapen.
- Ensure that the springs are stretched tightly and securely attached to the frame. Consider utilizing a spring tool to assist in attaching and stretching the springs with ease.
- Check the tension of the springs and make any necessary adjustments. The trampoline mat should be taut, level, and devoid of sagging or wrinkles.
It’s important to note that the number of springs required for your trampoline wrestling ring depends on the size of the ring and the weight capacity of the trampoline.
Consult the manufacturer’s instructions or seek advice from a professional to determine the appropriate number of springs for your specific trampoline.
Mounting the Trampoline Mat for a Wrestling Ring
Installing the trampoline mat is a crucial step in the construction of a trampoline wrestling ring. The mat serves as a safe and resilient surface for bouncing and wrestling, so it is essential to ensure proper installation.
Here’s a rephrased version of the process:
Begin the installation by removing any previous mat or attachments from the trampoline frame.
- Lay the trampoline mat flat on the ground, ensuring it is centered and matches the size requirements for your trampoline wrestling ring.
- Attach the mat to the frame by starting with the 12 o’clock position, then the 6 o’clock position, followed by the 3 o’clock and 9 o’clock positions. This helps evenly distribute tension and prevents the mat from becoming misshapen.
- Ensure a tight and secure attachment of the mat to the frame. Pull the mat tightly and use a spring tool if needed to assist with attachment and stretching.
- Check for any wrinkles or sagging in the mat. It should be taut, level, and free from excess material that may pose a tripping or injury hazard.
- Ensure that the trampoline mat is made of high-quality materials designed for heavy use. Select a mat suitable for the specific demands of a trampoline wrestling ring, capable of withstanding the weight and movements of wrestlers.
By following these steps, you can properly install the trampoline mat for your wrestling ring, ensuring a safe and resilient surface for bouncing and wrestling activities.
Setting up the Poles for the Trampoline Wrestling Ring
To set up the poles for the trampoline wrestling ring, you’ll need four wooden poles that are approximately 7 to 8 feet tall and have a width of 3.5 inches or more. Start by placing the poles next to the trampoline to determine their height and where you want to drill the holes for the ropes.
For example, if the first rope needs to be 14.5 inches above the red tarp, mark the desired hole positions on the poles using a Sharpie while they are propped up against the trampoline.
Afterward, lay the poles on the ground and use a drill to create 1-inch holes at each of the three marked positions on each pole. Remember to ensure that the three holes are evenly spaced and 14.5 inches apart from one another.
Securing the Poles for the Trampoline Wrestling Ring
If your trampoline has a designated location for the net, you can use a small wooden pole placed between the frame and the wrestling pole. In the first picture, I marked the spot where the net was supposed to go in yellow.
To secure the wooden pole, drill two 7-inch long screws through the pole and into the frame at the marked spot. Use nuts at the end of both screws to prevent the pole from falling away.
In the second picture, where there is no designated net location on the frame, the process is simpler. Drill two 7-inch long screws directly into the pole and through the frame.
I have circled these screws in purple. Again, use nuts on the ends of these screws to keep the pole securely attached to the frame.
To ensure additional stability, place a metal stake into the ground behind each of these poles. I have marked an example of the stake in red. This will prevent the poles from leaning inward and toppling into the trampoline.
By following these steps, you can properly attach the poles to the trampoline frame, providing stability and support for the wrestling ring.
Installing the Ropes for the Trampoline Wrestling Ring
To begin, gather three hoses that are each 50 feet long. The total length needed to go around the ring is 40 feet, but having an extra hose is recommended.
Optionally, you can run the rope through the hose to provide additional security, although the hose itself is capable of holding around 230 pounds without the rope.
When purchasing the hose, choose a color that you like. It’s important not to tape or paint the hose. Previous attempts using weatherproof duct tape or gorilla tape did not work well, as the hose tends to stretch and cause the tape to come loose. A gray hose can be found at Target for around $10 for a 50-foot length.
To connect the hoses, you will need two hose clamps, as shown in the pink-circled pictures. Tighten the two hoses together using the clamp, ensuring that two clamps are used for a secure connection.
If you decide to use rope inside the hose, you will also need a turnbuckle. For this case, I have circled the ends of the hoses in green, indicating that there are ropes running out of each hose. The turnbuckle connects the ropes, while clamps are still used at the ends of the hose.
By following these instructions, you can properly install the ropes for your trampoline wrestling ring, providing stability and support during wrestling activities.
Padding for the Trampoline Wrestling Ring
For the pads, you can repurpose an old mattress foam topper, which can be purchased at an affordable price in larger sizes. Cut out foam blocks that are 2 feet long and fold them. Insert rope into the fold to keep the foam in place.
To protect the foam from water damage, cover it with trash bags, which are a cheaper alternative to tarps.
While the pads are not necessary, they help cushion the poles. However, it is important to cover the hose clamps to prevent anyone from getting cut. Use something to cover the hose clamps for safety purposes.
Please note that the foam I am holding in the picture is not the exact size of the pads; it is just an example to show the appearance of the uncovered foam. In the picture, the purple circles demonstrate how the ropes are attached while holding the pads.
By following these steps, you can create pads for your trampoline wrestling ring using an old mattress foam topper, rope, and trash bags. These pads provide additional cushioning and safety for the poles during wrestling activities.
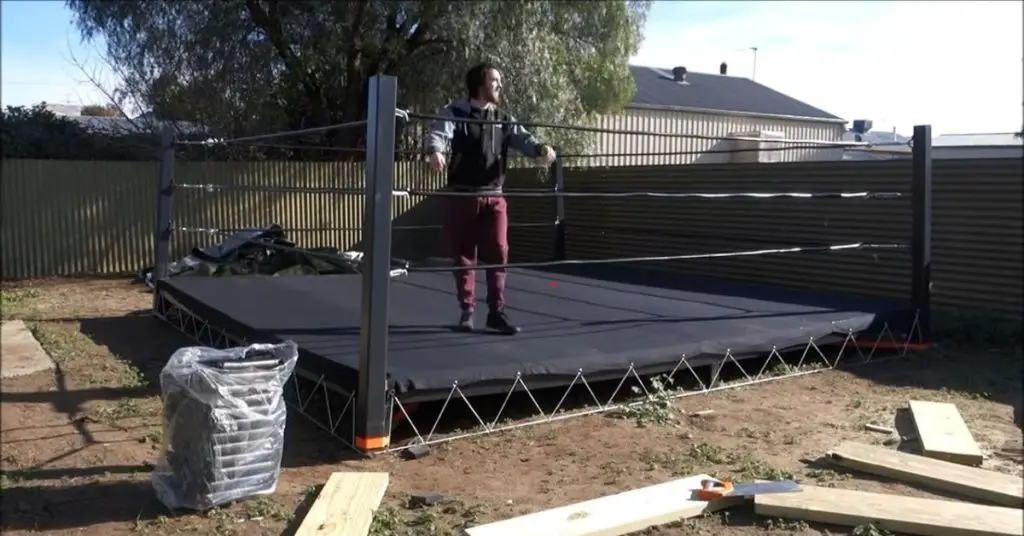
Wrapping up the Trampoline Wrestling Ring Setup
With the completion of the setup, you will find that climbing the hoses is easy and safe. The top of the pole should be flat, allowing you to comfortably sit on it. We have tested the durability of the hoses with weights up to 230 pounds, and they held up well without any issues.
Now, you can fully enjoy your new wrestling ring and perform exciting moves like elbow drops, leg drops, and Swanton bombs from the top rope onto your wrestling opponent.
The neighborhood kids will surely admire your setup, and you will become a popular attraction in town. Embrace the fun and excitement of your trampoline wrestling ring and have a great time!
Customization and Accessories
Customizing your trampoline wrestling ring and adding accessories can enhance the overall experience and make it uniquely yours. Here are some ideas for customization and accessories:
Incorporating a Wrestling Entrance Ramp:
Make your trampoline wrestling ring feel more like a professional wrestling arena by adding an entrance ramp. Construct a raised platform using sturdy materials such as plywood or metal. Ensure it is wide enough for wrestlers to walk up comfortably and make a grand entrance into the ring.
Personalizing with Custom Logos and Ring Decals:
Add a touch of personalization and branding by creating custom logos and decals for your trampoline wrestling ring. Design unique graphics that represent your wrestling persona or incorporate your favorite wrestling themes.
Apply these decals to the frame, safety pads, or even the entrance ramp for a customized look.
Designing Custom Corner Pads with Logos:
Give your trampoline wrestling ring a professional appearance by crafting custom corner pads. Use durable materials such as foam padding or vinyl covers and attach them to the corners of the ring. Apply custom logos or designs to the pads, adding a personalized and visually appealing touch.
Enhancing Entertainment with Sound and Lighting Effects:
Create an immersive and entertaining experience by implementing sound and lighting effects in your trampoline wrestling ring. Install a portable speaker system to play entrance music, wrestler theme songs, or crowd sound effects.
Use colored LED lights around the ring or strobe lights to enhance the atmosphere and create a dynamic visual display during matches.
Maintenance and Inspections
Maintenance and inspections are crucial for ensuring the safety and longevity of your trampoline wrestling ring. Regular checks and proper care will help identify any potential issues and prevent accidents.
- Conduct monthly checks for trampoline wrestling ring maintenance.
- Inspect the frame and springs for damage and tighten connections.
- Apply lubricant to springs to reduce friction and prevent rust.
- Check foam padding and safety net for tears or wear.
- Ensure boundary ropes and enclosures are secure and in good condition.
- Examine wrestling mats for signs of deterioration or damage.
- Use a trampoline cover to protect from extreme weather, and consider indoor storage during severe conditions.
- Educate users on safe practices and encourage reporting of any concerns.
- Address and repair issues promptly, replacing worn-out components as needed.
- Periodically seek professional inspection to ensure safety and longevity.
- Prioritize safety to prevent accidents and ensure a fun experience.
FAQs:
Q1: How can I build a trampoline wrestling ring?
To build a trampoline wrestling ring, start by selecting a suitable location, preparing the ground surface, measuring and marking the area, and implementing safety precautions.
Then, construct the frame, attach the springs, install the trampoline mat, secure the poles, and add any desired customization or accessories.
Q2: What materials do I need to build a trampoline wrestling ring?
The materials needed for a trampoline wrestling ring include a trampoline frame, trampoline mat, springs, safety pads, netting or fencing, bolts and screws, metal brackets, plywood sheets, wrench, drill and screwdriver, and optional accessories such as ropes, hoses, and foam padding for additional customization.
Q3: How do I ensure the safety of a trampoline wrestling ring?
To ensure safety, select a suitable location away from hazards, prepare the ground surface, follow the manufacturer’s guidelines for weight capacity, regularly inspect and maintain the equipment, provide proper supervision, enforce safety rules, and have first aid resources readily available.
Additionally, use safety pads, secure the poles, and ensure proper installation of all components.
Q4: Are there any specific rules or guidelines for trampoline wrestling matches?
Yes, it is important to establish and communicate clear rules and guidelines for trampoline wrestling matches. These may include restrictions on certain moves or techniques, mandatory use of safety equipment, guidelines for fair play, and instructions on how to enter and exit the wrestling ring safely.
Emphasize the importance of proper technique, sportsmanship, and respect for other participants.
Q5: Can I customize my trampoline wrestling ring?
Absolutely! Customization is a great way to personalize your trampoline wrestling ring. You can add accessories like entrance ramps, custom logos, and decals, corner pads with logos, sound and lighting effects for entertainment, and other creative elements to enhance the overall experience.
Just ensure that any modifications or additions do not compromise the safety or the structural integrity of the equipment.
Conclusion:
In conclusion, building a trampoline wrestling ring requires careful planning, proper materials, and a focus on safety.
By following the necessary steps, including selecting a suitable location, preparing the ground surface, constructing the frame, attaching the springs and trampoline mat, securing the poles, and implementing safety precautions, you can create a safe and enjoyable wrestling environment.
Remember to prioritize safety by regularly inspecting the equipment, enforcing rules, and providing proper supervision. Additionally, customization and accessories can enhance the overall experience, allowing you to personalize the ring and add entertainment elements such as entrance ramps, custom logos, corner pads, and sound/lighting effects.
With attention to detail and a commitment to safety, your trampoline wrestling ring can provide endless fun and excitement, allowing you to unleash your inner wrestler and create lasting memories.
We hope you will be well aware of how to turn a trampoline into a wrestling ring, after reading this comprehensive article. If you have any questions, feel free to comment below!