Do you know how to assemble a springfree trampoline? Assembling a Springfree trampoline is an exciting project that I tackled with enthusiasm.
I carefully unpacked and organized all the components with the instruction manual as my guide, ensuring I had the necessary tools and equipment.
Step by step, I connected the main frame pieces, securing them with precision using the provided screws and bolts. The next task was attaching the mat to the frame, ensuring it was evenly tensioned and centered.
Installing the net enclosure added an extra layer of safety. I followed the specific instructions for spring installation, ensuring they were evenly distributed and properly tensioned.
Finally, I installed the protective padding, firmly fastening it to cover the springs and frame.
With a thorough inspection and adherence to safety guidelines, I completed the assembly, ready to enjoy countless hours of safe and exhilarating bouncing on my Springfree trampoline.
How to Assemble a Springfree Trampoline: Assembling a Springfree trampoline is a straightforward process. With clear instructions, carefully connect the frame, attach the mat and net, and secure the springs and padding. Enjoy safe bouncing fun!
How to Assemble a Springfree Trampoline?

Assembling a Springfree Trampoline is easy and should take about an hour. Before you start, gather these tools: a Phillips head screwdriver, a socket wrench set, and an adjustable wrench. Now, let’s go through the assembly steps:
- Lay the trampoline frame on level ground. If you’re setting it up indoors, make sure there’s enough space above it.
- Put together the legs by inserting the tubes into the holes at the bottom of each upright leg. Use the Phillips head screwdriver to tighten the bolts securely.
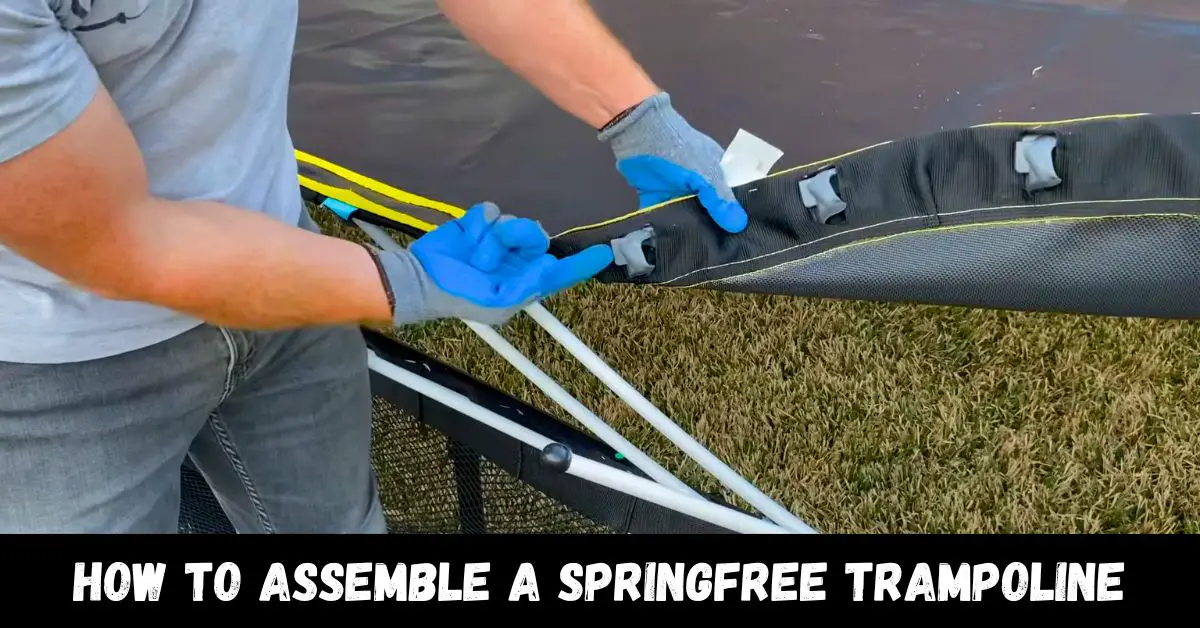
- Spread out the mat over the frame and attach it with 72 included springs. Connect each spring hook to one of the 72 eyelets around the mat’s edge. Then, stretch out and join all 72 springs in the center of the trampoline bed. This is what gives it the great bouncing effect.
- Lastly, install the net enclosure around the entire trampoline frame using the provided zip ties or rope. Ensure all openings are securely closed before anyone starts using the trampoline.
By following these steps, you’ll have your Springfree Trampoline set up and ready for fun!
What are the Steps for moving a Springfree Trampoline?
Moving a Springfree trampoline can be challenging due to its large size and weight. However, with the following tips, you can make the process easier:
- Ask a friend or family member for assistance. Having an extra set of hands will make the task quicker and more manageable.
- If possible, try to disassemble the trampoline before moving it. This will reduce its weight and make it easier to handle. But if disassembly isn’t an option, don’t worry—you can still move it without taking it apart.
- Utilize furniture dollies or other moving equipment to aid in transporting the trampoline. These tools will help you move it more smoothly and efficiently.
- Take caution when moving the trampoline as they are delicate and can get damaged easily if not handled properly.
By following these tips, you can successfully move your Springfree trampoline to a new location with less hassle.
Frame Assembly for Springfree Trampoline
To assemble the frame of your Springfree trampoline, follow these steps:
- Lay out all the frame components and identify the main frame pieces.
- Refer to the instruction manual for the specific instructions on connecting the frame components.
- Use the provided screws or bolts to secure the frame pieces together according to the manual’s instructions.
- Ensure that all connections are tight and secure, double-check for any loose or missing screws.
- Verify that the frame is properly aligned and leveled on the ground.
- Inspect the frame for any sharp edges or protruding parts that could pose a safety hazard.
- Once the frame assembly is complete, proceed to the next steps of attaching the mat, net enclosure, springs (if applicable), and padding.
By carefully following these steps, you will successfully assemble the frame of your Springfree trampoline, ensuring a safe and sturdy foundation for the rest of the installation process.
Nearby Springfree Trampoline Installation
If you’re searching for springfree trampoline installation services nearby, here are a few things to consider. Firstly, it’s crucial to find a reputable installer. Beware of unreliable companies that may not provide satisfactory service after taking your money.
Secondly, it’s wise to obtain multiple quotes from different companies. Don’t settle for the first one you come across. Thirdly, ensure that the chosen company has experience specifically in installing springfree trampolines.
This is important because the installation process can be complex, and it’s best to have skilled professionals handling it. Lastly, ask for recommendations from your friends, family, and neighbors. Their insights and experiences can help you make an informed decision.
By following these tips, you can easily locate reliable springfree trampoline installation services near your location.
Cost of Springfree Trampoline Installation

If you’re thinking about buying a Springfree Trampoline, you might be curious about the installation cost. Here’s what you should know.
The installation cost of a Springfree Trampoline depends on a few factors, such as the size and model you choose and where you want it installed.
Generally, larger trampolines tend to have higher installation costs. Additionally, if the installation site is not level or has special requirements, it can affect the overall cost.
On average, most people spend between $200 and $500 for the professional installation of their Springfree Trampoline.
However, there are ways to save money on installation. Some hardware stores offer free assembly and delivery services when you purchase a trampoline from them. Moreover, Springfree dealerships often have certified installers who may offer discounted rates.
To get an accurate estimate, it’s recommended to contact multiple dealerships or installer companies in your area for quotes. This way, you can compare prices and ensure you’re getting the best possible deal.
Available Springfree Trampolines for Sale
Look no further than Springfree Trampolines! Springfree is the leading global manufacturer of high-quality trampolines that prioritize safety.
Their trampolines are designed with your family’s well-being in mind and are engineered to eliminate risks commonly associated with traditional spring-based trampolines.
What sets Springfree apart from other brands? Firstly, their patented design removes hazardous springs and metal frames found in traditional trampolines.
This makes them not only safer but also provides a smoother jumping experience. Additionally, their special soft edge mat extends over the entire trampoline frame, further minimizing the risk of injuries. Springfree offers a range of sizes and models to suit your family’s needs.
From the compact Mini Rebounder, ideal for kids or quick home workouts, to medium and large sizes perfect for larger families or backyard parties. They even have an XL Jumbo model that accommodates up to 10 people!
Whatever size or model you choose, rest assured that Springfree Trampolines prioritizes your family’s safety. So, why wait? Treat your family to the gift of fun this holiday season with a spring-free trampoline!
Troubleshooting for Springfree Trampolines
If you encounter difficulties with your Springfree Trampoline, there are troubleshooting steps you can take to address the issues. Start by examining the frame of the trampoline and checking if all the bolts are securely tightened.
Loose bolts can cause instability and affect the trampoline’s performance. Tightening them using the appropriate tools can help resolve this issue.
Next, carefully inspect the trampoline mat for any signs of damage, such as rips or tears. Even small tears can compromise the integrity of the mat and potentially lead to further damage or accidents.
If any damage is detected, it is advisable to replace the mat with a new one from the manufacturer to ensure safety during use.
Lastly, examine the springs of the trampoline. Check if all the springs are intact, properly connected, and in good condition. Broken or damaged springs can affect the trampoline’s bounce and pose safety risks.
If any springs are broken, it is essential to replace them with compatible ones to maintain optimal performance and safety.
By addressing these troubleshooting steps, you can identify and resolve any issues with your Springfree Trampoline, ensuring a safer and more enjoyable jumping experience for users.
Do Springfree Trampolines Have Less Bounce?
When comparing traditional trampolines with short, stiff springs to Springfree trampolines, there are noticeable differences in how they provide bounce. Traditional trampolines often have springs that are rigid and inflexible, leading to a jarring stop and a hard impact on the mat when bouncing.
On the other hand, Springfree trampolines are specifically designed to offer a more enjoyable bouncing experience. Their unique design eliminates the need for traditional springs altogether.
Instead, Springfree trampolines use flexible composite rods beneath the jumping surface, which are highly resistant and provide a more forgiving bounce.
This innovative design allows Springfree trampolines to deliver a relatively soft and deep bounce. The absence of stiff springs and the presence of the composite rods make the bouncing experience on a Springfree trampoline gentler on the body, reducing the impact and providing a smoother, more comfortable jumping sensation.
So, if you prefer a trampoline with a bounce that is less jarring and offers a more cushioned landing, a Springfree trampoline would be an excellent choice.
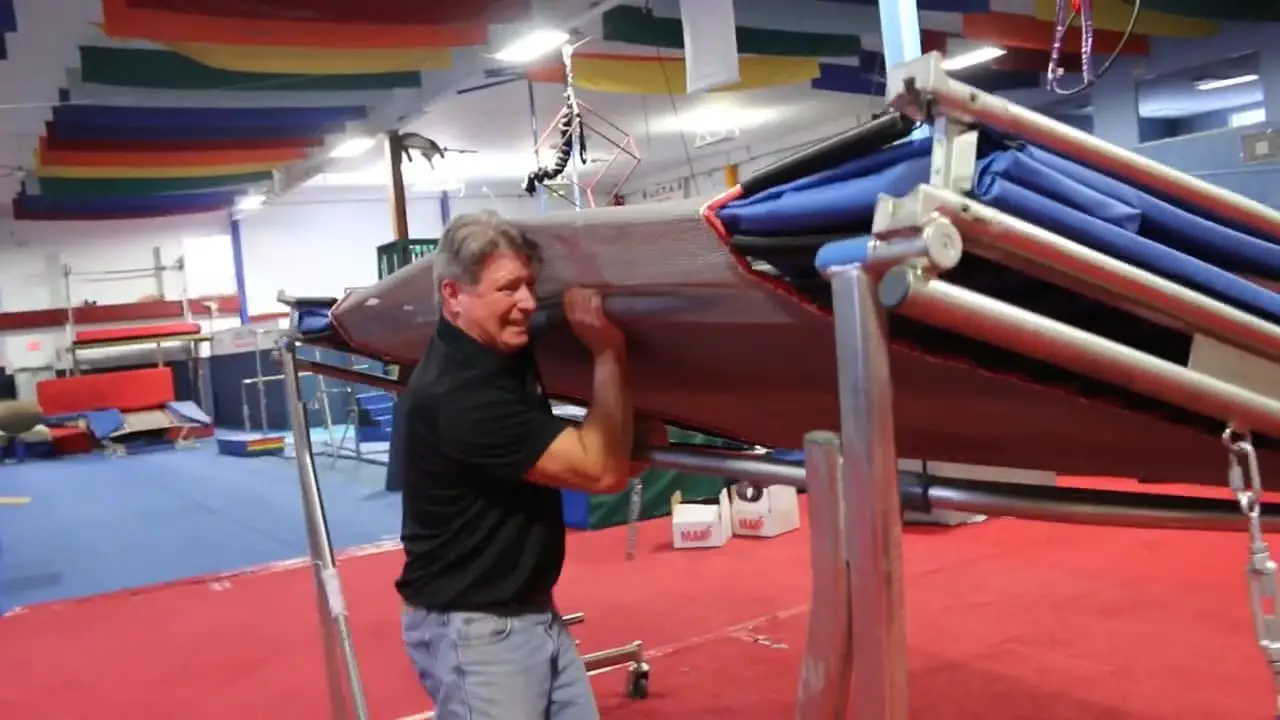
Is Moving Trampolines a Heavy Task?
If you find the need to move your trampoline a short distance within your backyard or lawn, you can employ a technique called the sliding method. To begin, remove the enclosure net before attempting to slide the trampoline.
This will make the process easier and reduce the risk of damaging the net. It is highly recommended to have at least two people involved in the task as trampolines can be heavy and cumbersome to move alone.
To execute the sliding method, carefully lift one side of the trampoline while the other pushes or pulls from the opposite side. Move the trampoline gradually, maintaining control and ensuring that it slides smoothly.
Avoid any obstacles or uneven terrain that could cause the trampoline to tip over or become unbalanced during the sliding process.
By employing the sliding method and enlisting the help of another person, you can safely and efficiently relocate your trampoline to a new position within your backyard or lawn.
Professional Installation of Springfree Products Available?
At Springfree, we offer professional installation services nationwide, prioritizing the safety of both our valued associates and customers.
If you find yourself near one of our Springfree showrooms, you can use our contactless and professional installation service, carried out by our skilled Springfree Trampoline installers.
Our installation process is designed to ensure a hassle-free experience for our customers. Our experienced installers will handle the entire setup, following our precise installation guidelines and utilizing their expertise to assemble your Springfree Trampoline efficiently and correctly.
With our professional installation service, you can have peace of mind knowing that your trampoline will be installed with the utmost care and attention to detail.
We strive to provide a seamless and enjoyable experience, allowing you to focus on the excitement and fun that await your family’s trampoline adventures.
What is the Process for Assembling a Trampoline Frame?
Assuming you have all the necessary parts, tools, and materials, here’s how you can assemble a trampoline frame:
- Find a level surface and lay out the trampoline mat. Ensure the area is free of sharp objects that could damage the mat.
- Place the circular base of the trampoline frame on top of the mat. Start connecting the frame pieces, following the instructions provided. Work your way up, attaching each piece securely.
- Once the frame is assembled, it’s time to attach the springs. Most trampolines have 96 springs, with 48 on each side. Begin by hooking one end of a spring onto a hole in the frame, then stretch it across to hook the other end onto the next hole. Repeat this process for all 96 springs.
- Double-check all the connections to ensure they are secure and tight. It’s important to do this before allowing anyone to jump on the trampoline.
By following these steps, you’ll be able to assemble the trampoline frame and get it ready for use.
Placement of Horizontal Rods on Springfree Trampoline?
The safety enclosure on a Springfree Trampoline includes horizontal rods that are inserted into the ground. These rods, numbering four in total, are connected to the legs of the trampoline. They aim to provide additional stability and prevent the trampoline from tipping over during use.
By securely attaching the horizontal rods to the trampoline legs and anchoring them into the ground, the structure becomes more secure and resistant to tipping.
This safety feature ensures a safer and more enjoyable bouncing experience for users, giving them peace of mind while they have fun on the trampoline.
Trampoline Assembly Steps
Here are the general steps for assembling a trampoline:
Unpacking and Organizing
- Carefully remove all the components from their packaging. Check for any damage or missing parts.
- Sort and systematically organize the parts. This will make locating and accessing the required pieces easier during assembly.
Frame Assembly
- Identify the main frame pieces according to the provided instructions or manual.
- Follow the step-by-step instructions to connect the frame components. This may involve inserting rods, aligning holes, or using screws or bolts.
- Use the provided screws or bolts to securely fasten the frame. Ensure that all connections are tight and stable.
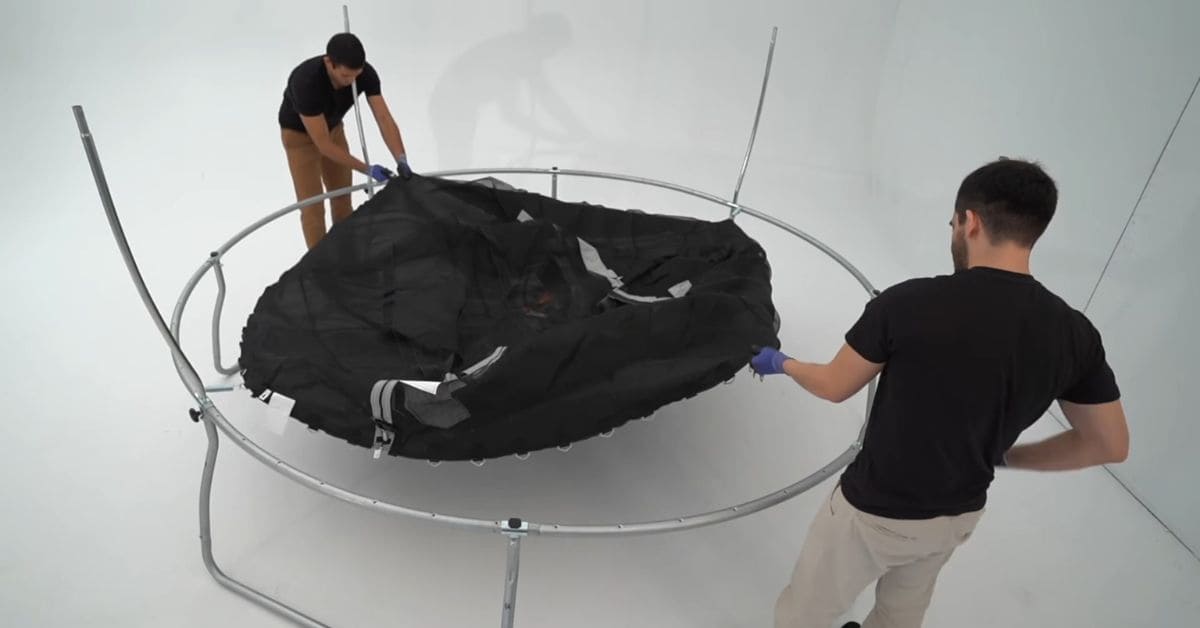
Mat and Net Installation
- Attach the mat to the frame by aligning the mat hooks with the corresponding frame loops. Make sure the hooks securely engage with the loops.
- Adjust the tension of the mat evenly across all sides to ensure a balanced and centered installation.
- Install the net enclosure by attaching it to the designated connection points on the frame. Follow the specific instructions provided for proper attachment.
Spring Installation (If Applicable)
- If your trampoline has sprung, attach them to the mat hooks and corresponding points on the frame. Ensure the hooks are properly engaged for a secure connection.
- Refer to the specific instructions provided in the manual for spring installation. Follow the recommended order and positioning of the springs.
- Ensure the springs are evenly distributed around the trampoline and properly tensioned for a consistent and safe bouncing experience.
Padding Installation
- Install the protective padding around the edges of the trampoline. Align the padding with the frame and ensure it covers any exposed springs or hard edges.
- Fasten the padding securely using the provided straps or ties. Make sure the padding is tightly secured and does not move during use.
- Regularly check the padding to ensure it remains in place and provides adequate cushioning for added safety.
Final Checks
- Inspect all connections and fastenings thoroughly to ensure they are secure and properly tightened.
- Verify that the mat and net are correctly attached and tensioned without any sagging or excessive slack.
- Ensure the trampoline is placed on a level surface and check for stability. Adjust the positioning or add additional support if needed to ensure a safe and stable setup.
How Hard is it to Assemble a Springfree Trampoline?
Assembling a Springfree trampoline can be a moderately challenging task, but it is manageable with proper preparation and following the instructions. The difficulty level can vary depending on the specific model and size of the trampoline.
The process involves unpacking and organizing the components, connecting the frame pieces, attaching the mat and net, installing springs (if applicable), and securing the protective padding.
While some steps may require physical strength and attention to detail, the provided instructions and diagrams help guide the assembly process. It is recommended to have at least two people for certain steps, and patience and careful execution are key to ensuring a successful and safe assembly.
How Long Does It Take to Assemble a Springfree Trampoline?
Assembling a Springfree trampoline typically takes approximately 2 to 4 hours, depending on your experience and the trampoline size. The process involves unpacking and organizing the components, assembling the frame, attaching the mat and net, installing springs (if applicable), and securing the padding.
It’s important to carefully follow the provided instructions and take your time to ensure proper assembly. If you have assistance from another person, the assembly time may be shorter.
Factors such as familiarity with trampoline assembly, organization of tools and parts, and the complexity of the model can also affect the overall assembly time.
Safety Guidelines
Here are some safety guidelines:
Review the Trampoline’s Weight Limit and Adhere to it:
It is essential to carefully review and follow the weight limit specified by the manufacturer for your trampoline. Exceeding the weight limit can lead to structural damage, instability, and an increased risk of accidents.
Make sure that all users, including children and adults, stay within the recommended weight range.
Establish and Enforce Trampoline Usage Rules:
Create clear and concise rules for trampoline usage and ensure that everyone understands and follows them.
Rules may include prohibiting somersaults, flips, or dangerous maneuvers, limiting the number of jumpers to one at a time, and discouraging rough play. Enforcing these rules consistently helps maintain a safe trampoline environment.
Regularly Inspect the Trampoline for Wear and Tear:
Conduct routine inspections of the trampoline to identify any signs of damage or wear. Check the mat, springs, frame, and safety enclosure for tears, holes, loose parts, or bent components.
Address any issues promptly, such as replacing damaged parts or contacting the manufacturer. Regular maintenance and repair ensure that the trampoline remains safe for use.
Encourage the use of Safety Accessories like Helmets and Pads:
While Springfree trampolines are designed with safety in mind, it’s still advisable to use additional safety accessories like helmets, knee pads, and elbow pads.
These protective gears can provide extra protection and minimize the risk of injuries in case of falls or accidents.
Supervise Children’s Play on the Trampoline:

Adult supervision is crucial whenever children are using the trampoline.
An adult should be present to actively monitor the play, ensure adherence to safety rules, and intervene if necessary.
Supervision helps prevent risky behavior, ensures that children follow safe practices, and allows for immediate response in emergencies or accidents.
Maintenance and Care
Proper maintenance and care are essential for keeping your Springfree trampoline in good condition and longevity. Follow these guidelines to maintain and care for your trampoline effectively:
Regularly Clean the Trampoline to Remove Dirt and Debris:
It is important to regularly clean your Springfree trampoline to keep it in optimal condition. Use a soft brush or cloth to remove dirt, leaves, and other debris from the mat, frame, and safety enclosure.
Avoid using harsh chemicals or abrasive cleaners that can damage the materials. Regular cleaning helps maintain the aesthetic appeal of the trampoline and ensures a safe and hygienic jumping experience.
Loose or Damaged Parts and Repair or Replace as Necessary:
Periodically inspect your trampoline for any loose or damaged parts. Check the frame, legs, and joints for any signs of wear, cracks, or bending. Tighten loose bolts or screws and promptly replace damaged or missing parts.
Regular maintenance and timely repairs will help maintain the structural integrity and safety of the trampoline.
Inspect the Springs and Mat for Signs of Wear and Tear:
The springs and mat are critical components of the trampoline that undergo constant stress and impact. Regularly examine the springs for any signs of stretching, corrosion, or breakage.
Inspect the mat for tears, fraying, or worn-out stitching. If you notice any issues, replace the springs or mat with genuine Springfree parts to ensure proper functionality and safety.
Lubricate Moving Parts:
To ensure smooth and efficient operation, lubricate the moving parts of your Springfree trampoline as the manufacturer recommends. This may include hinges, joints, or other pivot points.
Use a silicone-based lubricant or a lubricant specifically recommended by Springfree to reduce friction and prolong the lifespan of these components. Regular lubrication helps maintain the trampoline’s performance and prevents premature wear and damage.
Disassembly and Storage

Here are some things for disassembly and storage:
- To disassemble the trampoline, follow the reverse steps of the assembly process. Start by removing the net enclosure, followed by the mat, springs, and frame components.
- Before storing the trampoline, make sure to clean and dry all the components. This helps prevent dirt, debris, and moisture from causing damage or deterioration during storage.
- Choose a suitable storage location that protects from harsh weather conditions, such as direct sunlight, rain, or snow. Consider prolonging its lifespan by using a trampoline cover or storing the disassembled trampoline in a shed or garage.
By properly disassembling and storing your Springfree trampoline, you can ensure its longevity and quality for future use.
Additional Accessories and Enhancements
Here are some additional accessories and enhancements:
- Safety Enclosure: Consider adding a safety enclosure to your trampoline to provide extra protection and prevent accidental falls. This is especially important when children are using the trampoline.
- Ladder: Installing a ladder can make it easier and safer for users to get on and off the trampoline, especially for children or individuals with limited mobility.
- Anchor Kit: If you live in an area prone to strong winds or storms, an anchor kit can help secure the trampoline to the ground, reducing the risk of it being blown away.
- Basketball Hoop: Adding a basketball hoop attachment can bring more fun and entertainment to your trampoline experience, allowing users to engage in friendly games and practice their shooting skills.
- Shade Cover: To protect users from direct sunlight and provide shade, consider attaching a shade cover to the trampoline. This can help prevent sunburns and keep the trampoline surface cooler on hot days.
- Weather Cover: Invest in a weather cover to protect the trampoline from the elements when it’s not in use. This can help prevent unnecessary wear and tear caused by exposure to rain, snow, or UV rays.
By incorporating these additional accessories and enhancements, you can enhance the safety, enjoyment, and longevity of your Springfree trampoline.
FAQs About How to Assemble a Springfree Trampoline
Q:1 What tools are needed to assemble a Springfree trampoline?
The assembly process typically requires basic hand tools such as a rubber mallet, adjustable wrench, and Phillips screwdriver. These tools are usually included in the trampoline assembly kit.
Q:2 How many people are needed to assemble a Springfree trampoline?
While it’s possible to assemble the trampoline alone, having at least two people can make the process easier and safer. One person can hold the components in place while the other person secures the connections.
Q:3 How long does it take to assemble a Springfree trampoline?
The assembly time can vary depending on the trampoline model and the experience level of the assemblers. On average, it may take between 2 to 4 hours to complete the assembly.
Q:4 Are the assembly instructions provided with the trampoline?
Yes, Springfree trampolines come with detailed assembly instructions. These instructions include step-by-step guidance, illustrations, and safety precautions to ensure a smooth assembly process.
Q:5 Can I assemble a Springfree trampoline by myself, or do I need professional help?
While professional installation is available and can be chosen for convenience, Springfree trampolines are designed to be assembled by homeowners. Following the provided instructions and safety guidelines should allow for successful DIY assembly.
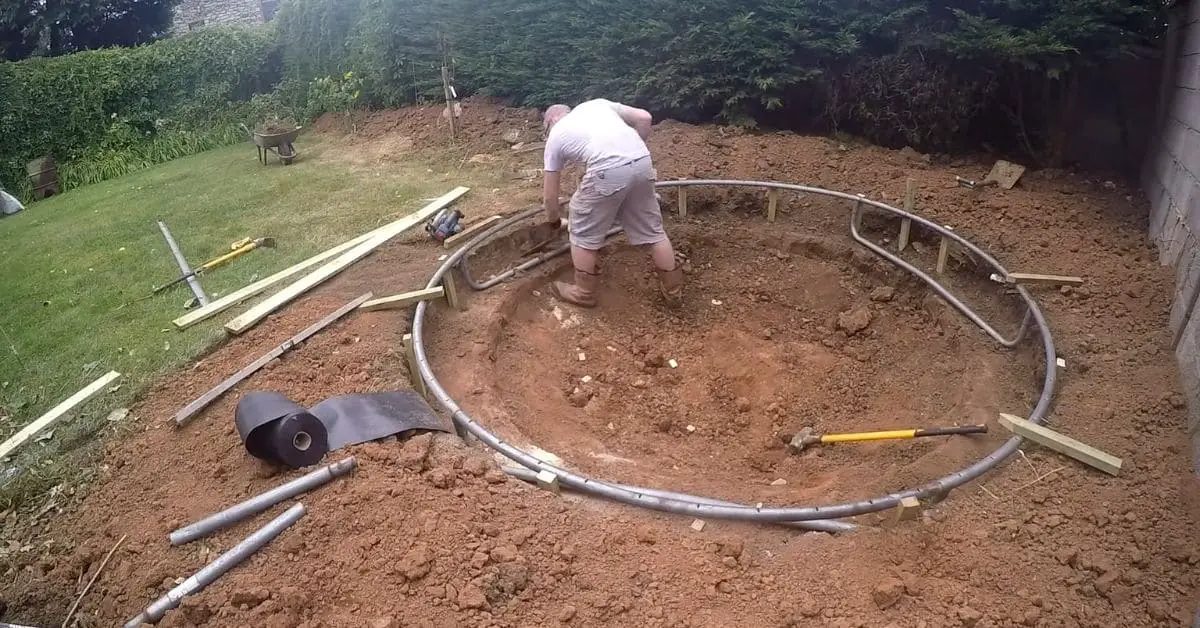
Q:6 Do I need to prepare the ground before assembling the trampoline?
It is recommended to assemble the trampoline on a level and solid surface, such as grass or concrete. Clear the area of any debris, rocks, or sharp objects that could damage the mat or affect the stability of the trampoline.
Q:7 Can I disassemble and reassemble a Springfree trampoline if I need to move it?
Yes, Springfree trampolines can be disassembled and reassembled if necessary. Follow the reverse process of assembly, carefully packing and organizing the components. It’s important to retain the assembly instructions for reference during reassembly.
Conclusion:
In conclusion, assembling a Springfree trampoline is a manageable task that can be accomplished by following the provided instructions and safety guidelines.
While having at least two people is recommended for ease and safety, it is possible to assemble the trampoline alone. The process typically requires basic hand tools included in the assembly kit, and the estimated assembly time ranges from 2 to 4 hours.
To ensure a successful assembly, it is important to carefully unpack and organize all the components, identify and connect the frame pieces according to the instructions, attach the mat and net securely, and install any springs or padding if applicable.
Regularly inspecting the trampoline for wear and tear, adhering to weight limits, establishing usage rules, and supervising children’s play is crucial for maintaining safety.
Remember to choose a level and solid surface for assembly, clearing it of any debris or sharp objects. Should the trampoline be moved, it can be disassembled and reassembled using the reverse assembly process.
By following these steps and guidelines, you can safely and successfully assemble your Springfree trampoline, ensuring many hours of enjoyment and fun for your family and friends.
We hope you will be well aware of how to assemble a springfree trampoline. After reading this comprehensive article. If you have any questions, feel free to comment below!