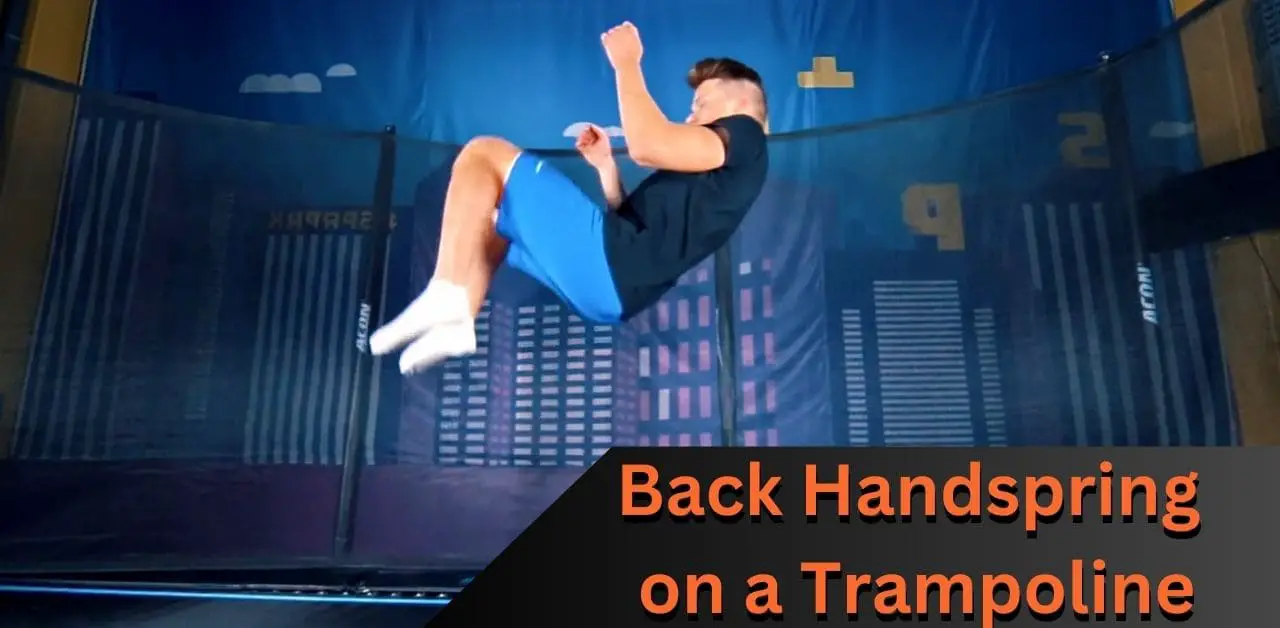
If you want to know about how to do a back handspring on a trampoline? You’ll want to start by standing in the center of the trampoline with your feet shoulder-width apart. As you begin bouncing, swing your arms forward and upward to gain momentum.
Then, jump up and backwards, tucking your chin into your chest and reaching for the trampoline with your hands.
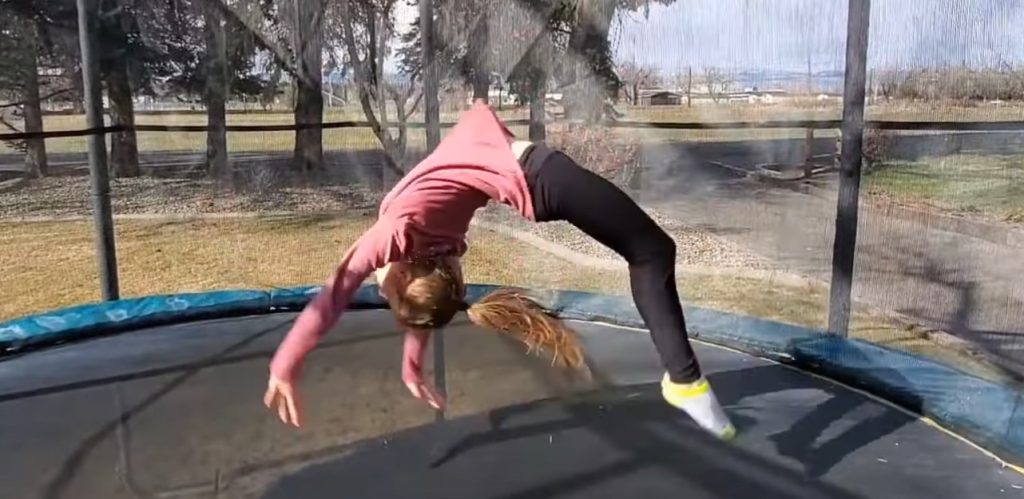
As you land on your hands, push off the trampoline with your feet, arch your back, and push your hips forward to generate more momentum. Finally, use this momentum to lift your feet off the trampoline and land back on your feet.
To succeed, keep your eyes on the trampoline as you jump back and tuck your chin to avoid injuring your neck. Keep your arms straight and your core engaged to maintain proper form, and practice on a lower setting before attempting a back handspring on a higher setting.
How to do a Back Handspring on a Trampoline: Start by standing in the center of the trampoline with your feet shoulder-width apart and follow the instructions for bouncing, swinging your arms, and jumping up and backwards to land on your hands.

What a Back Handspring is?
The back handspring is a fundamental movement in many gymnastics and cheerleading routines, involving a backward flip with hands touching the ground halfway through the maneuver.
To execute a successful back handspring, it is necessary to strengthen your upper body, particularly your arms and shoulders.
What’s the time frame for learning a back handspring on a trampoline?
Many people want to master new tricks quickly, and doing a back handspring on a trampoline may seem easy at first glance. However, it’s a completely different experience on a trampoline and it takes time to learn, especially if you don’t have much free time in your day and no prior tumbling experience off the trampoline.
On an average, it can take six to twelve months to become proficient in performing a back handspring on a trampoline. However, the duration may differ based on certain factors such as whether you have an instructor or spotter, your level of experience in gymnastics, the number of hours you dedicate to practicing, your age, and flexibility.
It may take less than six months for some people and longer than twelve months for others. The key is to remain patient and not get discouraged.
It is unlikely to master the trick on your initial attempts, so it’s essential to take your time, celebrate small accomplishments, and keep striving to improve.
How to Overcome Fear of Back Handspring?
If you’re afraid of doing a back handspring, the best approach is to take it slow. Begin by going through the motion without flipping, then try the skill on a soft surface before moving to a trampoline. It’s important to have a spotter present to ensure your safety.
Remember that practice makes perfect, and this includes overcoming fear. The more you practice and build confidence in your abilities, the easier it will become to perform the back handspring without worry.
What is the proper way to spot a back handspring on a trampoline?
To spot a back handspring on a trampoline, position yourself beside the person attempting the skill. Bend your arm and place your forearm at the small of their back for support.
Use your other arm to steady the arm closest to you. It’s important to be attentive and ready to assist if needed to ensure safety during the skill.
As the person goes through with the flip, use your arm to support their back. When they reach the handstand position, move your hands up to their legs to provide additional support.
Help them finish the back handspring and land properly. Keep in mind that spotting requires practice to perfect.
How to do a Back Handspring on a Trampoline: Steps
Now that we have covered the basics of back handsprings, let’s focus on how you can execute one. Performing a back handspring requires several steps, and it takes a lot of practice to become comfortable with the trick. However, the effort is worth it in the end.
Here are the steps you need to follow to perform a back handspring on a trampoline:
Now, let’s delve deeper into each step of the back handspring process. The more you understand about the details of this trick, the more effortless it will be to execute it next time you’re on a trampoline.
Ways to Prepare for a Back Handspring on a Trampoline:
Begin by practicing different arch variations and preparing your hand swing, as these are the foundational movements of a back handspring. Here are some key exercises to try:
- Grounded arch: This involves creating a bridge-like position by lying on your back and pushing your body up with your stomach facing the sky.
- Airborne arch: Give the airborne version a shot by gently tossing yourself backward.
- Hand swing: Work on perfecting the hand swing by squatting and leaning forward, extending your arms straight behind your back, and swinging them forward to create momentum.
These exercises will help you build the necessary momentum and body position required for a successful back handspring. Once you’ve mastered these foundational movements, it’s time to move on to the final part of the handspring.
It’s essential to remember that the trampoline’s surface tension will provide significant rebound, so be prepared for a bounce!
Combining the Back Handspring:
Now it’s time to combine all the components of the back handspring. With your spotter in position, start by placing your arms back, swinging them forward, and extending them into the bridge as you jump.
Land on your hands, then bounce back up into a standing position. Don’t worry if you don’t get it right the first time – it takes practice!
Spotting for Back Handspring:
Before attempting the back handspring, make sure to have a spotter if necessary. A spotter will keep you safe and guide you through the process. It’s important to choose a spotter you trust and who has gymnastics experience.
Start with the basics and don’t rush into flipping. Practice the grounded and airborne arch variations and the hand swing to build momentum and body position. Then, when you feel ready, combine all the components and try the back handspring.
Rebounding Preparation:
When doing a back handspring on a trampoline, it’s important to prepare for the rebound that will happen when you hit the mat. To do this, practice jumping on the trampoline a few times to get a sense of how high you go and where you land when you bounce.
Keep in mind that a rebound can be dangerous if you’re not careful. Make sure you have plenty of padding around the trampoline and consider installing a safety net to prevent any potential injuries.
Practice for Mastery:
Practice regularly to perfect your back handspring on the trampoline. Do not get discouraged if it takes longer than expected to master the technique. Remember that practice makes perfect, and with enough dedication, you will be able to execute a flawless back handspring that will impress your friends.
How to Prepare for a Back Handspring with a Workout
Here is a workout that can help you prepare for a back handspring by strengthening the necessary muscles and increasing flexibility:
GymnasticsHQ’s Back Handspring Prep Workout Drills:
To help strengthen the muscles needed for a back handspring, the GymnasticsHQ Back Handspring Prep Workout includes several drills. To track your progress, download the 30 Day Back Handspring Challenge provided at the top of the article. The drills include:
- Gravity Assisted Floor Angels: This can be done on the floor or against a wall. You start by extending your arms straight and then bending them until your elbows are at a 90º angle. Then, extend your arms back through to complete the range of motion. Repeat 12 times.
- Gravity Resisted Floor Angels: Flip over onto your stomach and do the same motion as the gravity assisted floor angels, but this time keep your arms raised and not touching the floor. Repeat 12 times.
- U’s with Light Weights: Lie on the edge of a bed or couch, hold a weight on the side hanging off the bed/couch, and raise your arm up towards the ceiling so that your elbow and shoulder are even with your elbow and hand at a 90º angle.
Then, rotate your hand up even with your elbow so you have a 90º angle between your shoulder/elbow and elbow/hand. Rotate your hand back down to the previous position and return to the starting position. Do 2 sets of 10 on each arm.
- Squats: Begin with your legs shoulder-width apart, squat down as far as you can making sure that your knees stay behind your toes, and toes facing forward. Do 10 reps.
- Squat Jumps: Complete a squat and then jump as you stand up, going back into the next squat. Do 10 reps.
- Sumo Squats: Start with your legs wider than shoulder-width apart and toes pointed outwards. Squat down making sure that your knees do not pass your toes. Do 10 reps.
- High Plank Hold: Start in a high plank making sure that your legs are straight, back is straight, and head is in a neutral position. Hold for 3 sets of 30 seconds.
- Elbow Plank Hold: This is the same positioning as the high plank hold, except instead of being on your hands, you are on your elbows. Hold for 3 sets of 30 seconds.
- Lying Leg Raises: Lay down flat on the ground with straight legs and arms above your head. Raise your legs up to a 90º angle with pointed toes, and try to get your lower back on the floor, pushing through your belly button and abdomen to the floor. Do 15 reps.
- Spider-Man Handstands: Use the wall to get into a straight body position with your legs together, arms and legs straight, and toes pointed. Hold for 30 seconds, 2 sets.
- Bridge: Do a bridge, trying to get your shoulders over your hands. If it’s too easy, put your legs together and push them straight. Hold for 10 seconds, 2 sets.
Strengthening Muscles and Improving Flexibility for Back Handspring:
To execute a flawless back handspring, you require flexibility in your shoulders and back. Moreover, you need robust legs to generate force while pushing off the ground at the start of a back handspring.
A powerful core is necessary to bring your legs over your head swiftly to gain the necessary momentum, and strong arms are vital to block off the floor and assist you in snapping back onto your feet.
Drills to Master the Back Handspring
Here are some drills to master the back handspring:
Drills for Practicing Back Handsprings at Home:
These drills are designed to be done at home and can help you improve the necessary skills for performing a back handspring.
Handstand the Wall:
To improve your back handspring, it’s important to practice holding a handstand against a wall in a tight body position for at least a minute. Your arms and legs should be straight and tight, and your bottom should be squeezed.
The Bridge:
Practicing bridges at home can also help with your back handspring. Push back through your arms and shoulders and aim to straighten your legs in the bridge position, feeling the stretch in your shoulders. This exercise helps to improve shoulder flexibility.
It’s crucial to have a trained coach spot you when attempting a back handspring. Do not try to do it on your own without proper supervision.
Once you have built the necessary muscle strength and learned the back handspring drills, your coach can assist you until you are confident to try it independently.
Gym-Based Drills to Master the Back Handspring:
Before attempting to do a back handspring with a spot, it’s important to master some drills at the gym. These drills require specialized equipment, such as mats and a spotter. Here are some of the drills you should be able to do:
- Drill to Improve Handstand Snap-Down: This drill focuses on the second half of the back handspring. Start with a handstand on a mat and quickly bring your feet down to land with your chest up. The goal is to push through your shoulders, wrists, and fingers to get your chest up quickly.
- Technique for Pushing onto Mat Stack – Sit, Fall, and Push Drill: This drill helps you get comfortable with the feeling of sitting and leaning back, which is crucial for the back handspring. The goal is to explode backwards onto a mat stack in a tight body position by pushing through your legs.
- Barrel Drill for Perfecting Back Handspring Mechanics: This drill helps you practice the steps of the back handspring – sitting, leaning, pushing back through the legs onto your hands in a handstand position, and then snapping your legs down to a stand.
- Trampoline Drill to Enhance Back Handspring: Before attempting the back handspring on the floor, you should practice it on a trampoline in a tight body position.
Remember, do not attempt any of these drills that require a spot or equipment that you don’t have access to.
How to Master the Back Handspring: Tips and Techniques
To master the back handspring, there are several tips and techniques that you can follow:
Use Your Leg Muscles:
To get a good push off the ground, you need to have strong leg muscles. Focus on pushing hard off the ground with your legs.
Block with Your Arms:
As soon as your hands hit the ground, use your shoulders and arms to block off the ground. The goal is to spend as little time on the ground as possible and keep your momentum going.
Snap Your Legs Down Fast:
You want to snap your legs down from a tight arch position to a tight hollow position as they go over your head. This helps you maintain your speed and momentum throughout the skill.
Trampoline back walkover: How do you do it?
If you’ve overcome your fear of moving backwards, performing a back walkover on a trampoline should be easy. Here are the steps:
- Stand with your arms up and extend your dominant leg in front of you.
- Begin to bend backwards, with your palms facing upwards and your hips forward.
- As you continue to move backwards, push with your arms and head.
- Slowly bend your back and keep your dominant leg in place.
- Make sure to keep your weight balanced on the planted leg and avoid bending your elbows or knees.
- Shift your weight to your hands and land on them.
How to perform a roundoff back handspring on a trampoline?
If you have mastered the basic back handspring, the next level to try on the trampoline is a roundoff back handspring. The trampoline’s springy surface is the best place to learn this move once again. It will give you the confidence and training necessary to practice on the mats.
To begin, stand with your feet together and arms at your sides to balance. Visualize the movements and choose a landing spot where you want to land.
This will help you gain the necessary momentum. A roundoff is similar to a cartwheel, except that you land on both feet at the same time instead of on one foot.
To do a roundoff back handspring on the trampoline, you will need to exert more effort than a cartwheel. This move requires more strength, and you will be pushing off with both hands, which is different from a cartwheel.
To gain momentum, lunge forward with your arms raised and swing them up to your ears, keeping them as straight as possible. Make sure your dominant foot is leading.
As you leap forward, extend your arms in front of you. It will feel like you are doing a cartwheel. First, place your dominant hand on the trampoline surface. Make sure to bring your legs over at the same time your hand touches the surface.
When you push off the ground, make sure your hands are firmly planted. Keep your shoulders and wrists parallel to the ground at this point.
Jump into a standing position while maintaining a straight line with your legs. When you land, your knees should be bent, and you should be facing the opposite direction from where you started.
Preparation and Safety
Preparation and safety are crucial when performing any physical activity, especially when learning a new move like a roundoff back handspring on a trampoline. Here are some things to keep in mind:
- Warm-up: Always start with a proper warm-up routine to prepare your body for the activity. This can include stretching, jogging, or any other activity that gets your heart rate up.
- Proper Equipment: Make sure the trampoline is in good condition and free from any damage. Use a safety net if possible, and ensure that there are no sharp or dangerous objects nearby.
- Clothing: Wear appropriate clothing that allows for free movement and does not get caught in the trampoline or obstruct your vision.
- Spotter: It is always a good idea to have a spotter nearby to assist you in case you lose your balance or need help.
- Progression: Master the basic back handspring before attempting the roundoff back handspring. Gradually increase the difficulty level as you gain confidence and skill.
- Safety Rules: Follow all the safety rules for trampolines, such as no flips or double bounces, and never attempt any move that is beyond your ability level.
By taking the necessary precautions and following proper techniques, you can minimize the risk of injury and enjoy learning new moves on the trampoline.
FAQs:
Q:1 What is a back handspring?
A back handspring is a gymnastics move that involves jumping backwards and flipping your body over, landing on your hands and feet in a standing position.
Q:2 How do I prepare for a back handspring on a trampoline?
Before attempting a back handspring on a trampoline, you should warm up and stretch thoroughly to prevent injury. It’s also important to have a spotter present to assist you and ensure your safety.
Q:3 How can I overcome my fear of doing a back handspring on a trampoline?
It’s common to feel scared when attempting a back handspring, but there are ways to overcome this fear. Start by practicing simpler moves like jumping and flipping onto your back, and gradually work your way up to a full back handspring. Visualization and positive self-talk can also help build confidence.
Q:4 What are some common mistakes to avoid when doing a back handspring on a trampoline?
Some common mistakes to avoid when doing a back handspring on a trampoline include not jumping high enough, not tucking your chin to your chest, and landing too hard on your hands and feet.
Q:5 How do I spot a back handspring on a trampoline?
To spot a back handspring on a trampoline, stand behind the person attempting the move and hold their waist as they jump backwards. Guide them through the flip and assist with the landing.
Q:6 How can I improve my technique when doing a back handspring on a trampoline?
To improve your technique when doing a back handspring on a trampoline, focus on jumping high, tucking your chin to your chest, and landing softly on the balls of your feet. Practicing drills and exercises to strengthen your core and legs can also help.
Q:7 How long does it take to learn how to do a back handspring on a trampoline?
The amount of time it takes to learn a back handspring on a trampoline can vary depending on your level of fitness and experience with gymnastics. With consistent practice and proper technique, some people may be able to learn the move in a few weeks, while others may take several months.
Conclusion:
In conclusion, learning how to do a back handspring on a trampoline requires proper preparation, safety measures, and consistent practice. It is essential to start with the basics and master them before moving onto advanced moves like the back handspring.
Proper warm-up and stretching are necessary to prevent injury and prepare the body for the movements involved.
Having a spotter present can provide a sense of security and help correct mistakes. When attempting the back handspring, remember to push off with both hands, tuck your chin, and keep your body tight. Spotting techniques can also be used to help overcome fear and build confidence in executing the skill.
Learning how to do a back handspring on a trampoline requires patience, determination, and practice. Don’t be discouraged by setbacks and mistakes, as they are a natural part of the learning process.
With time and effort, the back handspring can become a thrilling and rewarding skill to master on the trampoline. Always prioritize safety and enjoy the journey of mastering this exciting gymnastics move.
We hope you will be well aware about how to do a back handspring on a trampoline, after reading this comprehensive article. If you have any questions, feel free to comment below!