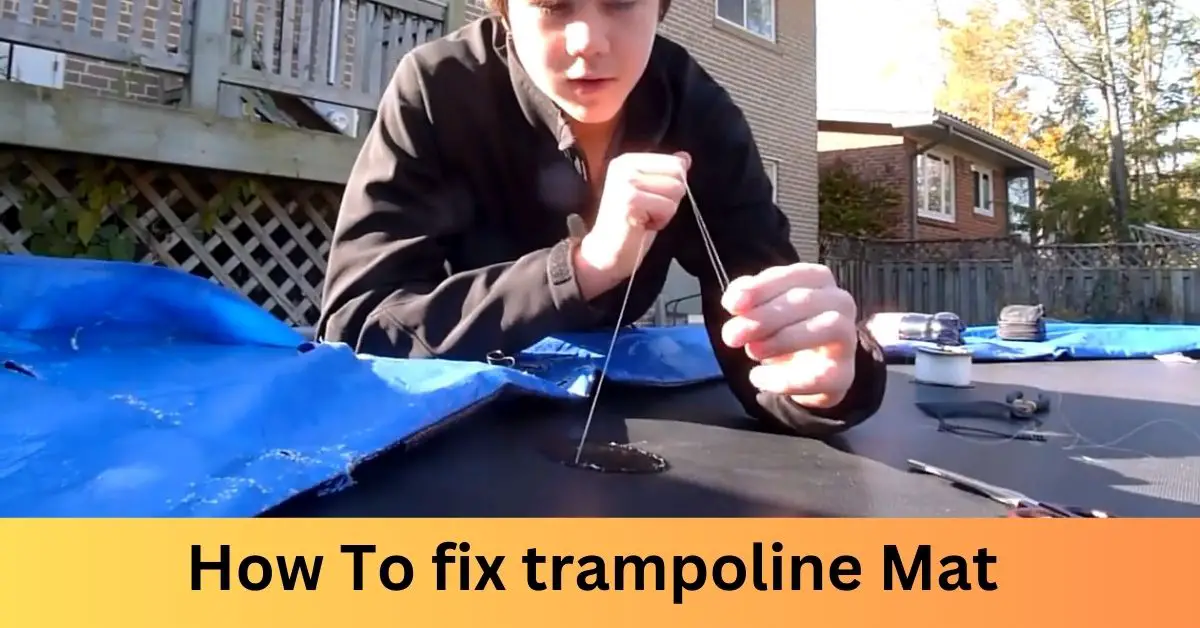
The trampoline mat, also known as the jump mat, is a crucial component that guarantees a fun and safe bouncing experience. Over time, however, due to continuous use and exposure to environmental elements, this mat can become worn out or even damaged, leading to potential safety issues.
Therefore, knowing how to fix a trampoline mat becomes essential. Whether it’s a small tear that can be patched up or a larger issue requiring full replacement, this guide will walk you through each step of the process.
We’ll start with a thorough assessment of the damage, then delve into the tools required for the task, and finally move on to the repair or replacement process.
Safety is paramount, so we’ll also discuss measures to be taken to ensure the trampoline is safe to use post-repair. With some patience, attention to detail, and a bit of effort, your trampoline mat can be restored to its original glory.
How to fix trampoline mat: Safely disassemble the trampoline, removing the springs first. Examine the mat for damage; small tears can be mended using a repair kit. If extensively damaged, replace the mat entirely. Reattach carefully, ensuring springs are evenly distributed for balanced tension and secure bouncing.
Importance of a Functional Trampoline Mat:

The trampoline mat plays a vital role in the overall performance and safety of the trampoline. It is designed to withstand repetitive bouncing motions and support the weight of the users.
A functional trampoline mat provides a stable and responsive surface for bouncing, allowing users to enjoy a smooth and controlled experience.
Furthermore, a high-quality trampoline mat helps to distribute the impact of the bounces evenly across the surface, reducing stress on the trampoline frame and springs. This not only extends the lifespan of the trampoline but also minimizes the risk of accidents or injuries.
Common Issues with Trampoline Mats:
Over time, trampoline mats can experience wear and tear due to regular use, exposure to the elements, and other factors. Some common issues that can arise with trampoline mats include:
Tears and punctures: Continuous bouncing and contact with sharp objects can cause the mat to tear or develop punctures. These tears can compromise the integrity of the mat, leading to potential safety hazards.
UV damage: Trampolines that are kept outdoors are exposed to sunlight, which can cause the mat’s material to fade, weaken, and become brittle over time. UV damage can make the mat more prone to tearing or breaking.
Elasticity loss: With frequent use, the trampoline mat may lose its elasticity, resulting in reduced bounce performance. A worn-out mat may feel saggy or loose, compromising the overall experience and potentially increasing the risk of injuries.
Material degradation: Depending on the quality of the mat’s material, it may degrade over time, leading to issues such as fraying, thinning, or weakening of the fabric. This deterioration can affect the mat’s durability and safety.
Assessing the Damage:
Regular inspection of the trampoline mat is essential to identify any signs of damage and take appropriate action. When assessing the damage, consider the following:
Visual inspection: Examine the entire surface of the mat for tears, punctures, or fraying. Look for any signs of material degradation, such as fading or thinning.
Elasticity test: Test the bounce of the trampoline by applying weight on the mat. If it feels overly saggy or loose, it may indicate a loss of elasticity.
Load-bearing capacity: Check the weight limit specified by the manufacturer and ensure that the mat can still support the intended user’s weight. Exceeding the weight limit can put stress on the mat and increase the risk of accidents.
Safety enclosure inspection: Inspect the connection points between the mat and the trampoline frame, as well as the attachment of the safety enclosure. Ensure that they are secure and in good condition.
Inspecting the Trampoline Mat for Tears or Holes:
To assess the condition of your trampoline mat, you should carefully inspect it for any tears, holes, or other damage. Follow these steps:
Clear the trampoline: Remove any objects, toys, or debris from the trampoline surface to get a clear view of the mat.
Visual inspection: Carefully examine the entire surface of the mat, paying close attention to the stitching, edges, and central bouncing area. Look for any signs of tears, holes, or punctures. These can vary in size, so be thorough in your examination.
Feel for inconsistencies: Gently run your hands over the surface of the mat, feeling for any irregularities. This can help you detect smaller tears or holes that may not be immediately visible.
Look underneath the mat: Lift the mat to inspect the underside as well. Tears or holes may be visible from this perspective and could indicate damage that is not immediately apparent from the top.
Evaluating the Overall Condition of the Mat:
While inspecting for tears or holes, it’s also important to evaluate the overall condition of the trampoline mat. Consider the following factors:
Fading or discoloration: Look for any significant fading or discoloration of the mat’s surface. Excessive exposure to sunlight can cause the material to weaken, so signs of discoloration may indicate UV damage.
Elasticity and sagging: Test the mat’s elasticity by pressing down on different areas and observing how quickly it regains its original shape. A mat that feels overly saggy or fails to bounce back effectively may have lost its elasticity.
Material integrity: Check for signs of material degradation, such as fraying, thinning, or brittleness. These issues can compromise the mat’s durability and safety.
Gathering the Necessary Tools:
Before beginning the inspection, gather the following tools to aid in the process:
Flashlight: A flashlight can help you inspect the trampoline mat more effectively, especially if the lighting conditions are not ideal.
Magnifying glass: A magnifying glass can be useful for examining smaller tears, holes, or other imperfections that may not be easily visible to the naked eye.
Gloves: Wearing gloves can protect your hands while inspecting the mat, particularly if you encounter sharp edges or objects.
Marker or tape: If you come across any tears or holes, use a marker or tape to mark the damaged areas. This will help you keep track of them and determine the necessary repair or replacement steps.
By following these steps and gathering the necessary tools, you will be able to thoroughly inspect the trampoline mat for tears, holes, and overall condition. Remember to prioritize safety throughout the inspection process.
Listing the Tools Required for Trampoline Mat Repair:
To repair small tears or holes in a trampoline mat, you will need the following tools:
Trampoline repair kit: This typically includes adhesive patches or pieces of trampoline material designed for repairs.
Scissors or utility knives: These tools will be used to cut the repair patches to the appropriate size and shape.
Clean cloth: A clean cloth is necessary for wiping the surface of the mat before applying the adhesive.
Adhesive or glue: You will need a suitable adhesive or glue recommended for trampoline mat repairs. Ensure it is compatible with the material of your mat.
Clamps or heavy objects: Depending on the type of adhesive you use, you may need clamps or heavy objects to hold the repair patch securely in place while the adhesive dries.
Where to Find the Tools and Materials:
The tools and materials required for trampoline mat repair can typically be found at sporting goods stores, trampoline retailers, or online marketplaces. Some specialty trampoline repair kits may be specifically designed for certain trampoline brands or models, so check for compatibility before purchasing.
Additionally, you may find adhesive patches or repair materials in general-purpose repair kits that can be used for various fabric or vinyl repairs.
Repairing Small Tears or Holes:
Once you have gathered the necessary tools and materials, follow these steps to repair small tears or holes in a trampoline mat:
Clean the area: Use a clean cloth to wipe the surface around the tear or hole. Remove any dirt, debris, or moisture that could interfere with the adhesive’s bonding.
Cut the repair patch: Take the adhesive patch or a piece of trampoline material from the repair kit and cut it to a size slightly larger than the damaged area. The patch should cover the tear or hole completely.
Apply adhesive: Apply a suitable adhesive or glue to the backside of the patch. Follow the manufacturer’s instructions for the specific adhesive you are using.
Position the patch: Carefully position the patch over the tear or hole, ensuring it aligns properly and covers the damaged area completely.
Secure the patch: Use clamps or place heavy objects on top of the patch to hold it in place while the adhesive dries. Refer to the adhesive manufacturer’s guidelines for the recommended drying time.
Allow for curing time: Allow sufficient time for the adhesive to cure and bond effectively. This will ensure a strong and durable repair.
Test the repair: Once the adhesive has fully dried, gently press and test the repaired area to ensure it is secure and can withstand the pressure of bouncing.
Remember, larger or more extensive damage may require professional repair or, in some cases, replacement of the trampoline mat. It’s essential to prioritize safety, and if you’re unsure about the extent of the damage or how to repair it, consult a professional or the trampoline manufacturer for guidance.
How to Fix Trampoline Mat: Easy Steps

If you have identified minor damage on your trampoline mat, such as small tears or holes, you can follow these steps to fix it using a repair kit or patching material:
Clean the area: Before starting the repair, ensure the damaged area is clean and free from debris. Wipe the surface around the tear or hole with a clean cloth to remove any dirt or moisture.
Prepare the repair kit: If you have a trampoline repair kit, gather the materials included in the kit. This may include adhesive patches, glue, and instructions. If you’re using patching material, cut it to an appropriate size and shape to cover the damaged area.
Apply adhesive or glue: If your repair kit includes adhesive patches, peel off the backing to expose the adhesive side. If you’re using patching material, apply a suitable adhesive or glue to the backside of the patch. Follow the manufacturer’s instructions for the specific adhesive you are using.
Position the patch: Carefully position the adhesive patch or patching material over the tear or hole, ensuring it covers the damaged area completely and aligns properly with the surrounding surface.
Press and smooth the patch: Apply firm and even pressure to the patch, smoothing it down onto the trampoline mat. Make sure there are no air bubbles or wrinkles.
Allow for curing time: Depending on the adhesive or glue used, allow sufficient time for it to cure and bond effectively. Follow the manufacturer’s instructions for the recommended drying or curing time.
Test the repair: Once the adhesive has fully dried, gently press and test the repaired area to ensure it is secure and can withstand the pressure of bouncing.
Replacing a Damaged Trampoline Mat:
In some cases, if the damage to the trampoline mat is extensive or cannot be effectively repaired, it may be necessary to replace the entire mat. Here’s a guide on how to replace a damaged trampoline mat:
Measure the trampoline: Measure the diameter of your trampoline to ensure you purchase a replacement mat of the correct size.
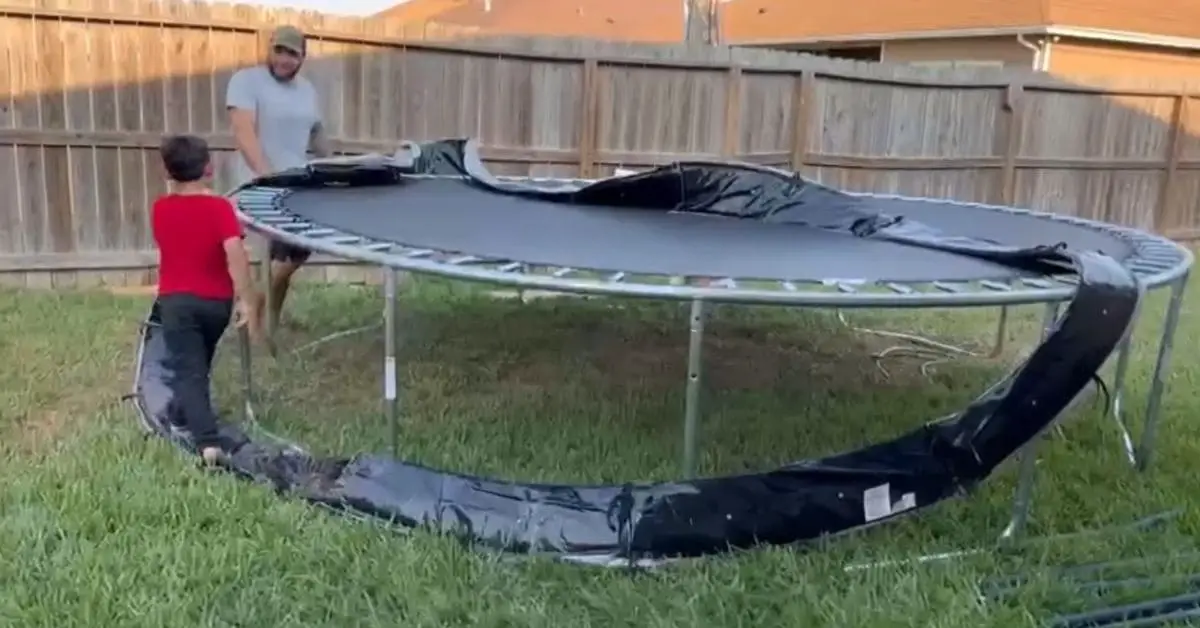
Remove the old mat: Begin by removing the damaged trampoline mat. Depending on the trampoline design, this may involve detaching the springs or releasing the mat from the frame. Follow the manufacturer’s instructions or consult a professional if needed.
Purchase a replacement mat: Purchase a new trampoline mat of the appropriate size and compatible with your trampoline model. You can find replacement mats at sporting goods stores, trampoline retailers, or online.
Install the new mat: Position the replacement mat on the trampoline frame, ensuring it is aligned properly. Attach the springs or secure the mat according to the manufacturer’s instructions. Be careful not to damage the new mat during installation.
Test the new mat: Once the replacement mat is securely in place, test it by gently bouncing on it to ensure it is properly installed and functioning as expected.
Remember to prioritize safety throughout the repair or replacement process. If you are unsure about how to proceed or encounter any difficulties, it is recommended to seek assistance from a professional or contact the trampoline manufacturer for guidance.
When to Consider Replacing the Entire Mat:
While minor damage to a trampoline mat can often be repaired, there are situations when it is necessary to replace the entire mat. Consider the following scenarios:
Extensive damage: If the trampoline mat has significant tears, multiple holes, or large areas of wear and degradation, it may be more practical and safer to replace the entire mat rather than attempting repairs.
Age and wear: Trampoline mats have a limited lifespan, especially if they are exposed to harsh weather conditions or undergo heavy use. If the mat is old, worn-out, and showing signs of deterioration, it is advisable to replace it to ensure optimal safety and performance.
Incompatibility or unavailability: If you have an older or less common trampoline model, finding a suitable replacement mat or repair kit may be challenging. In such cases, replacing the entire mat with a compatible one can be a more viable option.
Steps Involved in Replacing a Trampoline Mat:
If you’ve determined that it’s necessary to replace the trampoline mat, follow these steps:
Measure the trampoline: Measure the diameter of the trampoline frame to ensure you purchase a replacement mat that fits correctly.
Purchase a new mat: Look for a replacement trampoline mat of the appropriate size and compatible with your trampoline model. You can find these mats at sporting goods stores, trampoline retailers, or online.
Remove the old mat: Begin by removing the damaged or worn-out trampoline mat. This usually involves detaching the springs or releasing the mat from the frame. Follow the manufacturer’s instructions or consult a professional if needed.
Clean the frame and springs: Take the opportunity to clean the trampoline frame and springs while the mat is removed. Remove any dirt, debris, or rust to ensure a clean and safe installation.
Install the new mat: Position the replacement trampoline mat on the frame, ensuring it is aligned properly. Begin attaching the springs one by one, gradually working around the trampoline. Use a spring tool if available to make the process easier and safer.
Double-check the alignment: Ensure that the mat is evenly stretched and centered on the trampoline frame. Make any necessary adjustments to ensure proper alignment before proceeding.
Secure the mat: Once all the springs are attached, go around the trampoline again, checking that each spring is securely fastened and the mat is properly tensioned. Ensure there are no loose or sagging areas.
Ensuring Proper Installation:

To ensure the trampoline mat is installed correctly and safely, keep the following tips in mind:
Follow the manufacturer’s instructions: Consult the trampoline’s instruction manual or contact the manufacturer for specific guidance on installing the mat.
Different trampoline models may have unique installation requirements.
Seek professional assistance if needed: If you are unsure about any aspect of the installation process or encounter difficulties, consider seeking assistance from a professional trampoline technician. They can ensure proper installation and address any concerns or complications.
Regularly inspect the installation: After installing the new trampoline mat, periodically inspect the mat, springs, and frame to ensure everything remains in proper condition. This will help identify any potential issues or repairs needed.
By following these steps and ensuring proper installation, you can replace the trampoline mat effectively and maintain a safe and enjoyable bouncing experience.
Tips for Correctly Installing a New Trampoline Mat:
Installing a new trampoline mat properly is crucial for safety and optimal performance. Here are some tips to ensure a correct installation:
Read the instructions: Before starting the installation process, carefully read and follow the manufacturer’s instructions specific to your trampoline model. This will provide essential guidance and steps tailored to your trampoline.
Check for compatibility: Ensure that the replacement trampoline mat is compatible with your trampoline model in terms of size, shape, and attachment method. Verify that the new mat matches the specifications recommended by the manufacturer.
Gather necessary tools and assistance: Prepare all the tools required for installation, such as spring hooks or a spring tool, pliers, and possibly a rubber mallet. It can also be helpful to have someone assist you during the process, especially with larger trampolines.
Remove the old mat and springs: Carefully remove the old trampoline mat by detaching the springs from the frame. Take note of how the springs were attached and the pattern they follow.
Inspect the frame and springs: While the mat is removed, inspect the trampoline frame and springs for any damage, rust, or wear. Address any issues before installing the new mat.
Lay out the new mat: Place the new trampoline mat evenly over the frame, making sure it is centered. Align the mat’s attachment holes with the spring hooks on the frame.
Attach the springs: Begin attaching the springs to the mat and the frame one by one. Start with the springs in the four corners, evenly distributing tension as you work your way around. Use a spring hook or spring tool to stretch and connect each spring.
Check the alignment and tension: Regularly check the alignment and tension of the mat as you attach the springs. Ensure that the mat is evenly stretched and that there are no loose or sagging areas. Adjust the tension if necessary.
Ensuring the mat is securely attached to the frame:
To ensure that the trampoline mat is securely attached to the frame, follow these steps:
Verify proper spring attachment: Double-check that each spring is correctly attached to both the trampoline mat and the frame. Confirm that the hooks are fully engaged and securely fastened.
Check for even tension: As you attach the springs, make sure that the tension is distributed evenly across the mat. Avoid any areas with excessive tension or areas that are too loose.
Test the mat’s stability: Once all the springs are attached, perform a gentle bounce or apply slight pressure to different areas of the mat to test its stability. The mat should feel secure and not shift or move excessively.
Inspect the attachment points: Regularly inspect the attachment points where the springs connect to the mat and frame. Check for any signs of wear, loose hooks, or damaged hardware. Address any issues promptly.
Maintaining a Trampoline Mat:
To maintain the trampoline mat and extend its lifespan, consider the following maintenance tips:
Regular cleaning: Remove debris, leaves, and dirt from the trampoline mat regularly. Use a soft brush or broom to gently sweep the surface. Avoid using harsh chemicals or abrasive cleaning agents that could damage the mat.
Protect from UV exposure: Prolonged exposure to sunlight can cause the trampoline mat to deteriorate faster. Consider using a trampoline cover or placing the trampoline in a shaded area to reduce UV exposure.
Inspect for damage: Periodically inspect the trampoline mat for any signs of wear, tears, or holes. Promptly repair minor damage to prevent it from worsening. Replace the mat if the damage is extensive.
Limit excessive weight and rough use: Discourage activities on the trampoline that could put excessive strain on the mat, such as jumping with shoes, or using the trampoline for acrobatics or stunts beyond its intended use.
Follow weight capacity guidelines: Adhere to the weight capacity specified by the manufacturer. Overloading the trampoline can strain the mat and other components, leading to premature damage.
By following these tips for correct installation, ensuring secure attachment, and maintaining the trampoline mat, you can promote its longevity, performance, and safety.
Regular Cleaning and Inspection Routines:
To keep your trampoline mat in good condition, establish regular cleaning and inspection routines. Here are some guidelines:
Cleaning the mat: Remove debris, dirt, and leaves from the trampoline mat regularly. Use a soft brush or broom to gently sweep the surface. You can also use a mild soap and water solution to clean any stubborn stains. Rinse thoroughly and allow the mat to dry completely before use.
Inspecting for damage: Conduct routine inspections of the trampoline mat for signs of wear, tears, or holes. Check the edges, attachment points, and the entire surface of the mat. Promptly address any damage to prevent it from worsening. If you notice significant damage that cannot be repaired, consider replacing the mat.
Check the springs and frame: Along with the mat, inspect the springs and trampoline frame for any signs of damage, rust, or wear. Ensure that the springs are securely attached and that the frame is structurally sound. Tighten any loose bolts or screws as necessary.
Tips for Extending the Lifespan of the Mat:
To extend the lifespan of your trampoline mat, follow these tips:
Limit exposure to sunlight: Prolonged exposure to direct sunlight can cause the mat to deteriorate faster. Whenever possible, place the trampoline in a shaded area or use a trampoline cover to reduce UV exposure.
Remove footwear: Encourage users to jump on the trampoline barefoot or with socks. Shoes, especially those with hard soles, can cause unnecessary strain and wear on the mat.
Avoid sharp objects: Keep sharp objects, such as keys, toys, or jewelry, away from the trampoline. These can puncture or tear the mat if they come into contact with it during use.
Follow weight capacity guidelines: Adhere to the weight capacity specified by the manufacturer. Exceeding the weight limit can put excessive stress on the mat and other components, leading to premature wear and damage.
Store during harsh weather: In harsh weather conditions such as storms, high winds, or heavy snowfall, consider disassembling the trampoline or securely covering it to protect the mat from potential damage.
Safety Precautions:
While maintaining and extending the lifespan of the trampoline mat is important, safety should always be a top priority. Here are some essential safety precautions to follow:
Establish usage rules: Clearly communicate and enforce rules for safe trampoline usage. This may include limiting the number of jumpers, prohibiting somersaults or dangerous stunts, and ensuring adult supervision for children.
Install safety enclosures: Use a safety enclosure net around the trampoline to prevent users from falling off. Ensure the net is securely attached and in good condition.
Perform regular safety checks: Regularly inspect the entire trampoline, including the mat, springs, frame, and safety enclosure. Look for any signs of damage, wear, or instability. Address any safety concerns immediately.
Educate users on safe jumping techniques: Teach jumpers to land on the mat with their feet and avoid jumping too close to the edge. Encourage them to bounce in the center of the trampoline to maintain balance and reduce the risk of injury.
Supervise young jumpers: Ensure that children are supervised by responsible adults while using the trampoline. Adult supervision can help prevent accidents and ensure safe jumping practices.
By implementing regular cleaning and inspection routines, following tips to extend the mat’s lifespan, and prioritizing safety precautions, you can promote a safe and enjoyable trampoline experience for users while maintaining the mat’s longevity.
Importance of Following Safety Guidelines:
Following safety guidelines when using a trampoline is of utmost importance due to the inherent risks involved. Adhering to these guidelines helps prevent accidents and injuries, and promotes a safe and enjoyable trampoline experience. Here’s why it is crucial to follow safety guidelines:
Injury prevention: Trampoline-related injuries, such as fractures, sprains, and head injuries, can occur if proper safety measures are not followed. By following safety guidelines, users can minimize the risk of accidents and mitigate potential injuries.
User protection: Safety guidelines are designed to protect the users of the trampoline, especially children. Guidelines such as limiting the number of jumpers, avoiding somersaults, and using safety enclosures help create a safer environment for everyone involved.
Structural integrity: Safety guidelines also ensure the structural integrity of the trampoline. By following weight capacity limits and not exceeding the recommended usage, users prevent unnecessary strain on the trampoline frame, springs, and mat, reducing the risk of damage or collapse.
Liability reduction: Following safety guidelines can help mitigate potential liability issues. Whether it’s at home or in a public setting, implementing and enforcing safety guidelines demonstrates a commitment to user safety and may reduce the risk of legal complications.
Ensuring user Safety while using the Trampoline:
To ensure user safety while using a trampoline, consider the following measures:
Adult supervision: Children should always be supervised by responsible adults while using the trampoline. Adults can provide guidance, enforce safety rules, and intervene if risky behavior is observed.
Safety enclosure: Install a safety enclosure net around the trampoline to prevent users from falling off the mat. Ensure that the net is in good condition and properly attached.
Proper usage: Educate users on safe jumping techniques, such as landing with their feet, bouncing in the center of the mat, and avoiding jumps near the edge. Discourage rough play, horseplay, or attempting dangerous stunts.
Age appropriateness: Ensure that the trampoline is appropriate for the age and size of the users. Young children may be better suited for smaller trampolines with lower bounce heights.
Regular inspections: Perform routine inspections of the trampoline, including the mat, springs, frame, and safety enclosure. Look for signs of wear, tear, or damage. Promptly address any issues to maintain a safe environment.
Troubleshooting Common Issues:
Here are some common trampoline issues and troubleshooting tips:
Squeaky springs: If the springs are squeaky, apply a silicone-based lubricant or spray to reduce friction and noise. Avoid using oil-based lubricants, as they can attract dirt and cause the springs to deteriorate faster.
Loose springs: If the springs become loose, use a spring tool or pliers to reattach them securely to the frame and mat. Check that all springs are properly tensioned and evenly distributed.
Sagging mat: A sagging mat may indicate worn or overstretched springs. Check the tension of the springs and ensure they are correctly attached. If necessary, replace worn-out springs or consider replacing the mat if it has lost its elasticity.
Damaged safety enclosure: If the safety enclosure net is torn or damaged, repair or replace it immediately. A compromised safety enclosure reduces its effectiveness in preventing falls and increases the risk of injury.
Frame instability: If the trampoline frame feels unstable or wobbly, check that all frame components are securely connected. Tighten any loose bolts or screws and inspect for any signs of structural damage. If the frame is severely compromised, consider replacing the trampoline.
Always prioritize safety and seek professional assistance or consult the trampoline manufacturer if you encounter persistent issues or are unsure about troubleshooting certain problems.
Addressing Common Problems with Trampoline Mats:
Trampoline mats can experience various issues over time, including sagging, becoming loose, or being uneven. Here are some solutions for these common problems:
Sagging Mat:
Check spring tension: Inspect the tension of the springs that connect the mat to the frame. If the springs have lost their elasticity or are worn out, consider replacing them with new ones to restore proper tension.
Adjust spring positioning: Ensure that the springs are evenly distributed around the trampoline and are attached at the appropriate attachment points on the mat and frame. Realign any springs that may have slipped or shifted.
Replace the mat: If the sagging is severe or the mat has lost its elasticity due to wear and tear, it may be necessary to replace the trampoline mat entirely with a new one.
Loose Mat:
Verify spring attachment: Check that all the springs are securely attached to both the mat and the frame. If any springs are loose or disconnected, reattach them properly to ensure a tight and secure fit.
Adjust spring tension: If the mat is consistently loose, you may need to adjust the tension of the springs. Use a spring tool or pliers to increase the tension on the loose springs, ensuring they are stretched and attached firmly.
Replace worn-out springs: If the springs are worn-out or damaged, they may not provide adequate tension to keep the mat tight. Replace worn-out springs with new ones to maintain proper tension and a secure mat attachment.
Uneven Mat:
Inspect spring alignment: Check that the springs are evenly aligned and attached at regular intervals around the trampoline. If any springs are positioned improperly, adjust them to create a more even distribution.
Adjust tension: Assess the tension of the springs and adjust as needed to ensure consistent tension across the entire mat. Avoid areas with excessive tension or areas that are too loose.
Realign the mat: If the mat appears visibly uneven, carefully realign it on the frame. Ensure that the mat is centered and evenly distributed over the springs and frame.
Replace the mat: In some cases, an uneven mat may be a result of extensive wear or damage. If attempts to adjust or realign the mat are unsuccessful, replacing it with a new one may be necessary.
Remember to consult the manufacturer’s instructions or seek professional assistance if you are unsure about making adjustments or need further guidance. Proper maintenance, regular inspections, and timely addressing of mat issues can help maintain the safety and performance of your trampoline.
Testing and Safety Check
Performing a comprehensive testing and safety check is paramount when ensuring the secure use of a trampoline. Through a series of essential steps, this process guarantees the trampoline’s stability and the mat’s proper tension.
It involves confirming the secure attachment of the mat to the frame, aligning springs accurately, assessing the overall frame stability, and inspecting the safety enclosure and padding.
Visual examination for wear and tear and adherence to user guidelines further contribute to a safe trampoline environment. Regular safety checks promote confident and injury-free trampoline enjoyment for users of all ages.
Regular Maintenance and Prevention
Here are some maintenance and presentation tips:
- Inspect Regularly: Schedule routine inspections of the trampoline mat for signs of wear, tears, or stretching. Regular checks can help catch issues early.
- Cleanliness: Keep the trampoline and mat clean from dirt, debris, and moisture. Regular cleaning prevents material degradation and mold growth.
- Weight Limit Awareness: Educate users about the trampoline’s weight limit. Prevent overloading, which can strain the mat and lead to damage.
- Proper Footwear: Encourage users to wear appropriate footwear, like socks or soft-soled shoes, to reduce friction and potential damage to the mat.
- Safe Play: Instruct jumpers to avoid sharp objects, jewelry, or items that could puncture the mat. Educate them about safe jumping techniques.
- Seasonal Storage: During unfavorable weather conditions, disassemble and store the trampoline indoors or use weather covers to protect the mat and springs.
- UV Protection: If the trampoline is outdoors, consider using UV-resistant covers to shield the mat from sun damage, which can cause material deterioration.
- Spring Care: Ensure springs are securely attached and in good condition. Damaged or rusted springs can create stress points on the mat.
- Proper Assembly: During installation, follow manufacturer guidelines for attaching the mat to the frame and positioning the springs correctly.
- Regular Tension Check: Periodically check the tension of the mat by lightly bouncing on different areas. Adjust the tension if needed.
- Prompt Repairs: If you notice any damage, repair it promptly to prevent further deterioration. Follow appropriate repair techniques or consider professional help.
- Educational Signage: If the trampoline is used by multiple individuals, post clear guidelines about usage, weight limits, and safe practices.
- Educate Children: Teach children proper usage and jumping techniques to minimize strain on the mat. Encourage controlled bouncing.
- Follow User Manual: Refer to the trampoline’s user manual for specific maintenance recommendations and guidelines tailored to the product.
By consistently practicing these maintenance and prevention tips, you can significantly extend the lifespan of your trampoline mat and ensure a safe and enjoyable jumping experience for all users.
FAQs:
Q.1 How often should I inspect my trampoline mat?
It is recommended to inspect your trampoline mat at least once every season or more frequently if it is heavily used. Regular inspections help identify any damage or wear that may compromise safety.
Q.2 Can I repair a trampoline mat without professional help?
Yes, minor tears or holes can often be repaired without professional assistance. Utilize trampoline repair kits or patching materials specifically designed for trampolines and follow the provided instructions carefully.
Q.3 Are there any alternative materials I can use for patching?
While it’s best to use materials designed for trampolines, some alternatives like heavy-duty vinyl or canvas patches may be suitable for temporary repairs. However, they may not offer the same durability as dedicated trampoline repair materials.
Q.4 Can I use a damaged trampoline mat?
It is not recommended to use a damaged trampoline mat as it may pose safety risks. Even small tears or holes can worsen with use and potentially lead to accidents. Repair or replace the mat as soon as damage is detected.
Q.5 Are there specific weight limits for trampoline mats?
Yes, trampoline mats usually have weight limits specified by the manufacturer. It’s crucial to adhere to these weight limits to maintain the structural integrity of the mat and prevent accidents or damage to the trampoline.
Conclusion:
In conclusion, maintaining a functional trampoline mat is not just crucial for the longevity of your trampoline, but also for the safety and enjoyment of its users.
This guide has provided comprehensive steps to diagnose, repair, and prevent common issues with trampoline mats, from minor tears to more substantial damage necessitating full replacement.
Equipped with the right tools and knowledge, you are now empowered to extend the lifespan of your trampoline mat through regular maintenance and timely repairs. Furthermore, adhering to safety precautions while performing these tasks and during trampoline usage is paramount.
Lastly, by troubleshooting common issues such as sagging, loose, or uneven mats, you can ensure an optimal bouncing experience. A well-cared-for trampoline mat not only provides fun and exercise but can also be a gathering point for family and friends, turning your backyard into a hub of entertainment.
We trust this detailed gazebo buying guide has given you a good understanding. If you have any questions, don’t hesitate to drop a comment below!