
Installing trampoline springs without a tool can be straightforward with the right technique. I share my personal experience. Let me guide you about how to install trampoline springs without tool.
First, gather the necessary equipment, including the trampoline springs and a soft surface to work on. Begin by identifying the spring holes on the trampoline mat and hold the spring firmly with both hands.
With one end of the spring positioned in a spring hole, use your body weight to stretch the spring toward the opposite hole. Align the other end of the spring and push it down, hooking it into place.
Repeat this process for each spring, working systematically around the trampoline. Take breaks as needed and ensure proper body posture to avoid strain. Remember to follow safety guidelines and inspect the springs and trampoline components for wear or damage.
With patience and practice, you can successfully install trampoline springs without a tool, ensuring a safe and enjoyable bouncing experience.
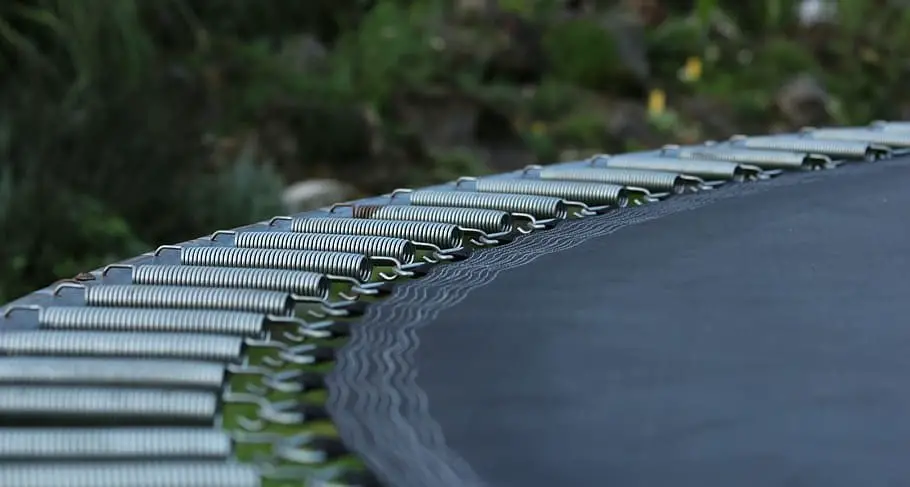
How to Install Trampoline Springs without Tool: Install trampoline springs effortlessly with our tool-free method, ensuring quick and hassle-free setup for maximum bouncing fun. Say goodbye to complicated tools and enjoy your trampoline to the fullest.
Methods for Installing Trampoline Springs
As mentioned earlier, it’s recommended to use a trampoline spring tool for easy installation. Before starting, it’s important to wear safety gloves to prevent getting pinched by the springs, which can be quite painful.
However, if you don’t have access to the tool, alternative methods can help. I will explain those methods to you later on. For now, let’s focus on how to install trampoline springs using the proper tool.
Using the Upper Bounce Trampoline Spring Pull Tool
Start by placing the jumping mat over the frame to install the springs on your trampoline. Make sure to count the number of holes on the top rail to ensure you don’t miss any springs. Attach all the springs to the mat securely.
Begin at midnight and use the trampoline spring tool to hook the springs onto the frame at 6, 3, and 9 o’clock. This helps maintain the balance between the spring and mat tensions.
Space the springs apart rather than placing them next to each other for better tension distribution. Continue this process until all the springs are installed, ensuring none are missed to prevent potential injuries.
It’s a good practice to follow a sequence where each spring is placed opposite another to distribute tension evenly. After installation, test the bounce and check for any trampoline squeaking sounds. If there are any issues, consider returning the trampoline for assistance.
What is the process for using a trampoline spring tool?
When you open your trampoline package, you will usually find a set of tools, including a spring tool, screwdriver, and more. If it’s your first trampoline, keeping the spring tool in your toolbox for future use is a good idea. You should also keep the instruction manual, which may be available online.
You may sometimes need to take apart your trampoline, whether for storage during winter, relocation, or disposal. The spring tool is a simple device shaped like a “T” with a rubber grip and a metal hook at the end.
It helps you easily attach and detach the springs when assembling or disassembling the trampoline.
Related article: How to remove trampoline springs without tool
Gather Necessary Materials
Before you begin the process of installing trampoline springs without specialized tools, it’s essential to gather the following materials and, in some cases, an extra pair of hands to make the job easier and safer:
- Trampoline Springs: Ensure you have enough springs to replace any damaged or missing ones on your trampoline. The number of springs required will depend on the size of your trampoline, so check your trampoline’s manual or specifications for guidance.
- Work Gloves: Sturdy work gloves are crucial for protecting your hands from potential injuries during the installation. They will provide a better grip on the springs and reduce the risk of blisters or pinched fingers.
- A Friend or Helper (optional): While not absolutely necessary, having a friend or helper can significantly ease the process of attaching the springs. They can assist in stretching and hooking the springs, making the installation more efficient and ensuring that the trampoline mat is evenly tensioned.
By having these materials at your disposal, you can proceed with the installation process more efficiently and safely.
How to Install Trampoline Springs without Tool?
Installing trampoline springs without a tool can be challenging, but it’s still possible with a little extra effort. Here’s a step-by-step guide:
Using Pliers:
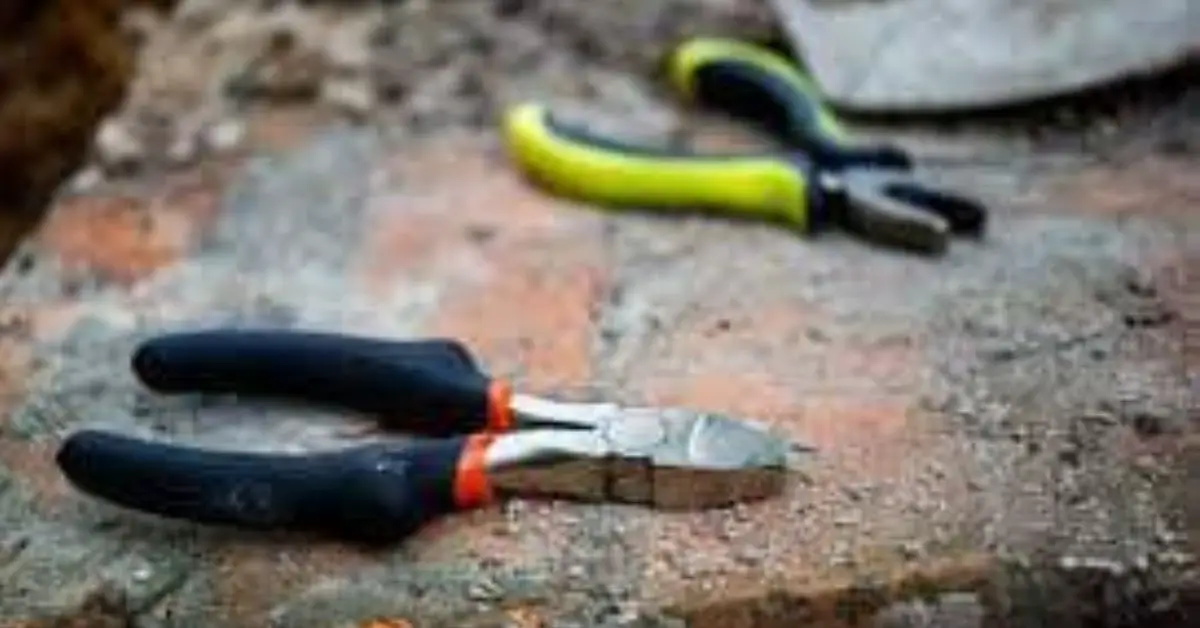
While using pliers can be challenging and potentially risky, they can provide a strong grip for pulling the springs into place.
However, it requires physical effort, and if your grip is not firm, the springs may snap back and cause injury.
Exercise caution when using pliers and ensure a secure grip to avoid accidents.
Using a Caulk Gun to Install Trampoline Springs:
Using a caulk gun to install trampoline springs without a dedicated tool is a clever approach, but using a sturdy caulk gun (avoid plastic ones) is important.
With this method, you utilize the pumping action of the caulk gun to stretch the spring, making it easier to insert into the frame’s holes. However, it’s worth noting that this method may not be suitable for removing the springs.
Alternative Trampoline Spring Installation Method:
If you happen to come across an old trampoline that someone is getting rid of, or if you’re in the process of disposing of your own trampoline, I suggest keeping some of the springs.
These springs can serve as a useful alternative to a trampoline spring tool. They are handy because they already have hooks on one end, making it easier to attach them to the frame.
This tip is valuable not only for experienced trampoline owners but also for those who are new to trampolines. By saving some of these springs, you’ll have a backup option for installing or replacing springs in the future, providing convenience and cost savings.
So, next time you encounter an old trampoline, remember to salvage a few springs for future use.
Using a Screwdriver as an Alternative:
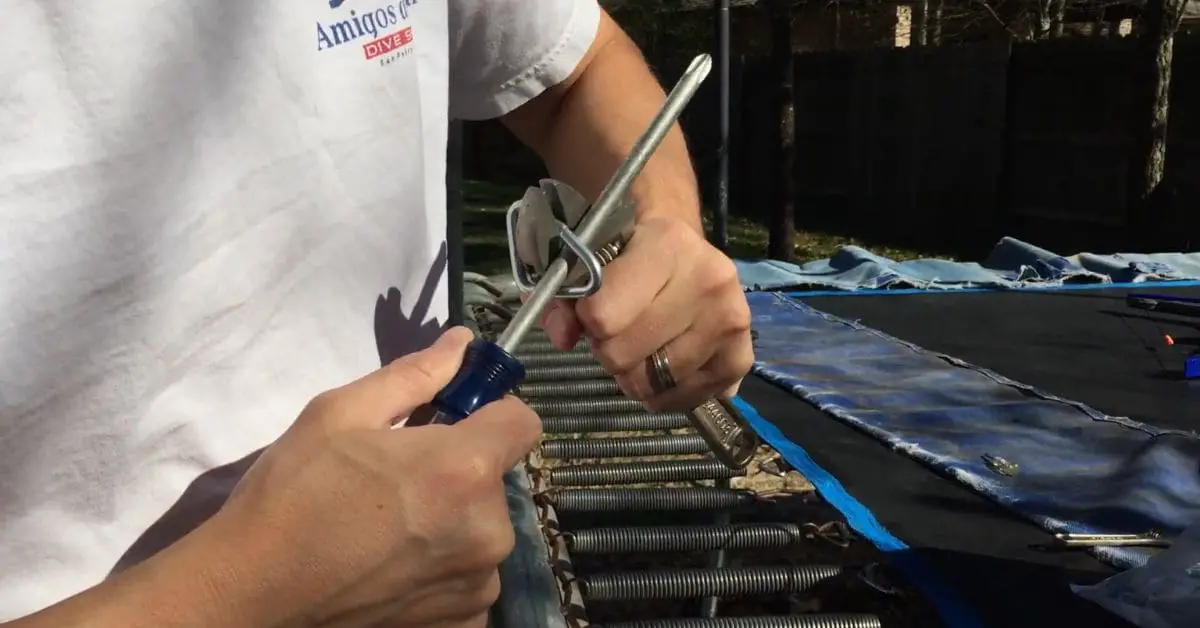
Using a screwdriver or a similar tool can be an alternative option to install trampoline springs without a dedicated spring tool. You can start by attaching one end of the spring to the frame and then slide the other end onto the jumping mat.
The advantage of using a screwdriver is that it provides a pivot point, making it easier to hook the springs without requiring excessive strength.
This method can be useful if you don’t have a specific trampoline spring tool. However, it’s important to exercise caution to avoid any injuries while working with the springs.
Alternative Methods for Installing:
You can consider a few other options, but please note that they may be challenging. Proceed with caution!
- Rope: You can use a sturdy rope to stretch and attach the springs. However, getting them in place might require much effort and precision.
- Crowbar: A crowbar can provide leverage to help you attach the springs. However, be careful as it may not be designed for this purpose and can potentially damage the trampoline or cause injury.
- Homemade tool: If you feel creative, you can make your own tool using household items. However, remember that it may not be as effective or reliable as a dedicated trampoline spring tool.
Remember, using alternative methods may require more effort and carry some risks. The proper tools designed for trampoline assembly are always recommended to ensure safety and ease of installation.
How do I use a spring tool to replace damaged trampoline springs?
Over time, your trampoline springs may wear out or break, requiring replacement. Attach one end of the new spring to the D-ring on the trampoline mat to do this.
Then, use a spring tool to connect the other end of the spring to the slot or hole on the trampoline frame. It’s best to replace one spring at a time to simplify the process.
This way, you can replace each damaged spring with a new one before moving on to the next.
Where can I purchase a trampoline spring tool?

When finding a trampoline spring tool, locating one at a local store can be challenging. Therefore, the most convenient option is to purchase it online.
You can explore various options by browsing online retailers or websites specializing in trampoline accessories.
It is advisable to look for branded trampoline spring tools from reputable manufacturers. These brands often prioritize quality and durability, ensuring you invest in a reliable tool that will withstand the rigors of replacing trampoline springs.
While prices for trampoline spring tools may vary slightly among different sellers, it is worth considering spending more on a high-quality tool.
Opting for a durable tool ensures that it will last you a long time, allowing you to replace trampoline springs whenever needed without worrying about the tool’s performance or longevity.
By purchasing a trampoline spring tool online and selecting a reputable brand, you can acquire a reliable and efficient tool that will assist you in replacing trampoline springs effectively.
Is it possible to create a homemade trampoline spring tool?
If you’re hesitant to spend money on a trampoline spring tool or prefer to create one yourself, some suggestions are available online. One idea involves using a piece of wood and a bent nail.
However, it’s important to note that this DIY method may not be effective unless you have the proper tools and skills to create a sturdy tool. It’s also worth mentioning that I found a video of someone successfully making their own spring tool, but they had the necessary equipment and expertise.
How to attach the final springs on a trampoline?
Many people often wonder about attaching the last springs on a trampoline when assembling it themselves. In my experience, I haven’t encountered any major difficulties in this step.
However, it’s worth noting that the last few springs can be more challenging to stretch and attach to the frame. A trampoline spring tool is the easiest and most recommended method for this task.
If a spring tool is unavailable, you can use a screwdriver or a caulk gun as alternatives. These tools can provide the leverage needed to attach the final springs effectively.
Tips and Best Practices
Installing trampoline springs without a tool can be a bit more challenging, but you can still achieve successful results with the right approach. Here are some tips and best practices to keep in mind:
Maintain Proper Posture:
Stand or kneel in a stable position while working on the trampoline. This will help you exert the necessary force and control the springs.
Take Breaks to Avoid Fatigue:
Installing trampoline springs can be physically demanding. Take breaks to rest and prevent muscle fatigue, especially if working on a large trampoline or installing numerous springs.
Double-Check Spring Placement:
Ensure that each spring is properly hooked onto the frame and the jumping mat. Double-check their placement to guarantee a secure and balanced trampoline surface.
Ensure Even Spring Distribution:
Maintain an even distribution of springs across the trampoline frame. This helps ensure balanced tension and optimal bounce throughout the trampoline surface.
Following these tips and best practices, you can install trampoline springs effectively and safely, even without a specialized tool.
Safety Considerations
Here we discuss the safety considerations:
Follow Manufacturer Guidelines

It’s important to carefully read and adhere to the instructions provided by the trampoline manufacturer.
They provide specific safety guidelines and installation, usage, and maintenance recommendations.
Avoid Finger Pinch Injuries:
When installing or handling trampoline springs, be mindful of your fingers and body parts. Use proper techniques and tools to minimize the risk of pinching or crushing injuries.
Inspect for Wear and Damage:
Inspect the springs, mat, frame, and other trampoline components for any wear, damage, or deterioration. Replace any worn-out or damaged parts promptly to ensure safe usage.
Clear Trampoline Area of Hazards:
Clear the surrounding area of the trampoline from any objects, furniture, or debris that could pose a tripping or collision hazard. To prevent accidents, maintain a safe distance from walls, fences, or other structures.
Encourage Safe Jumping Techniques:
Educate users, especially children, about proper jumping techniques, such as jumping in the center of the mat and avoiding flips or somersaults. Discourage rough play, climbing on the enclosure, or overcrowding the trampoline to prevent accidents.
Supervise Trampoline use for Children:
Trampolines should always be used under adult supervision. Never leave young children unattended while using the trampoline to prevent potential injuries.
Regularly Check and Secure Trampoline:
Periodically inspect the trampoline’s stability, ensuring all parts are securely fastened and have tight connections. Tighten any loose bolts or nuts and address any stability issues promptly.
Remember, prioritizing safety is crucial when using a trampoline. These considerations can create a safer environment and minimize the risk of accidents or injuries.
FAQs About How to Install Trampoline Springs Without Tool
Q:1 Can I install trampoline springs without a tool?
Yes, it is possible to install trampoline springs without a tool, although it may require alternative methods or tools.
Q:2 What are some alternative tools I can use?
Some alternative tools that can be used include pliers, a caulk gun, a screwdriver, or even repurposed objects like ropes or crowbars.
Q:3 Is it more difficult to install springs without a tool?
Yes, installing springs without a tool can be more challenging and may require more effort and physical strength than a dedicated spring tool.
Q:4 Are there any risks involved in installing springs without a tool?
Yes, risks can be involved, such as potential injuries from springs snapping back or difficulty in properly securing the springs without the aid of a tool.
Q:5 Are there any specific techniques or tips for installing springs without a tool?
Techniques may vary depending on the alternative tool used. It is important to follow proper instructions and take precautions to ensure safety and a secure installation.
Q:6 Where can I find instructions or tutorials for installing springs without a tool?
You can find instructional videos or online guides demonstrating alternative methods for installing trampoline springs without a tool.
Q:7 Should I consider purchasing a trampoline spring tool?
While installing springs without a tool is possible, a dedicated trampoline spring tool is generally recommended for easier and safer installation.
Conclusion:
In conclusion, installing trampoline springs without a dedicated tool can be challenging but not impossible. You can still accomplish the task by exploring alternative methods and tools, such as pliers, a caulk gun, or a screwdriver.
However, it is important to exercise caution and be aware of the potential risks involved, including the risk of injury or improper installation.
While it may require more effort and physical strength, following proper techniques and taking safety precautions can help ensure a successful installation.
It is recommended to seek out instructional videos or online guides demonstrating alternative methods for installing trampoline springs without a tool.
However, investing in a trampoline spring tool is worth it for a more convenient and efficient installation process. These tools are specifically designed to make the task easier and safer.
They provide a secure grip and reduce the risk of injury. A dedicated spring tool can be worthwhile if you frequently assemble or disassemble trampolines.
Ultimately, whether you choose to install trampoline springs without a tool or invest in a spring tool, prioritizing safety and following proper guidelines is crucial for a secure and enjoyable trampoline experience.
We hope you will be well aware of how to install trampoline springs without tools, after reading this comprehensive article. If you have any questions, feel free to comment below!