When I first set up my trampoline in the backyard for my kids, I realized that the ground was slightly uneven. I knew that for safety reasons, it was crucial to level the trampoline properly to ensure a stable and secure jumping experience.
To level my trampoline, I followed these simple steps. First, I cleared the area around the trampoline, removing any debris or obstacles. Then, I used a spirit level to check the trampoline’s legs for any unevenness.
If any of the legs were higher or lower than the others, I adjusted them by adding or removing soil underneath them. I made sure to check the level from all angles to ensure accuracy. Once all the legs were level, I rechecked them with the spirit level to confirm.
With the trampoline now level, I felt confident that my kids could enjoy safe and enjoyable bouncing fun without worrying about any wobbling or tipping. I also made it a routine to regularly check the trampoline’s level to maintain its stability and safety.
In this article, we will discuss how to level a trampoline.
How to Level a Trampoline: Levelling a trampoline is essential for safety. Clear the area, use a spirit level to adjust legs, and ensure stability. Regular checks maintain safety. Get step-by-step instructions now!
What Are the Top Methods for Levelling a Trampoline?
The initial step in installing a trampoline is to assess the slope of your backyard. Prepare a wooden plank that is larger than your trampoline, and position the trampoline in the section of the yard that requires leveling.
- Place the wooden plank on top of the trampoline and position a carpenter’s level parallel to the slope on the plank.
- Raise the plank down the hill until the bubble on the carpenter’s level is centered between the two lines.
- Measure the distance between the top of the downward side of the plank and the trampoline’s top.
- To find the distance in inches, divide the trampoline’s diameter by the plank’s distance.
- If the result is greater than 7, it indicates a steep slope, and relocating the trampoline may be necessary.
Alternatively, if the calculated result is less than 7, you can proceed with using that area. Another option is to consider installing an in-ground trampoline or leveling the sloped ground by cutting into it to create a level surface for the trampoline.
If you are in need to follow these steps, please continue reading.
Trampoline Leveling Blocks:
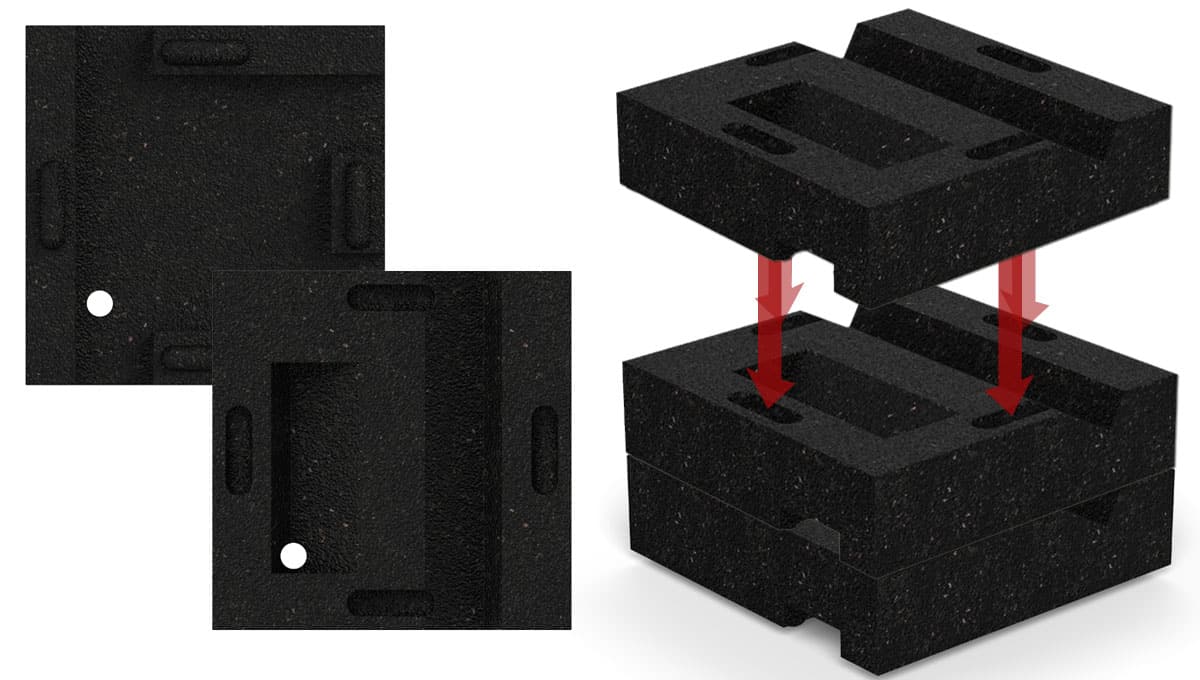
There are various leveling blocks available for trampolines, although most of them are designed for automobiles and RVs rather than trampolines.
These leveling blocks can be used to bring the trampoline legs level with the ground.
Simply place as many blocks as needed on the area of the ground that sinks the most, until that part of the leg is securely seated and level with the rest of the trampoline.
While this method is affordable, it’s important to note that a trampoline on blocks may not provide the most stable footing for your trampoline setup.
Cut Trampoline Legs:
Cutting the legs of a trampoline may not be a wise option for a couple of reasons. Firstly, there is a risk of getting the cuts wrong and ending up with an uneven trampoline.
Additionally, cutting the legs may decrease the value of the trampoline if you decide to sell it in the future.
Before you proceed with cutting the legs, it’s important to consider a few things. Firstly, ensure that you have no plans of moving the trampoline again, as once the legs are cut, there’s no going back.
You won’t be able to relocate the trampoline unless you purchase a new one. Secondly, you will need the right tools, such as a proper saw and drill, to cut through the steel legs and create new holes as needed.
It’s essential to be cautious and make sure you have the necessary skills and equipment before attempting to cut the legs of your trampoline. If in doubt, it’s recommended to explore alternative leveling options to avoid potential issues.
Cut Into Sloped Ground:
If your yard has a slope or uneven ground, you can still make your trampoline level by building trenches or burying part of it. It may require some extra effort, but it’s doable.
First, decide if you want the trampoline to be completely above ground or if you just need to level a specific part of it.
If you decide to bury the trampoline in the ground on uneven ground, you’ll need to dig a deep enough hole. This may take longer and require more effort.
If you prefer to keep the trampoline above ground, you can dig until the uneven areas are level with the rest of the ground. Once the ground is level, you can set up your trampoline, install anchors, and start jumping.
Another option is to build a retaining wall below the trampoline and add soil until you have a level area. This can also help achieve a level surface for your trampoline.
Remember to carefully plan and measure to ensure the trampoline is level and stable before using it. Safety should always be a top priority when installing and using a trampoline.
Trampoline Leveler:

You can also use a trampoline leveler, which is an extension that attaches to the legs of the trampoline.
These extensions can be adjusted to different lengths to achieve proper leg balance and level the trampoline.
To use a trampoline leveling kit, simply attach it to the legs of the trampoline that need to be adjusted. Then, extend or retract the extensions until the trampoline is level.
This can help you achieve a balanced and stable trampoline setup without having to modify the trampoline itself.
Just make sure to follow the instructions carefully and double-check that the trampoline is level before using it to ensure safety and enjoyment while jumping.
Dig A Trench:
- Move the trampoline out of the way and dig a hole where the uphill legs will go. The depth of the hole should match the slope you measured, and make sure it’s level with a carpenter’s level.
- Put the trampoline back in the hole, using the uphill legs. Make sure the uphill and downhill legs are securely seated to avoid instability from uneven leg heights.
- Check that the trampoline is level in all directions. If needed, adjust the trenches to correct any unevenness.
- The trampoline may still be slightly uneven after these steps.
- If the trampoline sticks out of the hole too much, remove it and continue digging.
- If it’s only slightly uneven, bury the legs of the trampoline in the ground to help it level out.
Remember to always follow safety guidelines and manufacturer’s instructions when installing or adjusting a trampoline to ensure safe and enjoyable use.
Measure the current slope:
- Start by using a level tool, such as a carpenter’s level or a bubble level, to check the trampoline’s slope.
- Place the level tool on different parts of the trampoline frame to assess the slope from various angles.
- Take accurate measurements of the slope and record them. This will help you determine how much adjustment is needed.
Remove soil or excess material:
- Begin by carefully inspecting the area underneath the trampoline. Look for any mounds of soil, rocks, or other debris that may be causing an uneven surface.
- Use a shovel or appropriate tools to dig out soil or remove excess material from under the trampoline. Be cautious not to damage the trampoline legs or frame during this process.
- Continuously check the level of the ground as you remove material to maintain a level surface.
Add or adjust base materials:
- Choose appropriate base materials such as sand, gravel, or even wooden blocks to create a level foundation for the trampoline.
- Gradually add the chosen material under the trampoline, focusing on the areas that need leveling. Use a rake or shovel to spread and distribute the material evenly.
- Periodically compact the added material by tamping it down with a board or a compactor tool to ensure a stable and level base.
- Throughout this process, recheck the level of the trampoline using your level tool to make adjustments as necessary.
Test for levelness:
- Once you’ve added and adjusted the base materials, place the level tool on the trampoline frame in multiple locations.
- Check for levelness by observing the bubble in the level tool. If it’s centered within the markings, the trampoline is level. If not, note which areas are higher or lower.
- Adjust the base material in the problem areas by either adding more material or removing excess until the trampoline is level in all directions.
Secure the trampoline:
- Ensure that the trampoline frame is securely in place on the level surface you’ve created.
- Check all the frame joints, legs, and connections for any loose bolts or hardware. Tighten any loose components to ensure stability and safety.
By following these detailed steps, you can effectively level your trampoline, creating a safer and more enjoyable environment for bouncing and playing.
What are the steps to level a trampoline on a concrete surface?
Typically, concrete surfaces should be level if they are poured by professionals. When concrete is poured, it naturally settles into a flat surface within the designated area.
However, issues such as ground movement, temperature changes, and poorly executed concrete work can result in cracks and unevenness over time. This can pose challenges when trying to set up a trampoline on concrete.
Even though concrete pads are not the best surface for trampolines due to the increased risk of movement and potential injuries, I will explain how you can level your trampoline on the concrete below.
- Clear away debris and broken chunks of old concrete.
- Mark out the area where your trampoline will be placed.
- Create a frame around the marked area using wooden 2×4 boards.
- Calculate and buy the appropriate amount of concrete. Ardex is recommended for its ease of use and self-leveling properties.
- Mix the concrete and pour it into the framed area. The liquid concrete will level itself out and cure flat as per the manufacturer’s directions.
- Vibrate the concrete before it sets to release any bubbles.
- Smooth the surface of the concrete and allow it to cure according to the manufacturer’s directions.
- Finally, place your trampoline on the newly poured and perfectly level concrete surface.
How can you level a trampoline on grass?
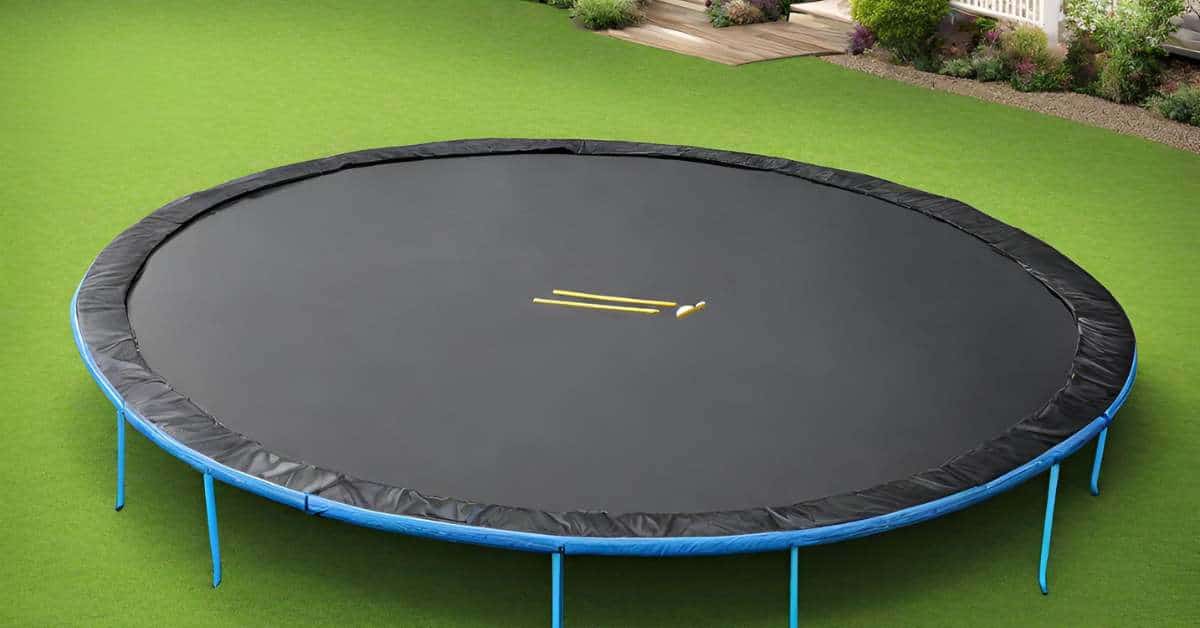
Lawns are typically leveled before the grass is planted or sod is laid, but if you have an older lawn or an area where grass grows naturally, you may need to do some additional work to level the ground before setting up an outdoor trampoline.
Thankfully, it’s not too difficult to level a trampoline on uneven grass.
Here’s a step-by-step guide to level a trampoline on grass:
- Mow the grass as short as possible to identify any uneven areas.
- Use a laser level to measure and identify dips and hills in the grass.
- Dig out excess dirt from bumps and mounds with a shovel, then compact the soil below using water and a roller.
- Fill in any dips with additional soil, and repeat the water and roller process to level the area.
- If there are bald spots, add grass seed and water the seeds.
- Finally, set up the trampoline on the smooth, leveled grassy area.
Related Article: How To Avoid In-Ground Trampoline Snakes
What is the process for leveling a Springfree trampoline?
Springfree trampolines are designed to be safe and have undergone rigorous testing for safety features. It’s important to set up a Springfree trampoline on level ground to ensure maximum safety while jumping.
Thankfully, Springfree trampolines are naturally level when placed on even ground, so it’s not any more difficult to level them compared to other types of trampolines.
Avoid setting up a Springfree trampoline on a slope or uneven ground, as it can increase the risk of accidents while jumping.
Here’s a step-by-step process to level a Springfree trampoline:
- Use a level or a smooth, even board with a level attached on top to measure the ground where you want to place the trampoline.
- Clear away any dirt, rocks, or debris that could disrupt the level surface of the ground.
- Remove any small rises by digging them out.
- Utilize leveling blocks to fill in any dips or gaps in the ground, creating a consistent, level base for the trampoline legs.
- Set up your Springfree trampoline and safety net on the even ground you’ve prepared, and enjoy a safer bouncing experience.
Is it possible to place a trampoline on a gentle slope?
If you have a slight slope in your yard, you can still install a trampoline as long as the slope isn’t too steep. To make the trampoline as level as possible, you can dig in the legs on the higher side of the unit.
You can also purchase a leveling kit for less than $50 if the slope is steeper than usual. It’s important to ensure that the trampoline is level before using it for safe bouncing.
You can use leveling blocks or add soil to the down-slope side to achieve a balanced surface. If the slope is deemed dangerous by our installers, you can cancel your order and receive a full refund.
Here are the steps to level a sloped area and create a level ground:
- Measure the rise and run of the slope to determine the extent of the slope and the amount of leveling required.
- Water the ground that you will be digging out to make the soil easier to work with.
- Build a retaining wall to hold back the soil and create a level surface. Choose appropriate materials for your retaining wall, such as bricks, stones, or timbers.
- Pile up soil behind the retaining wall, filling in the area to create a level surface.
- Check the newly created area for level ground using a level or other leveling tools to ensure it is even and flat.
- Compact the soil behind the retaining wall to ensure stability and prevent erosion.
- Plant a new grass lawn or other suitable vegetation on the leveled area to establish a stable and attractive ground surface. Follow proper planting and watering techniques for the specific type of vegetation chosen.
Note: It may be helpful to seek professional advice or assistance for larger or more complex leveling projects.
How can a trampoline be installed in a garden with a slope?
It’s important to install a trampoline on a flat surface in the backyard to ensure safe jumping for the whole family. Leveling the trampoline in a sloped garden is crucial to make sure it is stable and safe to use.
What Slope is Suitable for a Trampoline?
For a small slope, you can dig a little deeper on the top side and let the trampoline frame stick out of the ground on the bottom side. You can also allow the trampoline to follow the slope slightly.
It’s okay if the trampoline is not perfectly level, a 1 or 2-degree slope is acceptable. You can add soil and turf on the lower side to cover the frame if it protrudes from the ground.
For a steep slope, you will need to do more work. You should grade down the high side to create a flat area that is wider than the size of the trampoline.
This is to ensure that the trampoline does not immediately meet the slope at the edge. The graded area on the high side will look like a crescent shape.
Installing a Trampoline on a Slope or Uneven Ground: Leveling Tips
Here are some simple steps to follow when setting up a trampoline on a slope or uneven ground:
- Determine the slope of your backyard using a wood plank, measuring tape, and a carpenter’s level.
- Place the plank on top of the trampoline and use the level to raise the downward side of the plank until the level bubble sits between the two lines.
- Measure the distance from the top of your trampoline to the bottom edge of the plank.
- Divide the diameter of your trampoline by the above distance. If the result is over 7, you have a steep slope and may need to move your trampoline or cut into the slope to create a level area for it.
- Alternatively, you can use heavy-gauge steel trampoline leg extensions if you don’t want to dig too much to install the trampoline.
- Another option is to use trampoline leveling blocks, which interlock to create a durable base. These blocks are inexpensive, lightweight, and provide a sturdy leveling solution for trampolines placed on uneven ground.
Trampolines on Unpaved Surfaces: Best Practices
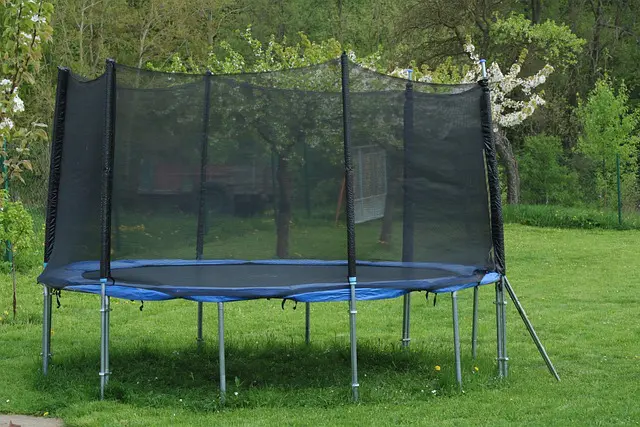
Grass is the best surface for a trampoline without a paved area. It provides a solid yet soft surface for bouncing and allows for better energy retention. Make sure the trampoline legs do not sink into the ground, as you want them to remain stable while kids are jumping on the mat.
Before installing the trampoline, ensure that the chosen location is suitable and not overly sloped. If the slope is too steep, it’s best to find another location.
To install on a slope, start by digging a trench to support the uphill trampoline leg, and anchor the downhill leg into the trench using timber blocks. Keep in mind that the installation technique may vary depending on the slope of the ground.
Installing an In-Ground Trampoline on a Small Slope:
To install a trampoline on a slope, you can dig a little deeper on the higher side and allow the frame to stick out of the ground on the lower side.
You can also let the trampoline follow the slope slightly without needing to level it perfectly. A slope of one or two degrees is still acceptable for safe use.
Installing an In-Ground Trampoline on a Steep Slope:
When setting up a trampoline on a steep slope, you need to level the ground by grading down the higher end and creating a flat area that’s a few feet wider than the trampoline.
This will prevent the trampoline from crashing into the slope’s edge. Avoid installing the trampoline on concrete or other hard materials, as falling on grass is safer.
You can add rubber feet to the trampoline legs to absorb more impact energy and keep the trampoline in a dry area with no sharp objects around. Choose the right type of trampoline, either in-ground or with legs, and make sure not to exceed the weight limit.
How to Level a Trampoline: Additional Tips and Considerations
Trampoline leveling is important to ensure safe and enjoyable bouncing. Here are some additional tips and considerations to help you level your trampoline properly:
Regular Check and Maintenance:
It’s important to regularly check the level of your trampoline, especially after heavy use or changes in weather conditions. Over time, the ground may settle or shift, causing the trampoline to become uneven.
Make sure to periodically assess the levelness of your trampoline and make any necessary adjustments to keep it level.
Avoid Uneven or Sloped Surfaces:
When setting up a trampoline, it’s best to avoid placing it on uneven or sloped surfaces in the first place, if possible. Uneven ground can cause stability issues and affect the performance of the trampoline. Choose a flat and level area in your backyard for optimal trampoline setup.
Follow the Manufacturer’s Guidelines:
Always follow the manufacturer’s guidelines and recommendations for trampoline installation and leveling. Each trampoline may have specific instructions and requirements for proper setup and leveling. Refer to the user manual or contact the manufacturer for any questions or concerns.
By regularly checking and maintaining the levelness of your trampoline, avoiding uneven or sloped surfaces, and following the manufacturer’s guidelines, you can ensure a safe and enjoyable bouncing experience for you and your family.
FAQs:
Q:1 Can I set up my trampoline on uneven ground?
Setting up a trampoline on uneven ground is not recommended as it can affect the stability and performance of the trampoline.
Uneven ground can cause the trampoline to wobble or tilt, which can be dangerous during use. It’s best to choose a flat and level area for the trampoline setup to ensure safe and proper use.
Q:2 How can I level my trampoline if my backyard has uneven spots?
If your backyard has uneven spots, there are a few options to level your trampoline. One option is to dig a trench to support the higher end of the trampoline and use timber blocks to stabilize the lower end. This can help create a level surface for your trampoline.
Another option is to use shims or leveling kits that are specifically designed for trampolines. These leveling accessories can be placed under the legs of the trampoline to adjust their height and level the trampoline.
Q:3 How often should I check the level of my trampoline?
It’s recommended to check the level of your trampoline regularly, especially after heavy use or changes in weather conditions. The ground can shift over time due to factors such as rain, frost, or settling, which can affect the level of the trampoline.
Checking the level of your trampoline periodically can help ensure safe and optimal performance.
Q:4 Can I level my trampoline without using any accessories?
While using leveling accessories such as shims or leveling kits is the most common and effective method to level a trampoline, there are some other DIY techniques that you can try.
For example, you can use bricks, pavers, or wooden planks to create a stable and level base for your trampoline. However, it’s important to make sure that the materials used are sturdy, level, and capable of supporting the weight and movement of the trampoline.
Q:5 Are there any specific guidelines for leveling an in-ground trampoline?
If you have an in-ground trampoline, the process of leveling may differ slightly. In this case, you may need to adjust the height of the trampoline legs using adjustable brackets or by adding or removing soil around the trampoline pit.
It’s important to follow the manufacturer’s guidelines and recommendations for installing and leveling an in-ground trampoline to ensure proper installation and safe use.
Q:6 Can I level a trampoline on grass or other unpaved surfaces?
Yes, you can level a trampoline on grass or other unpaved surfaces. However, it’s important to ensure that the ground is firm and stable enough to support the weight and movement of the trampoline.
If the ground is soft or prone to sinking, you may need to use additional techniques such as digging a trench or using leveling accessories to create a stable and level base for the trampoline.
Q:7 What are the risks of not leveling a trampoline properly?
Not leveling a trampoline properly can pose several risks. A trampoline that is not level may wobble or tilt during use, which can increase the risk of accidents and injuries.
Uneven ground can also cause excessive stress on certain parts of the trampoline, such as the frame or springs, which can lead to premature wear and tear or damage. It’s important to ensure that your trampoline is properly leveled to ensure safe and optimal performance.
Conclusion:
In conclusion, properly leveling a trampoline is essential for safe and optimal use. Installing a trampoline on uneven ground can increase the risk of accidents and injuries, as well as cause premature wear and tear on the trampoline components.
It’s important to follow the manufacturer’s guidelines and recommendations for trampoline installation and leveling and to regularly check and maintain the levelness of the trampoline, especially after heavy use or changes in weather conditions.
There are several methods to level a trampoline, such as using shims, leveling kits, or creating a stable base with bricks, pavers, or wooden planks.
For in-ground trampolines, the process of leveling may differ slightly and may involve adjusting the height of the trampoline legs using adjustable brackets or adding/removing soil around the trampoline pit.
It’s also important to consider the stability of the ground surface, whether it’s grass or other unpaved surfaces, and ensure it is firm and stable enough to support the trampoline.
Properly leveling a trampoline may require some effort and attention to detail, but it is crucial for ensuring the safety and longevity of your trampoline.
By taking the time to level your trampoline correctly, you can enjoy worry-free bouncing and have peace of mind knowing that you have taken the necessary steps to create a safe and enjoyable trampoline experience for everyone.
We hope you will be well aware of how to level a trampoline, after reading this comprehensive article. If you have any questions, feel free to comment below!