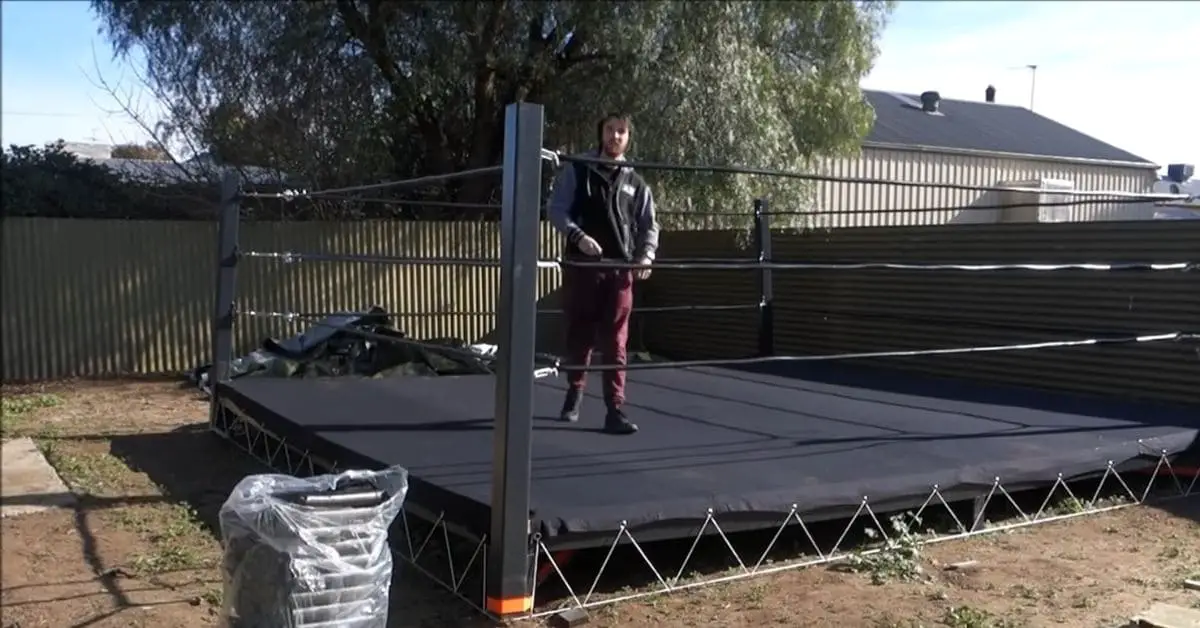
If you’re looking to take your wrestling skills to the next level and create a safe and fun environment for practicing high-flying moves, then a trampoline wrestling ring might be just what you need. In this guide, I’ll walk you through the step-by-step process of turning your trampoline into a wrestling ring.
First, we’ll need to gather the necessary materials, including PVC pipes, connectors, foam padding, and vinyl or canvas material. Once we have everything we need, we’ll begin constructing the frame using the PVC pipes and connectors. Then, we’ll attach the foam padding to the frame and cover it with vinyl or canvas material.
Next, we’ll create the turnbuckles and attach the ropes to the corners of the frame. This will ensure that the wrestling ring is sturdy and safe to use. Once everything is in place, you’ll be able to enjoy practicing your wrestling moves in a safe and exciting environment.
Overall, creating a trampoline wrestling ring is a fun and rewarding project that can enhance your wrestling skills and provide hours of entertainment. So, let’s get started!
How to make a trampoline wrestling ring: Transform your trampoline into a safe and fun wrestling ring with these simple steps. Gather materials such as PVC pipes, connectors, foam padding, and vinyl or canvas material. Create the frame, attach the padding, and cover it with the material. Add turnbuckles and ropes to the corners and enjoy practicing your wrestling moves in a safe and exciting environment.
How to make a trampoline wrestling ring?
Making a trampoline wrestling ring can be a fun and rewarding project, but it requires careful planning and execution to ensure that it is safe and durable. Here is a comprehensive guide on how to make a trampoline wrestling ring at home:
Preparing the Materials
When it comes to building a trampoline wrestling ring, having the right materials is essential. Not only does this ensure that the final product is sturdy and durable, but it also helps to ensure the safety of the individuals using it.
In this section, we’ll discuss the materials needed for building a trampoline wrestling ring, where to purchase them at an affordable price, and safety considerations to keep in mind when working with them.
Materials Needed
Trampoline: The centerpiece of the wrestling ring is, of course, the trampoline. You’ll need a high-quality trampoline that is large enough to provide ample space for wrestling. Most trampolines are 12-14 feet in diameter, and you’ll want to choose one with a weight capacity of at least 250-300 pounds.
Foam Padding: To provide a safe landing surface, you’ll need foam padding to cover the springs and edges of the trampoline. This padding can be purchased in rolls and comes in varying thicknesses.
Canvas: To cover the foam padding and create a wrestling ring surface, you’ll need a canvas. You’ll want to choose a heavyweight canvas that is durable enough to withstand the wear and tear of wrestling.
Zip Ties: These will be used to secure the foam padding and canvas to the trampoline frame.
Turnbuckles and Ropes (Optional): These can be added to the wrestling ring to create a more authentic look and feel.
Where to Purchase Materials
When it comes to purchasing materials for building a trampoline wrestling ring, there are a few options to consider. One option is to purchase a trampoline wrestling kit that includes all the necessary materials.
These kits can be found online or at sporting goods stores and are often more cost-effective than purchasing each item individually.
Another option is to purchase materials separately. Foam padding can be found at most home improvement stores, while canvas can be found at fabric stores or online retailers.
Zip ties can be found at most hardware stores, and turnbuckles and ropes can be purchased at sporting goods stores.
Safety Considerations
When working with materials for building a trampoline wrestling ring, safety should always be a top priority.
Here are a few considerations to keep in mind:
- Wear protective gear, such as gloves and eye protection, when handling materials to avoid injury.
- Make sure all materials are securely fastened to the trampoline to avoid any loose pieces that could cause injury.
- Follow manufacturer instructions for assembling the trampoline and attaching the foam padding and canvas.
- Use caution when cutting foam padding or canvas to avoid injury.
- Regularly inspect the trampoline and wrestling ring materials for any signs of wear and tear and make repairs as needed.
Building the Foundation
When it comes to building a trampoline wrestling ring, the foundation is a critical component. A sturdy foundation ensures that the trampoline is secure and stable, reducing the risk of injury during use.
In this section, we’ll discuss the importance of a sturdy foundation, provide step-by-step instructions for building one, and cover safety considerations to keep in mind during the process.
Importance of a Sturdy Foundation
The foundation of a trampoline wrestling ring provides the support necessary to keep the trampoline in place during use. A sturdy foundation is essential to prevent the trampoline from tipping over or shifting during wrestling, which could result in serious injury.
Additionally, a solid foundation can extend the lifespan of the trampoline and ensure that it stays in good condition for years to come.
Step-by-Step Instructions
Building a sturdy foundation for a trampoline wrestling ring requires the following materials and tools:
- Measuring Tape
- Level
- Shovel
- Gravel
- Landscaping Fabric
- Wooden Stakes
- Concrete Mix
- Water
Here are the step-by-step instructions for building a foundation:
Step 1: Choose a Level Area
Select an area of your yard that is level and clear of any debris or obstacles. Use a measuring tape to ensure that the area is large enough to accommodate the trampoline and foundation.
Step 2: Dig the Hole
Using a shovel, dig a hole in the ground that is slightly larger than the size of your trampoline. The hole should be at least 2 feet deep.
Step 3: Add Gravel
Fill the bottom of the hole with a layer of gravel, about 4 inches deep. Use a level to ensure that the gravel is evenly distributed and level.
Step 4: Lay Landscaping Fabric
Cover the gravel with a layer of landscaping fabric to prevent weeds from growing through the foundation.
Step 5: Install Wooden Stakes
Place wooden stakes around the perimeter of the hole, about 1 foot apart. These stakes will be used to hold the trampoline frame in place while the concrete sets.
Step 6: Mix Concrete
Mix the concrete according to the manufacturer’s instructions, adding water as needed. The concrete should have a smooth, pourable consistency.
Step 7: Pour Concrete
Pour the concrete into the hole, filling it to the top. Use a trowel to smooth the surface of the concrete and ensure that it is level.
Step 8: Insert Trampoline Frame
Carefully place the trampoline frame onto the wooden stakes, ensuring that it is level and centered in the hole. Use a level to double-check the frame’s alignment.
Step 9: Allow Concrete to Set
Allow the concrete to set for at least 24 hours before using the trampoline wrestling ring.
Safety Considerations
When building the foundation for a trampoline wrestling ring, there are several safety considerations to keep in mind:
- Always wear gloves and eye protection when working with concrete to avoid injury.
- Make sure the area where you’re building the foundation is clear of any underground utilities or wires to avoid damaging them.
- Use caution when digging the hole to avoid injury and ensure that the hole is deep enough to provide a sturdy foundation.
- Follow manufacturer instructions for mixing and pouring the concrete to ensure that it sets properly and provides a strong foundation.
- Allow the concrete to set for at least 24 hours before using the trampoline wrestling ring to avoid any instability during use.
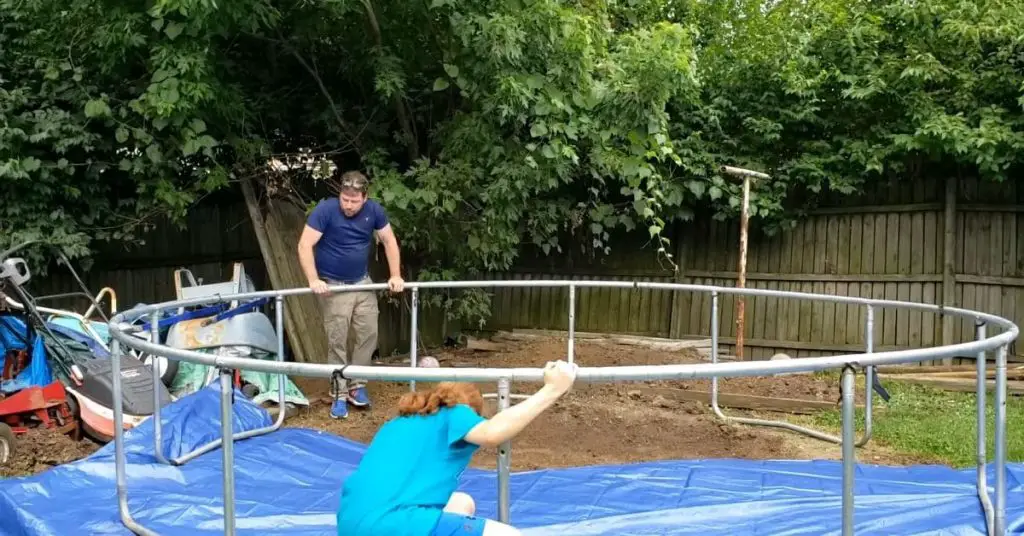
Assembling the Trampoline
Before assembling the trampoline, carefully read the manufacturer’s instructions to ensure that you understand the process.
Here are the general steps for assembling a trampoline:
Step 1: Attach the Legs
Attach the legs to the trampoline frame according to the manufacturer’s instructions. Make sure that each leg is securely attached and leveled.
Step 2: Attach the Springs
Attach the springs to the trampoline frame and mat, following the manufacturer’s instructions. Make sure that each spring is securely attached and evenly distributed around the frame.
Step 3: Attach the Safety Enclosure
Attach the safety enclosure to the trampoline frame, following the manufacturer’s instructions. Make sure that the enclosure is securely attached and properly aligned with the trampoline.
Step 4: Test the Trampoline
Test the trampoline to ensure that it is stable and secure. Jump on the trampoline to check for any wobbling or instability. If the trampoline is not stable, check the legs and springs to ensure that they are properly attached.
Ensuring the Trampoline is Securely Attached to the Foundation
Attaching the trampoline to the foundation is crucial to ensure that it stays in place during use.
Here are some tips to ensure that your trampoline is securely attached to the foundation:
- Make sure that the wooden stakes used to hold the trampoline frame in place during the concrete setting process are firmly embedded in the concrete.
- Use heavy-duty straps or bolts to secure the trampoline frame to the wooden stakes.
- Check the attachment points regularly to ensure that they are still secure and tight.
Safety Considerations
When assembling the trampoline, there are several safety considerations to keep in mind:
- Always wear gloves and eye protection when handling the springs to avoid injury.
- Use caution when jumping on the trampoline, and follow safety guidelines for trampoline use.
- Make sure that the safety enclosure is securely attached to the trampoline frame to prevent users from falling off the trampoline.
- Regularly check the trampoline and attachment points to ensure that they are still secure and stable.
- Follow the manufacturer’s instructions carefully to ensure that the trampoline is assembled correctly and safely.
Building the Wrestling Ring
Now that you have assembled your trampoline, the next step is to turn it into a wrestling ring. This can be done by attaching foam padding and canvas to the trampoline. In this section, we will explain how to create a wrestling ring using foam padding, canvas, and zip ties. We will also provide step-by-step instructions for attaching the foam padding and canvas to the trampoline and discuss safety considerations when building the wrestling ring.
Creating the Wrestling Ring
To create a wrestling ring, you will need the following materials:
- Foam padding
- Canvas
- Zip ties
You can purchase these materials from a variety of sources, including sporting goods stores and online retailers.
Attaching the Foam Padding
The first step in building your wrestling ring is to attach the foam padding to the trampoline. Here’s how to do it:
Step 1: Cut the Foam Padding
Measure the diameter of the trampoline and cut the foam padding to the appropriate size. You may need to use multiple pieces of foam padding to cover the entire trampoline.
Step 2: Attach the Foam Padding
Lay the foam padding on top of the trampoline, making sure that it is evenly distributed. Attach the foam padding to the trampoline using zip ties.
Start by attaching one zip tie to the foam padding and trampoline frame at one point, then continue around the trampoline attaching zip ties at regular intervals. Make sure that the foam padding is securely attached to the trampoline.
Attaching the Canvas
The next step in building your wrestling ring is to attach the canvas to the trampoline. Here’s how to do it:
Step 1: Cut the Canvas
Measure the diameter of the trampoline and cut the canvas to the appropriate size. The canvas should be slightly larger than the foam padding to allow for overlap.
Step 2: Attach the Canvas
Lay the canvas on top of the foam padding, making sure that it is evenly distributed. Attach the canvas to the trampoline using zip ties. Start by attaching one zip tie to the canvas and trampoline frame at one point, then continue around the trampoline attaching zip ties at regular intervals. Make sure that the canvas is securely attached to the trampoline.
Safety Considerations
When building the wrestling ring, there are several safety considerations to keep in mind:
- Make sure that the foam padding is thick enough to provide adequate protection for wrestlers.
- Check the zip ties regularly to ensure that they are still securely attached to the trampoline frame.
- Avoid using sharp objects near the foam padding or canvas to prevent damage or injury.
- Follow safety guidelines for wrestling to ensure that wrestlers are not injured during the use of the wrestling ring.
Adding Finishing Touches
Now that you have built your trampoline wrestling ring, it’s time to add some finishing touches to enhance its functionality and overall appearance.
we will discuss optional additions such as ropes or turnbuckles and provide instructions on how to add them. We will also discuss safety considerations when adding finishing touches.
Optional Additions
There are several optional additions that you can make to your trampoline wrestling ring to enhance its functionality and appearance. Some of these include:
- Ropes
- Turnbuckles
- Corner Pads
- Graphics or Logos
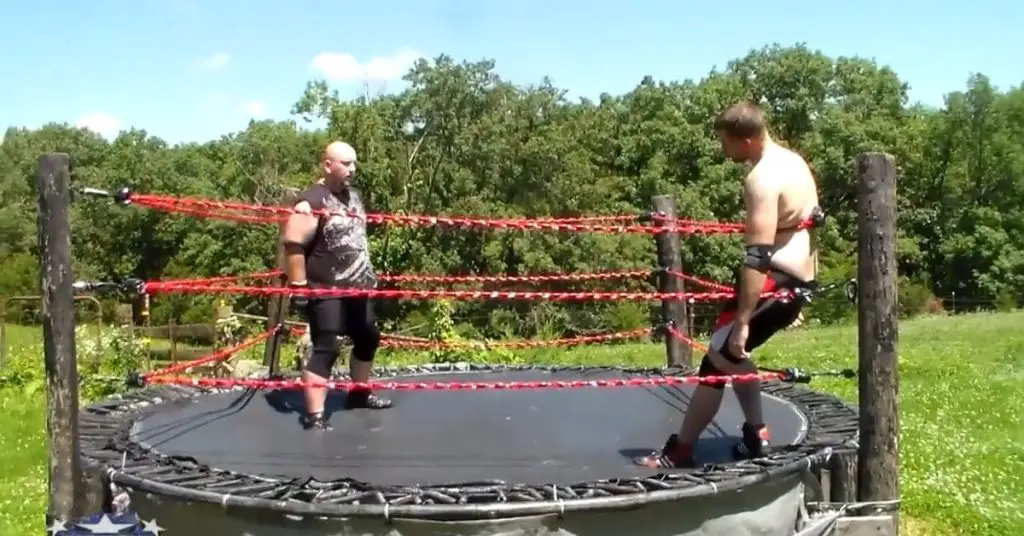
Adding Ropes
Ropes are an essential component of a wrestling ring, as they define the boundaries of the ring and help wrestlers stay within the designated area. Here’s how to add ropes to your trampoline wrestling ring:
Step 1: Measure the Ropes
Measure the distance around the trampoline to determine the length of rope needed. You will need three ropes for a traditional wrestling ring.
Step 2: Install Eye Bolts
Install eye bolts at each corner of the trampoline. Use a drill to make a hole in the trampoline frame, and then screw the eye bolts into place.
Step 3: Attach Ropes
Attach the ropes to the eye bolts using snap hooks or carabiners. Make sure that the ropes are tight and evenly spaced around the ring.
Adding Turnbuckles
Turnbuckles are used to tighten and adjust the ropes in a wrestling ring. Here’s how to add turnbuckles to your trampoline wrestling ring:
Step 1: Install Turnbuckles
Install turnbuckles on each side of the ring. Use a drill to make a hole in the trampoline frame, and then screw the turnbuckles into place.
Step 2: Attach Ropes
Attach the ropes to the turnbuckles using snap hooks or carabiners. Make sure that the ropes are tight and evenly spaced around the ring.
Safety Considerations
When adding finishing touches to your trampoline wrestling ring, it’s important to keep safety considerations in mind. Here are some tips to ensure that your finishing touches are safe and secure:
- Make sure that ropes and turnbuckles are properly secured to the trampoline frame to prevent injury.
- Check the ropes and turnbuckles regularly to ensure that they are still securely attached.
- Use caution when installing or adjusting ropes and turnbuckles to avoid injury.
FAQs
Q.1 What are the benefits of having a trampoline wrestling ring?
A trampoline wrestling ring provides a safe environment for wrestlers to practice and perform high-flying moves while reducing the risk of injury. It also allows for a more dynamic and exciting performance that can impress audiences.
Q.2 What do I need to turn my trampoline into a wrestling ring?
To turn your trampoline into a wrestling ring, you will need materials such as PVC pipes, connectors, and foam padding. You will also need tools such as a saw, drill, and tape measure.
Q.3 Can I use any type of trampoline for a wrestling ring?
Ideally, you should use a round trampoline that has a minimum diameter of 12 feet. It is important to choose a trampoline that is sturdy, has a high weight capacity, and is designed for outdoor use.
Q.4 How do I build a wrestling ring on my trampoline?
The process of building a wrestling ring on your trampoline involves creating a frame with PVC pipes, attaching foam padding to the frame, and covering the padding with vinyl or canvas material. You will also need to create turnbuckles and attach ropes to the corners of the frame.
Q.5 Is it safe to use a trampoline wrestling ring?
When constructed properly and used in accordance with safety guidelines, a trampoline wrestling ring can be a safe and fun way to practice and perform wrestling moves. It is important to use appropriate safety gear and to supervise all participants.
Q.6 Can I use my trampoline wrestling ring for other activities?
Yes, you can use your trampoline wrestling ring for other activities such as gymnastics, acrobatics, and general exercise. However, it is important to make sure that all activities are performed safely and within the weight capacity of the trampoline.
Q.7 How do I maintain my trampoline wrestling ring?
To maintain your trampoline wrestling ring, you should regularly inspect the frame, padding, and ropes for signs of wear and tear. You should also clean the ring after each use and store it in a dry, protected area when not in use.
Conclusion
In conclusion, building a trampoline wrestling ring may seem like a daunting task, but with the proper materials, safety considerations, and step-by-step instructions, it can be a fun and rewarding project. It is important to prioritize safety throughout the entire process, from choosing a level area for the foundation to ensuring the trampoline is securely attached.
A sturdy foundation is also crucial to ensure the safety of those using the wrestling ring. Building the wrestling ring involves attaching foam padding and canvas covering, which can add comfort and safety to the ring. Optional additions such as ropes and turnbuckles can also be added to enhance the wrestling experience.
By following the detailed guide provided, you can create a trampoline wrestling ring that is both safe and entertaining for all ages. Whether you are an experienced wrestler or just looking for a fun activity with friends and family, a trampoline wrestling ring can provide hours of excitement and enjoyment.
After reading this detailed guide on how to make a trampoline wrestling ring, we hope that you understand the process well. If you have any questions, please feel free to leave them in the comments section below.