
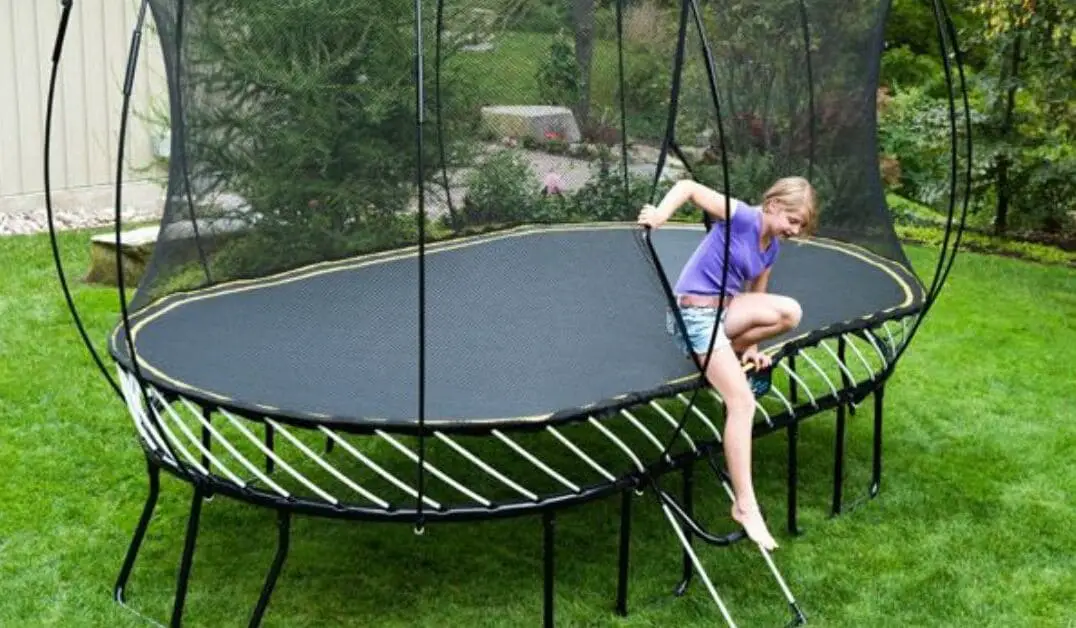
Welcome to my guide on how to make your trampoline bouncier! As a trampoline enthusiast myself, I understand the frustration of having a trampoline that has lost its bounce over time.
Whether you use your trampoline for exercise, entertainment, or both, having a bouncy trampoline is crucial for a safe and enjoyable experience. Luckily, there are several tips and methods you can use to restore the bounce to your trampoline.
In this guide, I will walk you through the most effective techniques for improving trampoline bounciness. From routine maintenance to adding more springs and even converting to a double-spring trampoline, I will provide detailed instructions and helpful tips to make your trampoline as bouncy as ever. So let’s get started and bring that bounce back to your trampoline!
How to make trampoline bouncier: Learn how to make your trampoline bouncier with these effective tips. From routine maintenance to adding more or stronger springs, there are various methods to improve the bounce of your trampoline. A bouncy trampoline not only adds to the fun but also ensures safety by reducing the risk of injury.
How To Make Trampoline Bouncier?
To make your trampoline bouncier, you can try various methods, such as routine maintenance, adding more or stronger springs, crossing springs, and even getting a double spring trampoline.
By following these tips and techniques, you can ensure that your trampoline provides a safe and enjoyable bouncing experience for years to come.
However, it is important to always prioritize safety and check for any worn or damaged parts before attempting to make your trampoline bouncier.
Factors affecting trampoline bounce
Trampolines are a fun and exciting way to exercise and play. However, over time, they may lose their bounce, and not be as enjoyable as they once were.
The bounce of a trampoline is determined by a variety of factors, including the quality of the trampoline, the number and quality of springs, the weight and age of the users, and the environment in which the trampoline is located.
What makes a trampoline bouncy?
A trampoline’s bounce is created by the tension of the springs and the mat. When weight is applied to the mat, it stretches the springs, which store potential energy. When the weight is removed, the springs release that energy, causing the mat to rebound.
The size and number of springs play a significant role in the bounce of a trampoline. The more springs a trampoline has, the more weight it can support, and the higher it can bounce.
The length and thickness of the springs also affect the bounce, with longer and thicker springs generally providing more bounce.
The quality and condition of the mat also contribute to the trampoline’s bounce. A worn-out or damaged mat can cause uneven tension in the springs, resulting in an uneven bounce.
The material of the mat can also affect the bounce, with high-quality materials such as polypropylene providing a better rebound.
Why do trampolines lose their bounce over time
Trampolines can lose their bounce over time due to several factors. One of the most common reasons is wear and tear on the springs and mat.
Over time, the springs can become stretched out or damaged, losing their elasticity and ability to provide the necessary tension for a good bounce. The mat can also become worn out, with tears or holes that create uneven tension on the springs.
Environmental factors can also affect the trampoline’s bounce. Exposure to sunlight and rain can cause the materials to deteriorate, which can lead to a loss of bounce.
Humidity can also affect the bounce, with high levels of moisture causing the springs to rust and lose their tension.
Finally, regular use can also contribute to a loss of bounce over time. The constant weight and pressure on the mat and springs can cause them to wear out more quickly, resulting in a decrease in the trampoline’s bounce.
Factors that affect trampoline bounciness
Several factors can affect the bounciness of a trampoline, including:
Size and number of springs: As mentioned earlier, the more springs a trampoline has, the higher it can bounce. The length and thickness of the springs also affect the bounce.
Quality and condition of the mat: A high-quality mat made of durable materials such as polypropylene can provide a better rebound. A worn-out or damaged mat can cause uneven tension on the springs, resulting in a decrease in bounce.
Weight limit: Trampolines are designed to support a certain amount of weight. Exceeding the weight limit can result in a loss of bounce or even damage to the trampoline.
Environmental factors: Exposure to sunlight, rain, and humidity can all affect the bounce of a trampoline over time.
Regular maintenance: Regularly checking the springs and mat for wear and tear, as well as keeping the trampoline clean and dry, can help maintain its bounce.
User technique: Proper jumping technique can also affect the bounce of a trampoline. Jumping in the center of the mat, avoiding excessive jumping, and landing softly can help maximize the trampoline’s bounce and extend its lifespan.
Preparing to make your trampoline bouncier

If you want to make your trampoline bouncier, it’s important to start by ensuring that it’s safe to use. This means checking for any worn or rusted parts, as well as making sure that all necessary safety equipment is in place. Here are some tips for preparing your trampoline to be bouncier:
Checking for safety equipment
The first step in preparing your trampoline for an increased bounce is to make sure that all necessary safety equipment is in place. This includes a safety net or enclosure, as well as padding around the frame and springs.
Check these components for any signs of wear or damage, and replace them if necessary.
Identifying rusted or worn parts
The next step is to inspect the trampoline for any rusted or worn parts that could be affecting its performance. Start by checking the frame and springs for signs of rust or corrosion, which can weaken the metal and reduce the trampoline’s bounce.
If you notice any rust, use a wire brush to remove it, and then apply a rust inhibitor to prevent it from returning. If any parts are worn or damaged, replace them promptly to avoid any safety hazards.
Determining necessary maintenance and repairs
Finally, you’ll want to determine what maintenance and repairs are necessary to improve the trampoline’s bounce. This may involve tightening the bolts and screws that hold the frame together, as well as lubricating the springs and other moving parts to reduce friction.
You may also want to adjust the tension of the springs, which can affect the trampoline’s bounce. To do this, use a spring puller to remove the springs from the frame, and then adjust the tension by moving the hooks to a different set of holes.
Be sure to refer to your trampoline’s instruction manual for specific guidelines on how to adjust the tension.
In addition to these steps, there are a few other tips that can help improve the bounce of your trampoline. These include:
Using the right mat
The trampoline mat is an essential component of the trampoline’s bounce, so it’s important to make sure that it’s in good condition.
If the mat is worn or damaged, replace it promptly. You may also want to consider upgrading to a high-quality mat, which can provide better bounce and durability.
Properly inflating the tires
If your trampoline has tires or wheels, be sure to check the air pressure regularly and inflate them to the recommended level.
This will help ensure that the trampoline is level and stable, which is essential for safe and effective bouncing.
Using the right accessories
There are a variety of accessories available for trampolines, including bounce boards, pads, and jump shoes. These can help enhance the trampoline’s bounce and provide a more challenging workout.
However, be sure to choose accessories that are compatible with your trampoline and that are appropriate for your skill level.
By following these tips and performing regular maintenance and repairs, you can help ensure that your trampoline is safe and bouncy for years to come.
Remember to always use caution when using a trampoline, and never attempt any stunts or maneuvers that are beyond your skill level. With a little care and attention, your trampoline can provide hours of fun and exercise for the whole family.
Tips to make your trampoline bouncier

Trampolines are a fun and exciting way to stay active and healthy, and having a bouncy trampoline can make the experience even better. However, over time, trampolines can lose their bounce and become less enjoyable to use.
Fortunately, there are several tips and tricks that you can use to make your trampoline bouncier and more fun to use. In this article, we will explore the first method: routine maintenance.
Method 1: Routine Maintenance
Regular maintenance is an essential part of ensuring that your trampoline remains bouncy and safe to use.
Here are three tips for keeping your trampoline in top condition:
Regular Cleaning
One of the most important things you can do to maintain your trampoline is to clean it regularly. Dirt leaves and other debris can accumulate on the mat and the springs, which can cause the trampoline to lose its bounce.
To prevent this, you should clean your trampoline at least once a month, or more often if it is used frequently.
To clean your trampoline, start by removing any debris from the mat and springs. You can use a soft-bristled brush or a broom to sweep away dirt and leaves.
Next, use a garden hose to spray down the mat and springs, making sure to remove any remaining dirt and debris. You can also use a mild detergent and a soft cloth to clean the mat and springs, but be sure to rinse them thoroughly with water afterward.
Lubricating Springs
Another important maintenance task is to lubricate the springs. Over time, the springs can become stiff and lose their bounce, which can make your trampoline less fun to use. To prevent this, you should lubricate the springs at least twice a year, or more often if the trampoline is used frequently.
To lubricate the springs, you can use a silicone-based spray lubricant. Simply spray a small amount of lubricant on each spring, making sure to cover the entire length of the spring. You can also use a cloth to wipe away any excess lubricant.
Checking for Worn Parts
Finally, you should regularly check your trampoline for worn parts. Over time, the mat, springs, and other components can become worn or damaged, which can affect the trampoline’s bounce and safety.
To prevent this, you should inspect your trampoline at least once a year, or more often if it is used frequently.
To check for worn parts, start by inspecting the mat for tears, holes, or other damage. If you find any damage, you should replace the mat as soon as possible. Next, inspect the springs for signs of rust or wear.
If you notice any rust or damage, you should replace the springs. Finally, check the frame and legs for any signs of damage or wear. If you find any problems, you should repair or replace the damaged parts.
Method 2: Adding more springs
In addition to routine maintenance, adding more springs is another effective way to make your trampoline bouncier. The number of springs on a trampoline directly affects the bounce, so increasing the number of springs can enhance the bounce.
Identifying appropriate springs
Before adding more springs, it’s essential to identify the appropriate springs for your trampoline. Not all springs are created equal, and it’s crucial to ensure that the new springs you purchase are compatible with your trampoline.
The size and weight capacity of your trampoline should be taken into account when selecting new springs. You can consult with the manufacturer or a trampoline expert to determine which springs are best for your trampoline.
Determining the number of springs needed
The number of springs needed to make your trampoline bouncier will depend on the size of your trampoline and the number of springs it currently has. A general rule of thumb is to add one spring for every two to three existing springs.
However, this can vary depending on the size and weight capacity of your trampoline. Again, consulting with the manufacturer or a trampoline expert can provide you with more specific guidance on the number of springs needed.
Installing new springs
Once you have identified the appropriate springs and determined the number of springs needed, it’s time to install the new springs. The process of installing new springs can vary depending on the type of trampoline you have.
However, in general, you will need to remove the old springs and replace them with new ones. It’s important to follow the manufacturer’s instructions or consult with a trampoline expert to ensure that the springs are installed correctly.
It’s worth noting that adding more springs can increase the tension on the trampoline mat, which can also affect the bounce. Therefore, it’s crucial to ensure that the trampoline mat is in good condition and can handle the increased tension.
If the trampoline mat is worn or damaged, it should be replaced before adding more springs.
Method 3: Replacing Existing Springs
If your trampoline has worn or damaged springs, replacing them can help restore its bounce. Here are some steps to follow when replacing existing springs:
Identifying worn or damaged springs
Before you can replace your trampoline springs, you need to identify which ones need to be replaced. Look for springs that are stretched out or have lost their tension. You may also notice that the trampoline is sagging or that it doesn’t bounce as well as it used to.
If you’re unsure which springs need to be replaced, you can test each one individually by pressing down on the trampoline mat and seeing which springs compress the most.
Choosing appropriate replacement springs
When choosing replacement springs, you’ll need to ensure that they are the same length and thickness as the original springs. You may also want to consider the spring’s tension and gauge.
Tension refers to how much force the spring can generate, while gauge refers to the thickness of the spring wire. Generally, thicker wires will be stronger and more durable, but may also be more expensive.
Installing new springs
Once you have your replacement springs, you can begin installing them. Start by removing the old springs from the trampoline, using a spring tool if necessary.
Then, attach the new springs to the trampoline frame and mat, making sure they are properly aligned and tensioned. Depending on your trampoline model, you may need to use a spring tool to stretch the springs and attach them to the frame.
It’s important to follow the manufacturer’s instructions for installing the new springs to ensure they are installed correctly and safely.
It’s worth noting that adding more springs or replacing existing springs can also affect the tension and balance of your trampoline. If you’re not sure how to choose or install new springs, consider consulting a professional or referring to your trampoline’s user manual.
Additionally, regularly checking and maintaining your trampoline springs can help prevent them from wearing out prematurely, extending the life of your trampoline and ensuring it remains bouncy for years to come.
Method 4: Attaching stronger springs
If you’ve already tried routine maintenance and adding more springs, but your trampoline still lacks the desired level of bounce, you may want to consider attaching stronger springs.
Identifying stronger springs:
You can find stronger springs at specialty stores that sell trampoline parts or online retailers. Look for springs that are made from high-quality materials and designed to withstand heavy use.
Determining the number of springs needed:
The number of springs you’ll need will depend on the size and weight capacity of your trampoline. As a general rule of thumb, the more springs you have, the more bounce your trampoline will have.
However, adding too many springs can also create a safety hazard, so it’s important to follow the manufacturer’s recommendations for your specific trampoline model.
Installing new springs
Installing new springs requires a bit of elbow grease, but it’s a relatively straightforward process. Start by removing the old springs and inspecting the frame and other parts for any signs of wear or damage.
Next, attach the new springs to the frame and the mat, making sure they are evenly spaced and securely attached. Finally, test the bounce of your trampoline to ensure that the new springs have made a noticeable improvement.
Attaching stronger springs can be a good option if you’re looking for a more dramatic improvement in your trampoline’s bounce. However, it’s important to make sure that you’re using the appropriate number of springs and that they are securely attached to prevent any safety hazards.
If you’re not confident in your ability to install the new springs yourself, consider hiring a professional to do the job for you.
Method 5: Crossing Springs
Crossing springs is another technique that can be used to increase the bounce on your trampoline. This method involves changing the arrangement of the springs by criss-crossing them in different patterns.
By crossing the springs, you can create a more even distribution of tension across the mat, which can lead to a better bounce.
Criss-Cross Pattern
One way to cross your trampoline springs is to use a criss-cross pattern. To do this, you will need to alternate the direction of the springs as you attach them to the frame.
Start by attaching the first spring at the noon position, then attach the second spring at the 6 o’clock position. Continue alternating the direction of the springs as you work your way around the trampoline.
The criss-cross pattern helps to evenly distribute the tension across the mat, which can help to create a more consistent and bouncy surface. However, keep in mind that this method may require more springs than your trampoline currently has, so you may need to purchase additional springs.
V-Pattern
Another method for crossing trampoline springs is to use a V-pattern. This involves attaching the springs in a diagonal pattern that resembles the shape of a V. Start by attaching the first spring at the noon position, then attach the second spring at the 4 o’clock position.
Next, attach the third spring at the 8 o’clock position, and so on, alternating between the 4 and 8 o’clock positions until you have attached all of the springs.
The V-pattern can help to create a more consistent and bouncy surface by evenly distributing the tension across the mat. However, keep in mind that this method may require more springs than your trampoline currently has, so you may need to purchase additional springs.
W-Pattern
The W-pattern is a more advanced technique for crossing trampoline springs. It involves attaching the springs in a zigzag pattern that resembles the shape of a W. To do this, start by attaching the first spring at the midnight position, then attach the second spring at the 2 o’clock position.
Next, attach the third spring at the 6 o’clock position, and so on, alternating between the 2 and 6 o’clock positions until you have attached all of the springs.
The W-pattern can help to create an even distribution of tension across the mat, which can lead to a more consistent and bouncy surface. However, this method requires a significant number of springs and can be challenging to install.
It is important to make sure that you have the right number of springs and that they are attached correctly to avoid any safety risks.
Method 6: Double spring trampoline
If you’re looking to make your trampoline even bouncier, another option is to consider a double spring trampoline. These trampolines use two springs instead of one to create a more even and powerful bounce.
Here are some things to consider if you’re thinking about upgrading to a double spring trampoline.
Identifying appropriate double spring trampoline
Not all trampolines are designed to accommodate double springs, so it’s important to do your research and find a compatible model. Look for trampolines that are specifically designed for double springs or that come with a conversion kit.
Make sure to choose a trampoline with a sturdy frame and high-quality springs to ensure safety and durability.
Installing a new trampoline or conversion kit
If you already own a trampoline, you may be able to upgrade it to a double spring system with a conversion kit. This typically involves purchasing a kit that includes new springs, brackets, and other necessary hardware, and following detailed instructions to install the new system.
If you’re purchasing a new trampoline, look for one that comes with the double spring system already installed. This may be more expensive upfront, but it will save you the time and hassle of installing a conversion kit yourself.
When installing a double spring system, it’s important to follow all manufacturer instructions carefully and to make sure that all components are securely in place. You may also want to consider hiring a professional to assist with installation to ensure that everything is done correctly.
Benefits of double spring trampolines
There are several benefits to using a double-spring trampoline. First, the double spring system distributes weight more evenly across the trampoline surface, resulting in a smoother and more powerful bounce. This can make it easier to perform more complex tricks and maneuvers.
Double-spring trampolines also tend to be more durable and long-lasting than single-spring trampolines. With two springs supporting each point of the trampoline surface, there is less stress on any one spring, which can help prevent wear and tear over time.
Finally, double-spring trampolines can be safer than single-spring trampolines. With two springs supporting each point of the trampoline surface, there is less risk of a single spring breaking or malfunctioning, which can help prevent accidents and injuries.
FAQs
Q.1 Why is my trampoline not as bouncy as it used to be?
There are several reasons why a trampoline might lose its bounce over time, including worn out or rusted springs, stretched or damaged mat, and a frame that has bent or lost its shape.
.Q.2 What can I do to make my trampoline bouncier?
There are several methods to make your trampoline bouncier, such as routine maintenance, adding more springs, replacing existing springs, attaching stronger springs, crossing springs, and installing a double-spring trampoline.
Q.3 How often should I clean my trampoline?
It is recommended to clean your trampoline regularly, at least once every two weeks or after heavy rain. This helps prevent dirt and debris from accumulating on the surface, which can affect the bounce.
Q.4 How do I know if my trampoline springs need to be replaced?
If your trampoline is not as bouncy as it used to be, and you notice that the springs are stretched, rusted, or damaged, it’s time to replace them. You should also replace springs that are missing or broken.
Q.5 Can I cross my trampoline springs to make it bouncier?
Yes, crossing the springs in a criss-cross, V-pattern, or W-pattern can help distribute the weight evenly and increase the bounce. However, it’s important to follow the manufacturer’s instructions and use the appropriate number and type of springs.
Conclusion
In conclusion, a bouncy trampoline can bring joy and excitement to both children and adults alike. While trampolines can lose their bounce over time due to wear and tear, routine maintenance and repairs can help restore their bounciness.
Understanding the factors that affect trampoline bounce, such as the mat and springs, can also aid in the process. Adding more or stronger springs, replacing worn or damaged springs, and even crossing the springs can make a noticeable difference in the trampoline’s bounce.
Additionally, investing in a double spring trampoline can provide even more bounce and durability. By following these tips and methods, you can enjoy a trampoline that is not only safer but also bouncier and more fun to use.
We hope that after reading our guide on How to make your trampoline bouncier, you have a good understanding of the steps needed to improve the bounce. If you have any questions, please don’t hesitate to ask us in the comments section below.