I know the importance of having a secure and safe trampoline. That’s why I want to share with you the process of installing a trampoline net. A trampoline net provides an added layer of protection against accidents and unauthorized use of the trampoline.
The installation process is simple and can be done by anyone with basic tools and materials. In this article, I will walk you through the step-by-step process of installing a trampoline net, from removing the old net to tensioning the new one. I will also provide tips on how to put on a trampoline net that is properly installed and secure.
By the end of this article, you will be equipped with the knowledge and skills to install a trampoline net and enjoy a safer and more secure bouncing experience.
How to Put on a Trampoline Net: Looking for a safe and secure way to enjoy your trampoline? Installing a trampoline net is essential for preventing falls and keeping unwanted visitors off the trampoline.
Are you familiar with the meaning of the term “Safety Net”?
Yes, when it comes to trampolines, safety nets are typically mentioned or used as a part of backyard or lawn equipment to prevent any unforeseen accidents or significant injuries to those using them while also making it more enjoyable to play on a trampoline.
It is not just for children; as you may have seen, adults can also be thrown off trampolines without safety measures.
What is the best way to put a net on a trampoline?
Installing trampoline safety nets is not tricky, and the shape and size of the trampoline may affect the installation process. Every trampoline installation is unique, so it’s important to remember that the size of most trampoline models can vary from a 6ft trampoline to an 8ft trampoline to a mini trampoline.
Whether you’re installing a safety enclosure net or a replacement net, it’s essential to consider the specific dimensions of your trampoline.
How do you install netting on a trampoline? By carefully following the instructions, you can install a net on any trampoline, regardless of your experience level. Additionally, you can also learn how to disassemble a trampoline.
To install the netting on a trampoline, you will need several tools such as an enclosure net, rope, lower poles, upper poles, PVC sleeves, pole caps, rubber mallet, Phillips screwdriver, and a spring-pulling device.
These tools securely attach the netting to the trampoline frame and poles. Using these tools correctly ensures that the net is tensioned properly and will not come loose during use.
Following the installation instructions for your specific trampoline model is essential to ensure a safe and secure setup.
Can you afford to purchase a trampoline net?
Trampoline nets are a must-have safety accessory for any trampoline owner. They come in various sizes and colors, making it easy for you to find the perfect match for your trampoline.
To make your lawn accessories more affordable, you can purchase a trampoline net at a reasonable price. However, choosing a well-known brand’s product is important to ensure its safety and quality.
When purchasing a trampoline net, the price typically ranges between $40 to $150. A high-quality, safe net compatible with round trampolines is built of durable, long-lasting materials such as polyurethane. Investing in a high-quality net is important to ensure it can withstand rough usage and provide long-lasting safety.
Before proceeding with the installation of the trampoline net, make sure to read and follow the instructions provided by the manufacturer carefully. Incorrect installation may lead to accidents and injuries.
It is recommended to seek professional assistance if you are unsure about the installation process. Overall, purchasing a trampoline net is a wise investment for the safety and enjoyment of anyone using the trampoline.
What are some recommended trampoline nets?
We can help you find a high-quality and top-performing model if you want the best trampolines. Many trampolines come with instructions for installing trampoline netting, an essential safety feature.
Here are some of our top suggestions:
Skybound Trampoline Safety Net Model:
Are you wondering how to install a Skybound trampoline net? It’s pretty simple! Just follow the steps provided in the instructions that come with the product.
If you’re looking for a trampoline net that can fit various brands, then Skybound is the perfect solution for you. This model comes in three sizes: 12, 14, and 15-ft trampoline options.
You can choose from various designs to find the perfect fit for your trampoline, including straight, arched, top rings, and more. With its versatility and ease of installation, the Skybound trampoline net is an excellent choice for anyone needing a replacement or new net for their trampoline.
Installing the Skywalker Trampoline Net:
The Skywalker model is great if you’re searching for a trampoline with different size options. This model is available in three sizes: the most significant 15ft, the middle-sized 12ft, and the smallest 10ft option.
One of the critical features of this model is its jump mat made of tightly woven Polyethylene material. This material is UV-resistant, which means it can withstand prolonged exposure to sunlight without damage. Additionally, it can endure extreme weather conditions, ensuring its durability and long-lasting use.
When choosing a jump mat for a trampoline, the size is an important consideration to ensure compatibility. With the Skywalker model, you have three size options to pick the right one that fits your trampoline perfectly.
Installing the Zoomster Enclosure Trampoline Net Model:
The Zoomster Enclosure trampoline net model is a popular choice among trampoline enthusiasts. It is designed to be compatible with six straight net poles and is made of high-quality polyester that is weather-resistant and breathable, ensuring durability and longevity.
Installing the Zoomster trampoline net is straightforward and provides clear installation instructions. All you need to do is assemble the trampoline according to the manufacturer’s instructions and follow the installation steps provided for the net.
Once installed correctly, the net will ensure the safety of the jumpers and provide a secure and enjoyable jumping experience.
How to Put on a Trampoline Net: Step By Step
If you’ve finished installing your trampoline and are ready to attach the safety net, don’t worry – it’s a relatively straightforward process. Simply follow these steps:
Assembling the poles for the trampoline net installation:
To start with the trampoline net installation process, the first step is to assemble all the pole parts. It’s important to note that the poles come in several pieces and must be attached first. These poles are typically made of either aluminum or steel tubes.
To attach them, the bottom end of the poles can be fastened with a trampoline base, while the top ends are connected to the top rails of the net. To do this, you can slide the small tube into the more significant part until they click into place.
Once you have all the poles assembled and attached to the base, you’re ready to move on to the next step of tying the enclosure net to the ground.
Attaching the poles to the trampoline base:
To continue the trampoline net installation, the next step is to attach all the trampoline poles to the base. This can be accomplished using nuts and bolts. Ensure the bars are securely fastened to the floor for stability and safety.
Once the poles are attached, you can proceed to the next step by placing the top rails on the bars. The top rails will hold the webbings in place and prevent them from sagging or coming loose.
Ensure the top rails are firmly attached to the poles and properly aligned for a sturdy and secure fit.
Tying the enclosure net with the trampoline base:
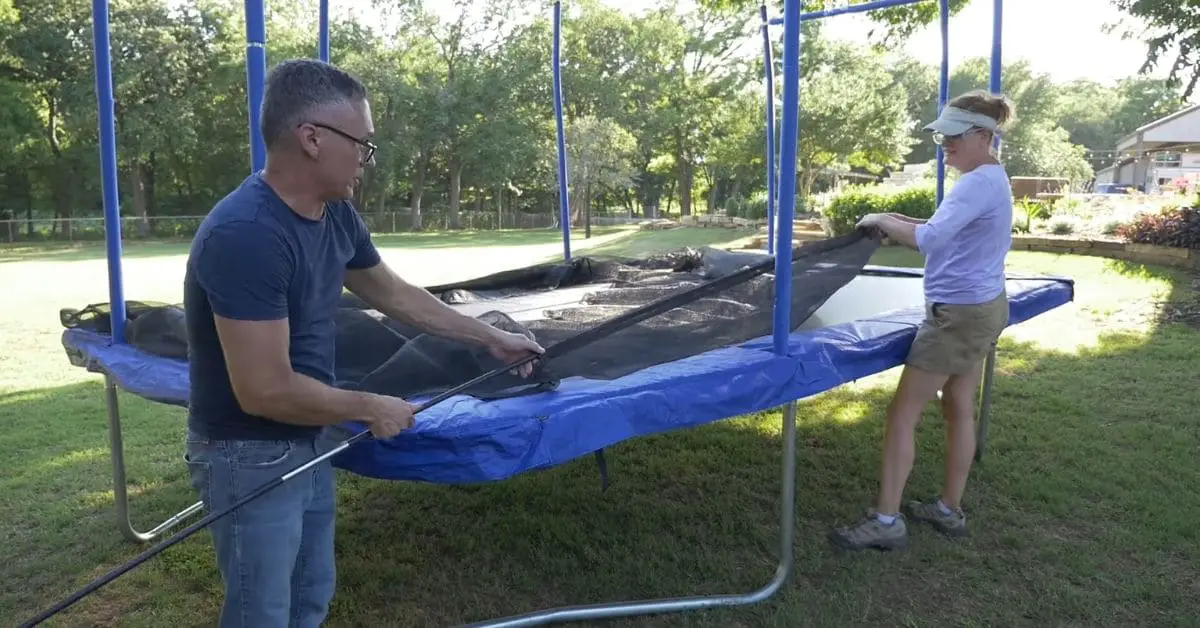
The next step is to tie the net to the trampoline base to complete the trampoline net installation. First, spread the net over the trampoline to cover the jumping area.
Ensure that the net is aligned correctly with the poles and that there are no twists or tangles in the net. Then, tie the net to the trampoline base using the provided ropes or clips. Be sure to connect the net securely so it does not come loose during use.
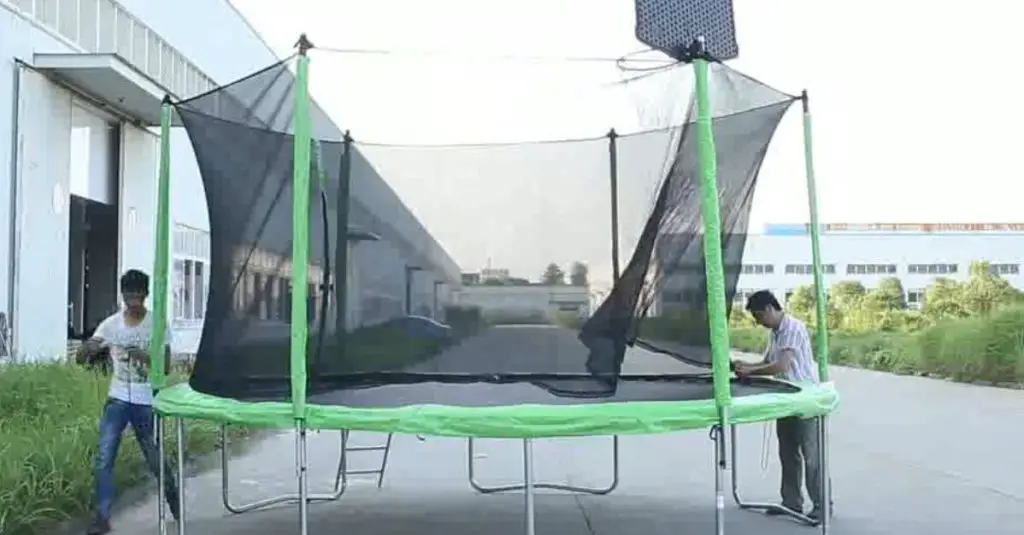
Tying the Net with the Poles:

To finish the installation of your trampoline net, the next step is to tie the net with the poles. Start by attaching the loops at the net’s top to the bars. Tying at least three knots in each circle is vital to ensure they are tight and secure.
This will prevent the net from slipping or coming loose during use. For optimal strength, it’s recommended to use a square knot. This knot is easy to tie and will keep the loops in place.
Proper net assembly and securing the net to the poles are crucial steps that should not be overlooked, as they play a vital role in ensuring the safety of those using the trampoline.
What is the process for removing a trampoline safety net?
Taking down a trampoline safety net is generally easier than putting it up. The exact steps may vary depending on the net type, but the process is straightforward. Some models have poles directly attached to the frame and can quickly detach.
To begin, lay the poles in the center of the trampoline to prevent them from getting tangled while you work on detaching the net.
To remove the net of your trampoline, start by detaching it from the trampoline base. This can be done by sliding the net off of the poles. If the bars have pins at the top, remove them and keep them in a safe place, such as a box or container.
Once the net is detached, keep the net and poles together, and store them inside for future use. This will help ensure they stay in good condition and are easy to find when it’s time to set up the trampoline again.
What are the steps to repair a trampoline net?
If your trampoline net has been damaged and needs repair, don’t worry – it can be fixed easily. The first step is to locate the damaged area of the net. Once you’ve found it, use a strong thread, such as nylon or polyester, to carefully thread the damaged area.
Be sure to use a solid needle to pierce the netting material without causing further damage. Start sewing from the top of the hole and work your way down.
Use a tight and secure stitch to ensure the repair is durable. Once finished, test the repaired area to ensure it’s strong enough to withstand use.
- First, you need to thread the needle with a strong thread. Make sure the line is long enough to cover the entire tear.
- Next, start threading from the bottom end of the tear. Pull the thread through the net and tie a knot at the end to secure it in place.
- Continue the process of threading through the net until you reach the top of the tear. At the top, tie another knot to secure the thread.
- Repeat the process to repair all the tears on the net. Make sure to tie the knots tightly to fasten the net.
- After repairing all the tears, check the entire net to ensure no other tears or holes need to be fixed.
Creating a Trampoline Enclosure Net on Your Own
Have you ever thought about making your trampoline safety net? It’s easier than you might think! To begin, measure the circumference of your trampoline to determine how much netting you will need. Then, purchase the necessary nylon netting.
You can also create your netting by purchasing thread and weaving it into a net pattern. Before installing the net, attach several net poles to the trampoline frame to ensure that the net will be securely in place.
You can create your custom trampoline enclosure net with patience and attention to detail!
To make your trampoline safety net, you must first bring several logs and secure them in the ground to surround the trampoline. You can also fasten wooden poles with the trampoline frame and legs to make them more secure.
Once you have measured the circumference of the trampoline, purchase the necessary nylon netting or make the net yourself using thread. After the trap is ready, please attach it to the trampoline and the net poles. This will help keep the trampoline safe for users and prevent them from falling off.
Tools and materials needed
Here are the tools and materials you will need to make a DIY trampoline enclosure net:
Trampoline net:
Related article: Mini Trampoline Exercises
You will need a sturdy and durable netting material to create a DIY trampoline enclosure net. One of the popular choices is nylon netting due to its strength and longevity.
While purchasing a net, measure the perimeter of your trampoline to ensure that you buy the right netting size. This will prevent any issues during installation and ensure that the netting fits securely around the trampoline.
Zip ties:
Zip ties are an essential tool required to make a trampoline enclosure net. These small plastic strips tightly secure the net to the poles, trampoline frame, and other important areas.
It is important to purchase adequate zip ties to ensure the netting is appropriately and securely attached to the trampoline. The zip ties are easy to use and provide a reliable and durable method for fastening the net to the poles and frame.
Poles:

When making your trampoline enclosure net, poles are necessary for installation. You can choose either wooden or metal poles, depending on your preference. To ensure you purchase the correct size, measure the height of your trampoline to determine the appropriate length of the bars needed.
Once you have the correct length poles, attach them to the trampoline frame. It’s essential to ensure the bars are securely attached and sturdy enough to support the weight of the net.
Screwdriver or wrench:
You will require a screwdriver or wrench to attach the poles for your trampoline enclosure net properly. This tool will help you securely fasten the bars to the trampoline frame, preventing them from wobbling or falling during use.
Be sure to use the appropriate size of screwdriver or wrench for your specific trampoline and pole size. Ensure that the screws are tightened securely to guarantee the trampoline’s safety.
Ladder:
A ladder is an essential tool when installing a trampoline enclosure net. It enables you to reach the top of the trampoline easily and secure the netting in place. However, safety should be your top priority when using a ladder. Use a sturdy ladder and follow all safety guidelines, such as keeping it on level ground and placing it at the right angle. Also, make sure someone else is around to steady the ladder while you work on it. This will prevent accidents or injuries.
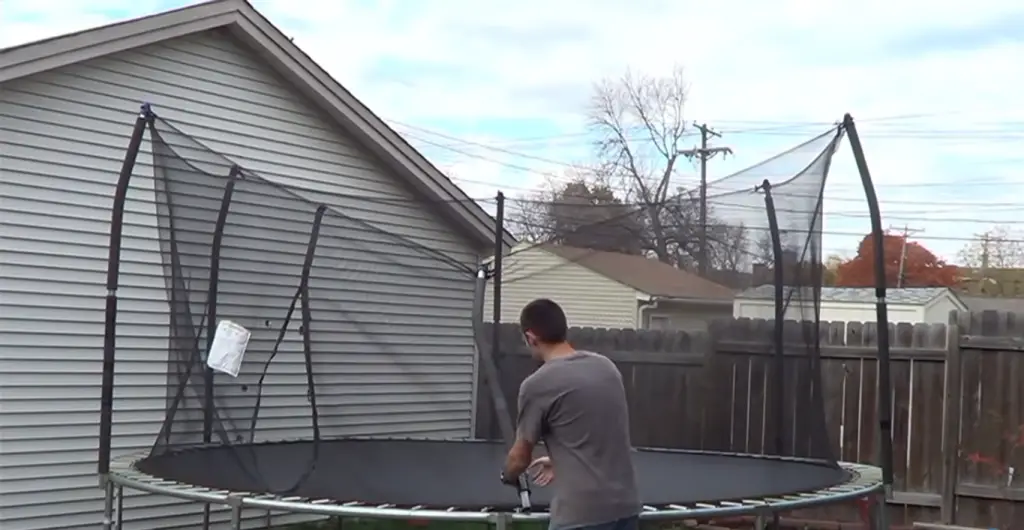
Post-installation check
After installing the trampoline enclosure net, it is essential to perform a post-installation check to ensure the safety of users.
You should perform a post-installation check to ensure the trampoline enclosure net is appropriately installed and secure. This involves checking that the net is correctly attached to the poles and trampoline frame, with no gaps or loose areas that could allow someone to fall off the trampoline.
You should also ensure the poles are secure and not wobbling or bending under pressure.
In addition to checking the net and poles, inspecting the trampoline for any other issues is essential. Look for damaged or worn parts, such as springs or padding, and replace them.
Check that the frame is sturdy and not bent or rusted. It’s also a good idea to regularly check the trampoline for debris, such as leaves or sticks, and remove them to prevent tripping hazards.
Regular post-installation checks and maintenance can help ensure your trampoline is safe and in good condition.
Troubleshooting
Here are some common problems that may arise when putting on a trampoline net and some solutions to fix them:
Common problems during installation:
During the installation of a trampoline enclosure net, several common problems may arise. Firstly, the netting may not fit properly around the trampoline, which could cause gaps that compromise safety.
Secondly, the poles that hold the netting in place may not be securely fastened to the trampoline, leading to wobbling or instability. Finally, the zip ties used to secure the mesh may not hold properly, causing the net to lose during use.
These issues can have profound safety implications and affect the overall performance of the net. Therefore, promptly addressing any problems that arise during the installation process is essential.
Solutions to fix issues:
If you encounter problems while installing a trampoline enclosure net, you can apply some standard solutions to fix them. First, ensure that the netting is the correct size for your trampoline and is tightly secured to the poles and frame.
Ensure all poles are securely attached and tightened with a screwdriver or wrench to prevent wobbling or falling. If the zip ties are not securely holding the netting, add more links or use a different fastener to secure the net.
It is essential to regularly inspect the netting and poles for any signs of wear and tear and replace any damaged parts promptly to prevent further issues. By taking these steps, you can ensure that your trampoline enclosure net is installed correctly and functioning safely.
Maintenance and care
To ensure your trampoline enclosure net’s longevity and safety, inspecting and maintaining it regularly is essential. Here are some tips for caring for your trampoline enclosure net:
Regularly inspecting the net and frame:
Regular inspections of your trampoline net and frame are crucial to ensuring the safety of those who use it. Inspect the netting regularly for any holes, tears, or fraying. Check that the poles are securely attached to the frame and not bent or damaged.
If any damage is found, repair or replace the affected parts immediately. Ensuring the net is pulled taut and fastened securely to the frame and poles is also essential. Check the fasteners, such as zip ties or ropes, to ensure they hold up properly.
Regular inspections can help prevent potential safety hazards and prolong the lifespan of your trampoline.
Cleaning the net and trampoline:
Keeping your trampoline and net clean is essential for both safety and longevity. Use a soft-bristled brush or cloth to regularly wipe down the netting and frame. Remove any debris or dirt that may have accumulated on the trampoline’s surface.
Avoid using harsh chemicals that can damage the netting and frame. Instead, use mild soap and water to clean them. If your trampoline is located in an area with many trees or vegetation, consider covering it with a tarp to prevent debris from collecting on the surface.
Repairing any damages or wear and tear:
Even with regular maintenance and care, trampoline nets and frames may experience wear and tear over time. Repairing any damage immediately is essential to prevent further deterioration and potential safety hazards.
Repair small holes or tears in the netting with a patch kit or replace the mesh if the damage is extensive. If poles are damaged or bent, replace them immediately to prevent the frame from collapsing or becoming unstable.
Regularly checking for wear and tear and addressing any issues promptly can help prolong the lifespan of your trampoline and ensure that it remains safe to use.
FAQs:
Q:1 Why do I need a trampoline enclosure net?
Answer: A trampoline enclosure net provides an added layer of safety to prevent users from falling off the trampoline while jumping. It can also help keep objects and pets from getting onto the trampoline, reducing the risk of injuries.
Q:2 What material should I choose for my trampoline enclosure net?
Answer: Nylon is the most commonly used material for trampoline enclosure nets due to its strength and durability. However, other materials, such as polyester or polyethylene, may also be suitable.
Q:3 How do I choose the right size net for my trampoline?
Answer: Measure the circumference of your trampoline and choose a net that matches that size. It’s essential to ensure a proper fit to prevent gaps where users could potentially fall through.
Q:4 Can I install a trampoline enclosure net by myself?
Answer: It is possible to install a trampoline enclosure net by yourself, but it is recommended to have at least one other person assist. It can be difficult and time-consuming, and having an extra set of hands can make it easier and safer.
Q:5 How often should I inspect my trampoline enclosure net?
Answer: Inspecting your trampoline enclosure net regularly, at least once a month, is recommended. Look for signs of wear and tear, such as holes or tears in the netting or bent or loose poles. Replace any damaged or worn parts immediately to ensure continued safety.
Q:6 How do I clean my trampoline enclosure net?
Answer: Use a mild soap and water solution to clean the netting, and rinse thoroughly with a hose. Avoid harsh chemicals or abrasive materials that could damage the netting or poles.
Q:7 How do I repair any damages to my trampoline enclosure net?
Answer: A nylon or polyester repair kit can patch small holes or tears. If the damage is more significant, such as a large tear or a bent or broken pole, it is recommended to replace the damaged part entirely for safety reasons.
Conclusion:
In conclusion, installing a trampoline enclosure net can be straightforward when approached correctly. Following the steps outlined above, which include measuring the trampoline, selecting suitable materials, and securing the net and poles, you can have a safe and functional trampoline in your backyard.
Regular maintenance and care, such as inspecting the net and frame, cleaning, and repairing any damages or wear and tear, are also essential to ensure continued safe use of the trampoline.
It is essential to remember that safety should always be the top priority when installing and using a trampoline. Always follow the manufacturer’s instructions and any applicable safety guidelines.
Additionally, it is recommended to have adult supervision when children are using the trampoline to prevent accidents or injuries. A trampoline can be a fun and enjoyable addition to any backyard with proper installation, care, and supervision.
After reading this comprehensive article, we hope you will be well aware of how to put on a trampoline net. If you have any questions, feel free to comment below!