Installing an in-ground trampoline was a project I had been looking forward to for a while. After researching the best location and gathering the necessary tools and materials, I began digging the hole for the trampoline.
I made sure to dig the hole deep enough and level the ground as I went to ensure a stable base for the trampoline.
Once the hole was dug, I followed the manufacturer’s instructions to assemble the trampoline and lower it into the hole. I then secured the trampoline to the ground using concrete and added safety features such as padding around the edges.
To finish the project, I backfilled the hole with soil and compacted it, ensuring that the trampoline was flush with the surrounding ground. I also added landscaping around the trampoline to blend it into the surroundings.
After completing the installation, I tested the trampoline for stability and safety, making any necessary adjustments. With the project complete, I was thrilled to have an in-ground trampoline that was both fun and safe for my family to enjoy.
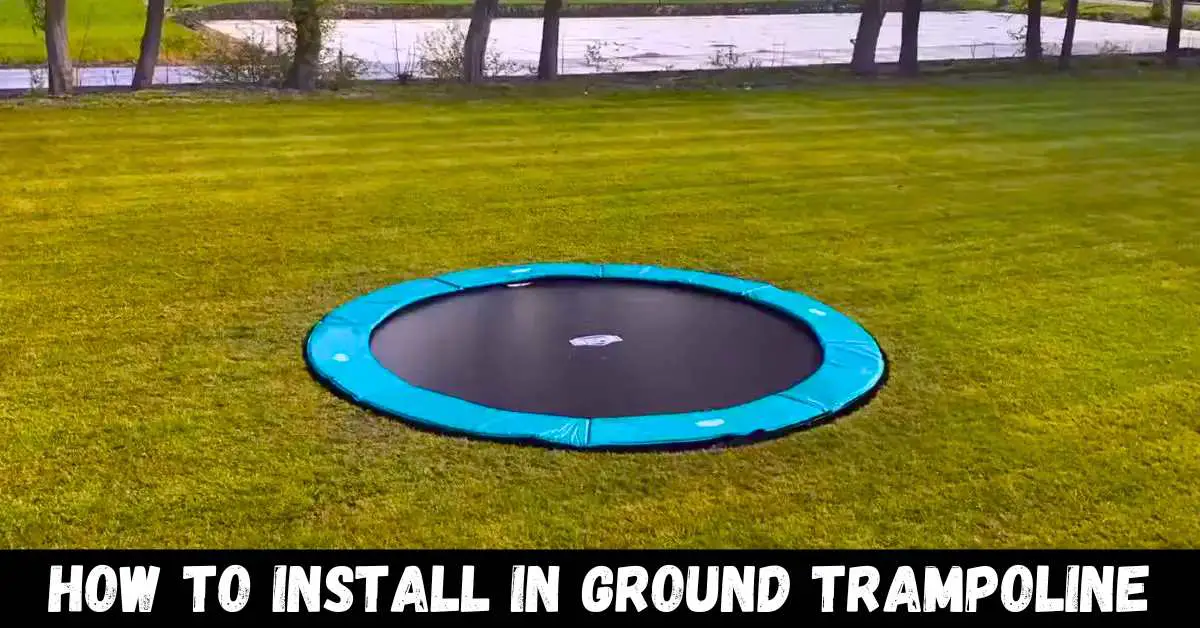
How to install in ground trampoline: To install an in-ground trampoline, start by selecting a flat, level location and digging a hole deep enough to accommodate the trampoline. Assemble the trampoline according to the manufacturer’s instructions and lower it into the hole. Secure it to the ground with concrete and add safety features like padding. Backfill the hole with soil and test the trampoline for stability before use.
How to install in ground trampoline?
Installing an in-ground trampoline can be a fun DIY project that can provide endless hours of entertainment for your family and friends. Here’s a step-by-step guide on how to install an in-ground trampoline:
Planning and Preparation
Planning and preparation are essential steps in installing an in-ground trampoline. Choosing the right location, clearing the area, leveling the ground, and gathering the necessary tools and materials will help ensure a smooth and successful installation process.
In this article, we will go into detail about each of these steps.
Choosing the Right Location
The first step in planning for an in-ground trampoline installation is to choose the right location. The location you choose will have a significant impact on the safety and enjoyment of your trampoline.
Here are some factors to consider when choosing a location for your in-ground trampoline:
Level Ground: Ensure that the ground is level where you plan to install your trampoline. A sloping surface can lead to instability and cause accidents. Avoid installing your trampoline on a hill or uneven ground.
Distance from Obstructions: Make sure there are no trees, fences, walls, or other obstacles that can interfere with the trampoline’s safety or use. A minimum distance of six feet should be maintained between the trampoline and any obstructions.
Adequate Space: The location should provide enough space for the trampoline and its safety zone. The safety zone is the area around the trampoline where children can jump and play safely.
It should be clear of any obstacles, including trees, fences, and furniture. The safety zone should extend at least ten feet from the trampoline in all directions.
Soil Conditions: Check the soil conditions of the location you have chosen. If the soil is rocky or has a high water table, it may be difficult to dig the hole for the trampoline. In such cases, you may need to hire a professional to install the trampoline.
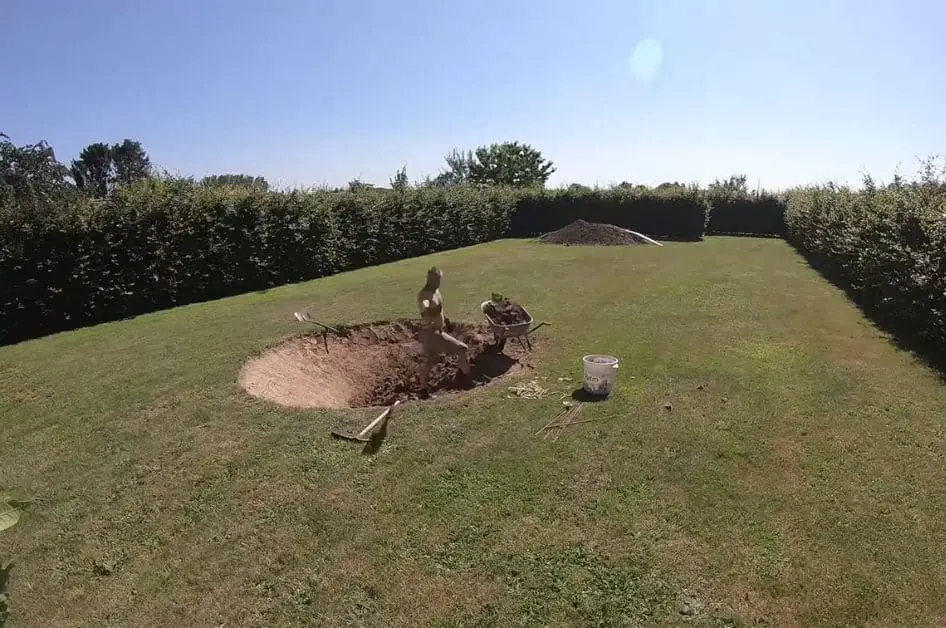
Prepare the Site by Clearing the Area and Leveling the Ground
Once you have chosen the right location for your in-ground trampoline, the next step is to prepare the site by clearing the area and leveling the ground. Here are the steps to follow:
Clear the Area: Remove any rocks, debris, or other obstacles from the site to ensure a smooth installation process. If there are any plants or grass in the area, remove them, and store them in a safe place to replant later.
Mark the Location: Use stakes and string to mark the location of the trampoline’s center. This will ensure that the hole is dug in the right place.
Dig the Hole: Use a shovel or a backhoe to dig a hole in the ground. The hole should be the same size as the trampoline frame and deep enough to accommodate the trampoline’s height.
Level the Ground: Use a level to check that the ground is level where the trampoline will be placed. If it is not level, use soil or sand to level it.
Gather the Necessary Tools and Materials
To install an in-ground trampoline, you will need some tools and materials. Here is a list of the most important ones:
- Shovel: A shovel is essential for digging the hole for the trampoline.
- Level: A level is necessary to check that the ground is level where the trampoline will be installed.
- Measuring Tape: Use a measuring tape to measure the size of the trampoline and the distance from obstructions.
- Backhoe: If the soil is hard or rocky, a backhoe may be necessary to dig the hole.
- Trampoline Kit: You will need a trampoline kit that includes the frame, springs, mat, and safety padding.
- Safety Features: You will need safety features, such as an enclosure net and safety mats, to ensure the safety of those who use the trampoline.
Related article: How to measure a trampoline
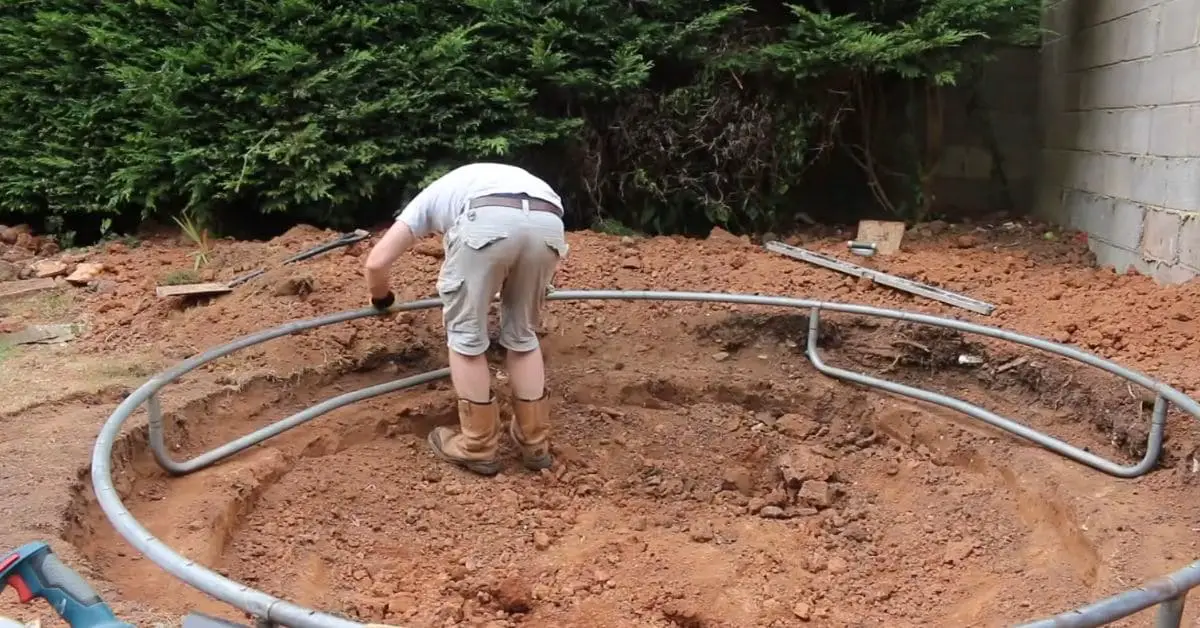
Digging the Hole
Digging the hole is a crucial step in installing an in-ground trampoline. The hole needs to be the right size and depth to accommodate the trampoline frame, ensuring a safe and secure installation.
we will go into detail about each step involved in digging the hole for an in-ground trampoline.
Mark the Area Where the Hole Will be Dug
The first step in digging the hole for an in-ground trampoline is to mark the area where the hole will be dug.
Here are the steps to follow:
Place the Trampoline Frame: Place the trampoline frame on the ground in the chosen location. Mark the perimeter of the frame using spray paint or stakes and string.
Measure the Diameter: Measure the diameter of the frame to determine the size of the hole that needs to be dug. The hole should be slightly larger than the diameter of the frame to allow for the insertion of the frame.
Mark the Hole’s Center: Use the measuring tape to mark the center of the hole where the trampoline will be placed. This will help ensure that the hole is dug in the right place.
Use the Appropriate Digging Equipment to Excavate the Hole
Once you have marked the area for the hole, the next step is to use the appropriate digging equipment to excavate the hole. The size and type of equipment you use will depend on the size of the hole and the type of soil in your area.
Here are some of the digging equipment you can use:
Shovel: A shovel is a versatile digging tool that can be used for small to medium-sized holes. It is best for soft soil and for digging around the edges of the hole.
Post-Hole Digger: A post-hole digger is a specialized digging tool that is designed for digging holes in the ground. It is best for digging medium to large-sized holes in soft soil.
Backhoe: A backhoe is a heavy-duty digging machine that is used for large holes and hard soil. It is best for digging deep and wide holes quickly and efficiently.
Ensure that the Hole is the Right Size and Depth for the Trampoline
The final step in digging the hole for an in-ground trampoline is to ensure that the hole is the right size and depth for the trampoline.
Here are the steps to follow:
Check the Depth: Use a measuring tape to check the depth of the hole. The depth should be equal to the height of the trampoline frame plus six inches for the drainage system.
Check the Size: Measure the size of the hole to ensure that it is slightly larger than the diameter of the trampoline frame. This will allow for the insertion of the frame and the installation of the retaining wall.
Smooth the Bottom: Smooth the bottom of the hole using a shovel or a rake. This will ensure that the trampoline frame sits level and secure.
Install Drainage System: If you live in an area with heavy rainfall, you may need to install a drainage system at the bottom of the hole. This will prevent water from accumulating in the hole and damaging the trampoline.
Installing the Trampoline
If you have recently purchased a trampoline, you may be excited to set it up and start using it. However, it is important to take the time to properly install the trampoline to ensure that it is safe and secure. In this guide, we will go over the steps involved in installing a trampoline.
Step 1: Assemble the Trampoline According to the Manufacturer’s Instructions
Before you can install the trampoline, you need to assemble it according to the manufacturer’s instructions. This will typically involve attaching the legs, the frame, and the springs to the trampoline mat.
Be sure to read the instructions carefully and follow them closely. Failure to do so could result in an unstable trampoline that is prone to tipping over or causing injury.
When assembling the trampoline, it is also important to ensure that all of the parts are properly aligned and tightened. Check the trampoline regularly during the assembly process to make sure that everything is secure.
Step 2: Lower the Trampoline into the Hole
Once the trampoline is fully assembled, the next step is to lower it into the hole. The hole should be dug to the depth specified by the manufacturer’s instructions.
This is usually around 2-3 feet deep. The diameter of the hole should be slightly larger than the trampoline itself to allow for a bit of wiggle room.
When lowering the trampoline into the hole, it is important to be careful and work slowly. Enlist the help of friends or family members to make the process easier.
Once the trampoline is in place, use a level to ensure that it is sitting flat on the ground. Adjust the placement of the trampoline if necessary to ensure that it is level.
Step 3: Secure the Trampoline to the Ground
Once the trampoline is in the hole and level, the next step is to secure it to the ground. There are a few different ways to do this, depending on the type of trampoline and the manufacturer’s instructions. Here are a few common methods:
Stake the trampoline to the ground: Many trampolines come with stakes that can be driven into the ground to secure the legs in place. Follow the manufacturer’s instructions for how to use these stakes.
Attach the trampoline to a concrete anchor: Some trampolines come with a concrete anchor that can be attached to the bottom of the trampoline legs. The anchor is then buried in the ground and secured with concrete.
This is a more permanent solution, but it may be necessary if you live in an area with high winds or severe weather.
Use sandbags or weights: Another option is to use sandbags or weights to secure the trampoline to the ground. Place the sandbags or weights on the legs of the trampoline to prevent it from tipping over.
Step 4: Add Padding and Safety Features
Once the trampoline is securely in place, the final step is to add padding and safety features. This includes adding a safety net around the perimeter of the trampoline to prevent users from falling off, as well as adding padding to cover the springs and frame of the trampoline.
The safety net should be installed according to the manufacturer’s instructions, and it should be tall enough to prevent users from jumping over it.
The padding should be thick enough to absorb the impact of a fall and should be securely attached to the trampoline frame.
In addition to these safety features, it is important to set some ground rules for using the trampoline. For example, only one user should be on the trampoline at a time, and no one should attempt flips or other dangerous maneuvers without proper training and supervision.
Finishing Touches
Once the trampoline is installed, there are a few finishing touches that you can add to make it look even better and ensure that it is safe and stable. In this guide, we will go over the steps involved in adding these finishing touches.
Step 1: Backfill the Hole with Soil and Compact It
After the trampoline is installed, there will likely be a hole around the perimeter of the trampoline. This hole should be filled with soil to bring it up to ground level. Use a shovel or a wheelbarrow to add soil to the hole until it is level with the surrounding ground.
Once the soil is added, use a tamper or a plate compactor to compact the soil. This will help to ensure that the trampoline is stable and won’t shift or sink over time. Be sure to compact the soil evenly around the entire perimeter of the trampoline.
Step 2: Add Landscaping Around the Trampoline to Blend It into the Surroundings
If you want to make your trampoline look even better, consider adding some landscaping around it to blend it into the surroundings. This could include adding flowers, bushes, or other plants around the perimeter of the trampoline.
When choosing plants for landscaping around a trampoline, it is important to consider the safety of the users.
Avoid planting anything with thorns or prickly leaves, and choose plants that won’t shed debris that could get onto the trampoline.
Another option for landscaping around a trampoline is to add a border of decorative rocks or pavers. This can create a defined edge around the trampoline and make it look more polished.
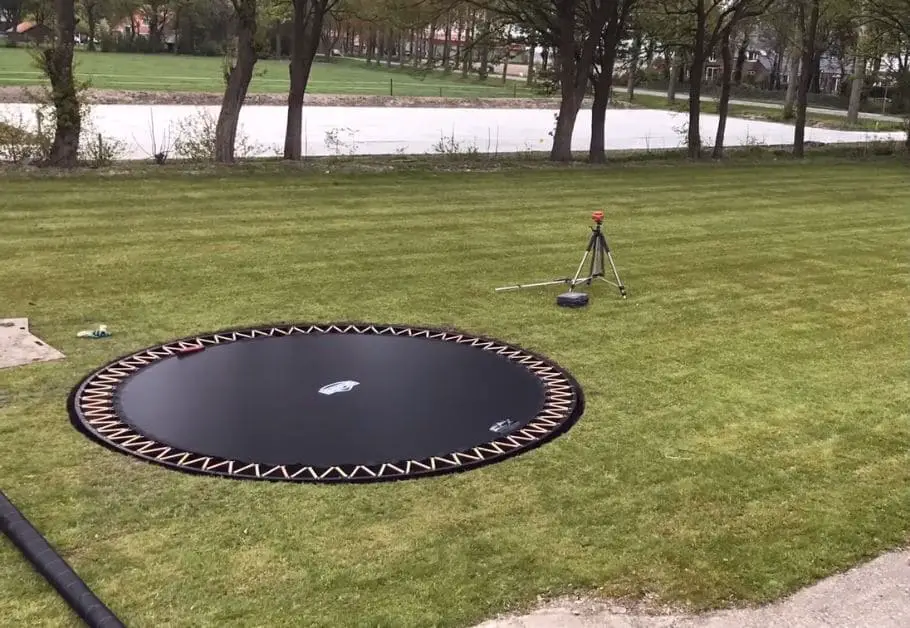
Step 3: Test the Trampoline for Stability and Safety
Once the finishing touches are added, it is important to test the trampoline for stability and safety. This should be done before anyone uses the trampoline to ensure that it is safe and won’t cause injury.
To test the trampoline for stability, stand on the edge of the trampoline and gently bounce up and down. The trampoline should feel stable and not wobble or tip over. If it does, double-check that the trampoline is properly secured to the ground and that all of the parts are securely attached.
To test the trampoline for safety, check that all of the safety features are installed and working properly. This includes the safety net, padding, and any other features included with the trampoline.
Make sure that the safety net is securely attached to the trampoline and that it is tall enough to prevent users from jumping over it.
Maintenance and Care
To keep your trampoline in good condition and ensure its longevity, it is important to perform regular maintenance and care. Here are some tips for maintaining and caring for your trampoline.
Regularly Check the Springs
The springs on a trampoline are crucial to its performance and safety. Over time, springs can become worn or damaged, which can cause them to lose their tension or break. To prevent this from happening, it is important to regularly check the springs for signs of wear or damage.
To check the springs, look for any signs of rust, stretching, or bending. If any springs appear to be worn or damaged, they should be replaced immediately to prevent injury. In addition, it is a good idea to periodically tighten the springs to ensure that they are all evenly tensioned.
Replace Any Worn or Damaged Parts
In addition to the springs, other parts of the trampoline can become worn or damaged over time. This includes the mat, padding, and safety net. To keep your trampoline safe and functional, it is important to replace any worn or damaged parts as soon as possible.
When replacing parts, be sure to use high-quality replacement parts that are designed for your specific trampoline. This will ensure that the parts fit properly and perform as intended.
Keep the Trampoline Clean
To keep your trampoline looking and functioning at its best, it is important to keep it clean. This includes regularly removing debris such as leaves, twigs, and dirt from the mat and frame.
To clean the trampoline, use a soft-bristled brush or broom to sweep off any debris. For tougher stains or dirt buildup, a mild soap solution and soft cloth can be used to gently clean the mat and frame.
Protect the Trampoline from the Elements
Exposure to the elements can cause your trampoline to deteriorate faster. To prevent this, it is important to protect your trampoline from the sun, wind, and rain.
One way to protect your trampoline is to use a cover. Trampoline covers are designed to fit snugly over the mat and frame, protecting it from the elements when not in use.
Another option is to store your trampoline indoors or in a covered area during the off-season or when not in use for extended periods.
In addition to protecting the trampoline itself, it is also important to protect the area around the trampoline. This includes trimming any overhanging branches or vegetation that could damage the trampoline or obstruct the jumping area.
FAQs
Q.1 What is an in-ground trampoline?
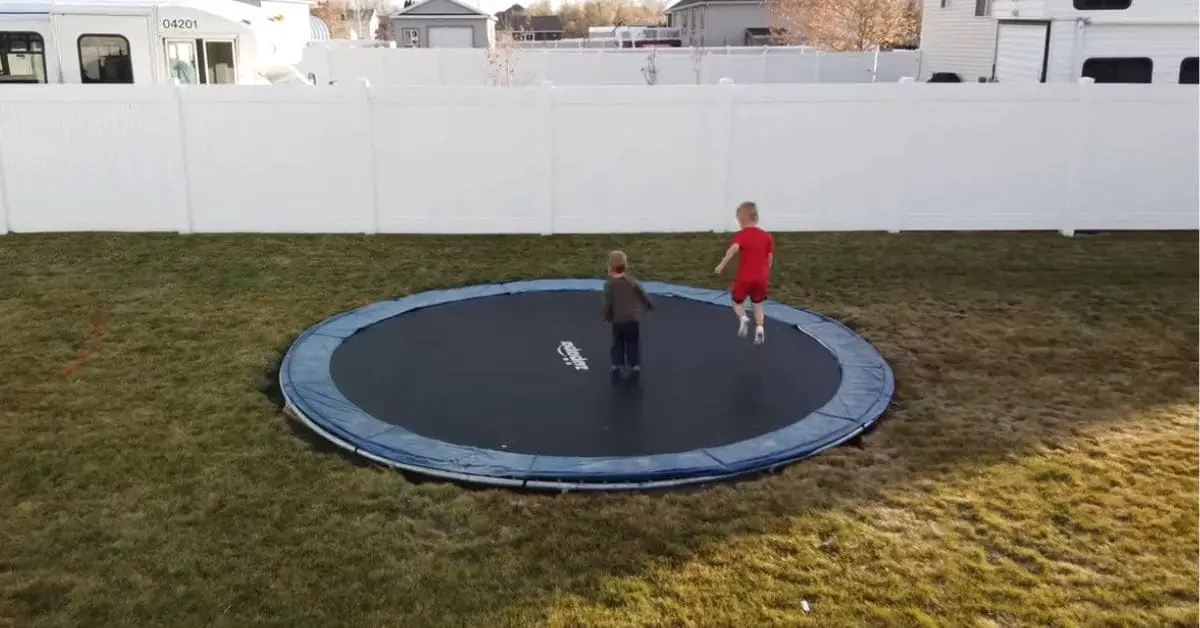
An in-ground trampoline is a type of trampoline that is installed directly into the ground, making it flush with the surrounding surface.
Q.2 What are the benefits of an in-ground trampoline?
In-ground trampolines are safer than above-ground trampolines because they are flush with the ground, reducing the risk of falls. They are also more aesthetically pleasing as they blend into the surrounding environment.
Q.3 What is the best location for an in-ground trampoline?
The best location for an in-ground trampoline is a flat, level area with plenty of space around it. The area should also be clear of any overhead obstacles such as tree branches or power lines.
Q.4 What tools and materials are needed to install an in-ground trampoline?
The tools and materials needed to install an in-ground trampoline may vary depending on the specific trampoline model and installation instructions.
Generally, you will need a shovel, measuring tape, level, and basic hand tools such as a screwdriver and wrench. Materials may include concrete, gravel, and landscaping materials.
Q.5 How deep should the hole be for an in-ground trampoline?
The depth of the hole will depend on the specific trampoline model and installation instructions. Generally, the hole should be at least 2 feet deep to provide a stable base for the trampoline.
Q.6 Can I install an in-ground trampoline myself, or should I hire a professional?
While it is possible to install an in-ground trampoline yourself, it can be a complex and labor-intensive process. Hiring a professional installer can ensure that the trampoline is installed safely and correctly.
Q.7 Are in-ground trampolines safe for children?
When installed and used properly, in-ground trampolines can be a safe and fun activity for children. However, it is important to follow all safety guidelines and supervise children while they are using the trampoline.
Conclusion
In conclusion, installing an in-ground trampoline requires proper planning, preparation, and the right tools and materials. Choosing the right location and properly excavating the hole to the right size and depth are important steps to ensure the stability and safety of the trampoline.
Installing the trampoline and adding padding and safety features are also crucial to ensure the safety of users.
After installation, regular maintenance and care, including checking the springs, replacing worn or damaged parts, and keeping the trampoline clean and protected from the elements, will help extend its lifespan and ensure its safe use.
With these steps in mind, you can enjoy a fun and safe bouncing experience on your in-ground trampoline.
We believe that this detailed guide on how to install an in-ground trampoline will help you understand the process easily. If you have any questions, please don’t hesitate to ask by leaving a comment below!