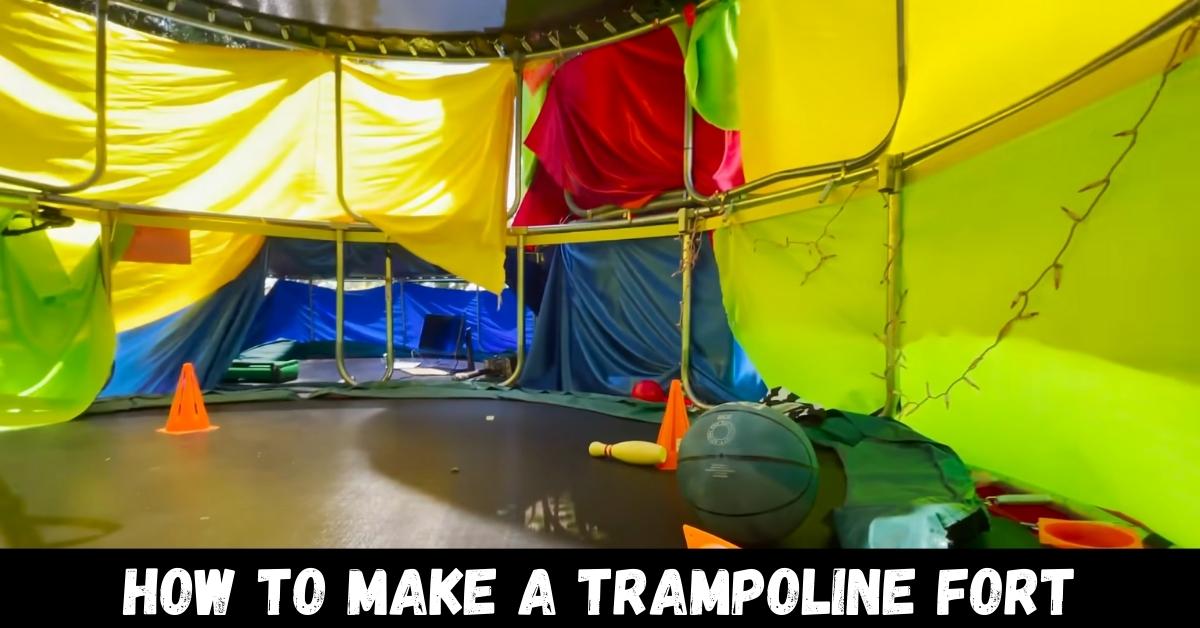
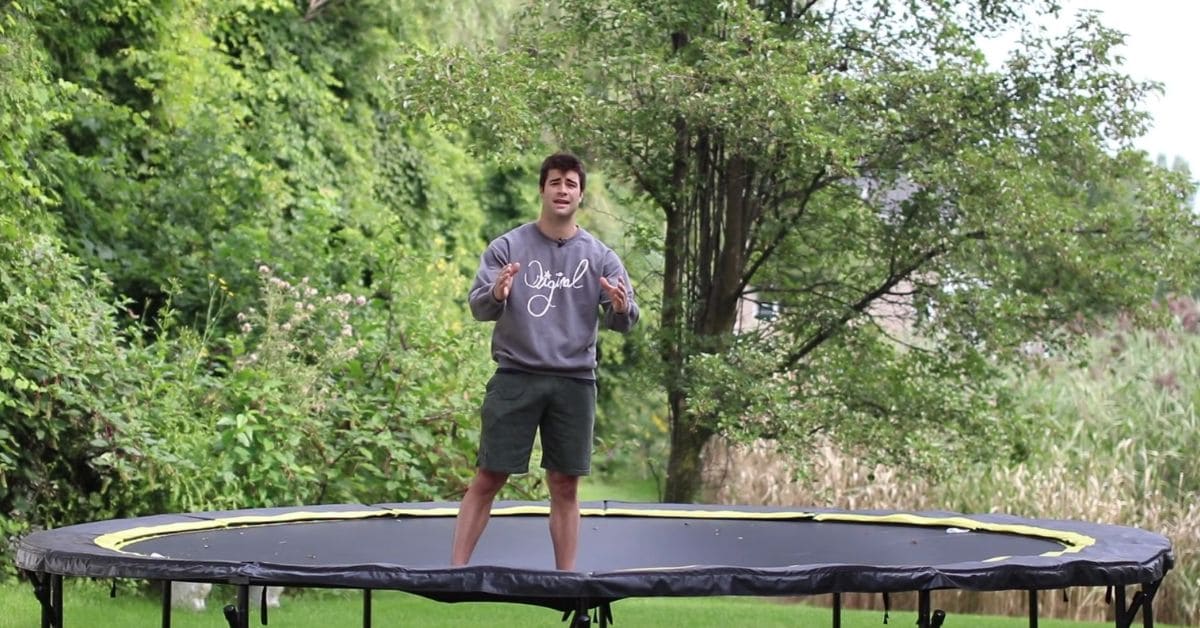
Building a trampoline fort is a really fun activity that I absolutely enjoy doing with my kids. It’s a great way to spend time together and create a cool outdoor hangout spot. The best part is that it’s really easy and only takes around an hour to complete.
If you want to know how to make a trampoline fort? To start building the trampoline fort, I first place the side of the blanket by the side and use pegs to secure them in place. Then I cover the trampoline nets from all sides with the blankets, ensuring that everything is properly covered.
Next, I take a double bedsheet and use it to cover the top of the fort, providing shade and protection from the sun. To make the inside of the fort extra comfy, I cover the trampoline mat with another bedsheet to create a soft and cozy floor.
How to Make a Trampoline Fort: Building a trampoline fort is easy and fun! Secure blankets around the trampoline, cover the nets, and add a sheet on top for shade. Make a comfy floor with another sheet.
Supplies Needed to Build a Trampoline Fort
If you’re planning a trampoline fort sleepover, here are the items you’ll need to gather from your home:
1. Trampoline – the main ingredient!
2. Plenty of blankets, depending on the size of your trampoline
3. Double bedsheet for a cozy sitting area
4. Pillows to make it extra comfortable
5. Lights to create a magical ambiance
6. Electricity connection to power the lights
What does “Trampoline Fort DIY” mean?
Forts are like secret hideaways where you can escape from everyday life and have fun with friends. If you have kids, building a fort together is a great way to bond without going anywhere.
How about making a trampoline fort for a sleepover? It’s simple to set up and you can decorate it your way. When you show it to everyone, they’ll be impressed by how cool it looks.
How to Make a Trampoline Fort: Ultimate Steps
Here are the ultimate steps for making a trampoline fort:
Selecting a Suitable Location to Build:
When you’re planning to make a trampoline fort, the first thing to do is to choose a suitable location. You need to find a spot that has enough space to accommodate the trampoline and also allows for easy access to the fort from the outside.
Safety is of utmost importance when choosing your location. Make sure that there are no high-voltage power lines or trees that could pose a danger to the trampoline fort. Keep in mind that the location you choose should be a safe distance away from any potential hazards.
When selecting your spot, take a good look around and identify any trees or bushes that may make it difficult to access the fort. Clearing the area around the trampoline will help ensure easy access and reduce the risk of injury.
Preparing Your Trampoline by Cleaning Before Building a Fort:
Before building a trampoline fort, it’s essential to clean the trampoline properly. This will ensure that there are no contaminants or debris on the surface of the trampoline that could cause damage to you or the trampoline itself.
To begin, sweep off any dirt or debris on the surface of the trampoline. You can use a soft-bristled broom or a clean cloth for this. If there are any stubborn stains or marks, you can use a mild soap solution and a sponge to gently clean the trampoline.
Make sure to rinse off any soap residue thoroughly with a hose or bucket of clean water. Allow the trampoline to dry completely before proceeding with building the fort.
By taking the time to clean your trampoline properly, you’ll be ensuring that it’s safe and ready for use. This will help prevent any injuries or damage to the trampoline, so you can enjoy building and using your trampoline fort with peace of mind.
Covering the Safety Net with Blankets for Trampoline Fort Building:
Now that you’ve cleaned your trampoline, it’s time to start building the fort. First, choose some colorful blankets that you want to use to cover the sides of the safety net on your trampoline. You can use any blankets you like, as long as they’re big enough to cover the sides of the net.
Start by placing the blankets on the sides of the safety net. You’ll need to use pegs to hold the blankets in place, as they may not stay put on their own. Cover any remaining uncovered sides with another blanket and use pegs to hold it in place.
Once you’ve covered all the sides of the safety net with blankets, finish up by fixing the lower end of the blankets with spring pads. This will help keep the blankets securely in place and prevent them from slipping off the trampoline.
By covering the safety net with blankets, you’ll be creating a cozy and comfortable space inside the trampoline fort. This will help keep you and your family safe while enjoying your new outdoor hangout spot.
Placing Blankets Over the Safety Net for Trampoline Fort Building:
To create the trampoline fort, you’ll need to cover the safety net with blankets. First, take a blanket and place it over one side of the safety net. Use pegs to secure it to the net. Then, take another blanket and place it next to the first one. Use pegs to secure it to the net as well.
Repeat this process by placing blankets side by side and securing them with pegs until all sides of the safety net are covered. Make sure there are no gaps between the blankets. If necessary, put two blankets side by side and secure them with pegs.
To finish, use spring pads to secure the lower end of the blankets. This will help keep the blankets securely in place and prevent them from slipping off the trampoline.
By placing blankets over the safety net, you’ll be creating a cozy and comfortable space inside the trampoline fort. This will help keep you and your family safe while enjoying your new outdoor hangout spot.
Cover the Top of the Trampoline Fort with a Bedsheet and Make the Roof:
To complete your trampoline fort, grab a double bed sheet and place one end of it over the top of the safety net. Use pegs to secure the bedsheet to the net, making sure to cover the entire top of the trampoline.
Once the bedsheet is secured in place, it will form the roof of your trampoline fort. Use pegs to secure the bedsheet from the outside of the trampoline.
After placing pegs on all sides of the bedsheet, your trampoline fort is now complete and ready for you to enjoy!
Adding Pillows to the Trampoline Fort:
To make your trampoline fort more comfortable, you can add pillows inside. Simply take your pillows and place them inside the fort. You can place them on the floor or use them to lean against the sides of the fort.
Make sure to choose pillows that are comfortable and not too bulky, so they don’t take up too much space inside the fort.
Adding pillows will make your trampoline fort a cozy and relaxing space to hang out in. You can use them to take a nap, read a book, or just lounge around with friends or family.
And if you want to add some extra ambiance to your fort, you can also string up some lights inside. This will create a magical atmosphere for you to enjoy.
Add some decorations to your trampoline fort!
After building your trampoline fort, it’s time to decorate it! Add pillows, blankets, and other items to make it cozy and inviting.
You can also use decorations like lanterns or a radio to set the mood and make it more fun. Get creative and make your fort unique and enjoyable!
Installing Lights and Electricity Connection for your Trampoline Fort:
If you plan to spend the night in your trampoline fort, you’ll need some lights. To set up the lights, you’ll need an electricity connection and a way to connect the lights to it. You can use a portable extension board to connect the lights to the electricity.
Make sure to use lights that are safe for indoor use and won’t overheat. You can use lanterns, string lights, or other decorative lights to make the inside of your fort cozy and inviting.
Be careful when setting up the lights and make sure that all cords are secured and won’t trip anyone. It’s also important to turn off the lights and unplug them when you’re not using them to conserve energy and prevent any accidents.
Is it possible to have a sleepover on a trampoline?
You can have a sleepover on a trampoline, but there are a few things to keep in mind.
- First, make sure you have a trampoline that is big enough to fit everyone comfortably.
- Second, be careful not to exceed the weight limit of the trampoline.
- Third, check the weather before planning your sleepover. You don’t want to be caught in severe weather conditions like hurricanes. Rain and wind can also be a problem, but if you put a tent over the trampoline, you can still have fun even if it’s raining or windy.
It’s important to remember that when you’re on a trampoline with others, everyone should either be jumping or lying down together. If some people are jumping while others are lying down, it could be dangerous and someone might get hurt. So it’s best to have just one person jumping at a time.
How can I create a trampoline sleepover by myself? What are some types and ideas for a trampoline sleepover?
Now that you understand the basics of having a sleepover on a trampoline and the safety precautions, it’s time to explore the different types and ideas for trampoline sleepovers.
There are generally two types of trampoline sleepovers: open trampoline sleepovers and trampoline tent sleepovers.
How to Have a Trampoline Tent Sleepover?
A trampoline tent sleepover means putting a tent on the trampoline or transforming the trampoline into a tent. This way, it becomes more private and suitable for days when it’s rainy or windy.
However, it also means that the view will be limited. It’s an excellent option for those planning to have a trampoline sleepover for many days and do not want to move the covers in and out.
Open Trampoline Sleepover Ideas:
An open trampoline sleepover means turning the trampoline into a bed. You can decorate the trampoline with lights and bedding and enjoy sleeping under the starry sky with your family and friends.
The fresh air, occasional birdsongs, and vast night sky make the experience amazing and memorable.
What is the best type of trampoline for a trampoline sleepover?
When choosing a trampoline for a sleepover, two factors matter the most: size and shape. For most trampoline campouts, a 12-ft trampoline is available.
However, if you only want a small family-sized trampoline sleepover for 3~4 family members, an 8 FT trampoline may also be enough. If you expect more friends to join the group, a larger trampoline is better.
For the trampoline shape, a round trampoline may offer a better cozy feeling. Round trampolines are more family-friendly and fit both jumping experiences and sleepover experiences.
They also allow entry-level physical practices. If you are looking for a trampoline for professional gymnastics exercises, you can also consider rectangle trampolines.
How important is it to supervise children playing on a trampoline fort?
When building a trampoline fort with your kids, it’s important to prioritize their safety. You don’t want them to get hurt while having fun. To ensure their safety, you need to inspect the fort carefully before letting them play on it.
One thing to check for is sharp edges. If there are any metal parts or springs that have sharp edges, make sure to cover them up with foam padding or duct tape. This will prevent your children from getting cuts or scratches if they accidentally hit or fall on them.
You should also be on the lookout for any objects that could hurt your kids if they fall into them. This could include sharp rocks or sticks that are near the trampoline. Make sure to remove any hazards and clear the area around the fort before letting your kids play on it.
It’s also a good idea to supervise your children while they are playing on the trampoline fort. Accidents can happen even in the safest environment, so keeping an eye on them will ensure that you can intervene if something goes wrong.
By taking these precautions, you can make sure that your kids can enjoy their trampoline fort in a safe and secure way.
Safety Precautions

When building and using a trampoline fort, it is important to prioritize safety to prevent any accidents or injuries.
Here are some important precautions to take:
Securely Anchor the Trampoline:
It is crucial to ensure that the trampoline is anchored securely to the ground to prevent it from moving or tipping over. This is especially important if you live in an area prone to strong winds.
Use the appropriate anchoring tools and techniques recommended by the manufacturer or a professional to make sure the trampoline is safe and secure.
Monitor Children at all Times:
Children should always be supervised when playing on a trampoline fort to prevent falls or injuries. An adult should be present at all times to make sure children are using the fort safely and not engaging in any rough play that could lead to accidents.
Make sure to communicate the rules and guidelines for using the trampoline fort with the children and ensure that they understand them.
Avoid Jumping Near the Fort:
Jumping near the trampoline fort can be dangerous and may cause accidental damage or collapse. Encourage children to jump away from the fort and to be mindful of their surroundings. A safe distance of at least six feet is recommended.
Don’t Overcrowd the Fort:
The trampoline fort should only be used by a limited number of people at a time to prevent overcrowding and collisions. Too many people on the trampoline can cause the mat to become overstretched and increase the risk of accidents.
Use Safety Equipment:
Consider using safety equipment such as helmets and knee pads to prevent injuries. Make sure children are wearing appropriate clothing and footwear while playing on the trampoline. Avoid loose clothing or clothes with drawstrings that could get caught in the springs.
By taking these safety precautions, you can ensure that the trampoline fort is a fun and safe activity for everyone to enjoy.
Creative Ideas for Trampoline Forts
Trampoline forts are a fantastic way to provide kids with a fun and exciting play area that encourages physical activity and imagination. With a little creativity, you can customize your trampoline fort to make it unique and special for your children.
Here are some more details on the creative ideas listed:
Add Fairy Lights:
Fairy lights are a great way to make your trampoline fort look magical and create a cozy atmosphere. You can choose from a variety of colors and styles to match your child’s preferences.
Consider stringing them up around the fort or attaching them to the netting for a whimsical touch. Be sure to use outdoor-safe lights and keep them out of reach of children.
Build a Tunnel:

Kids love to crawl and explore, and building a tunnel on your trampoline fort can provide an exciting obstacle course.
You can use sheets, blankets, or even shower curtains to create the tunnel.
Simply attach them to the netting with zip ties or bungee cords. You can also add a crawl-through hole to the top of the fort for added fun.
Create a Secret Hideout:
Kids love having their own secret spots, and creating a hideout underneath the trampoline can provide a fun and cozy play area. Using sheets or tarps, attach them to the netting to create a private space for your child.
You can add a small mat or cushions for extra comfort. This can also be a great spot for reading or taking a break.
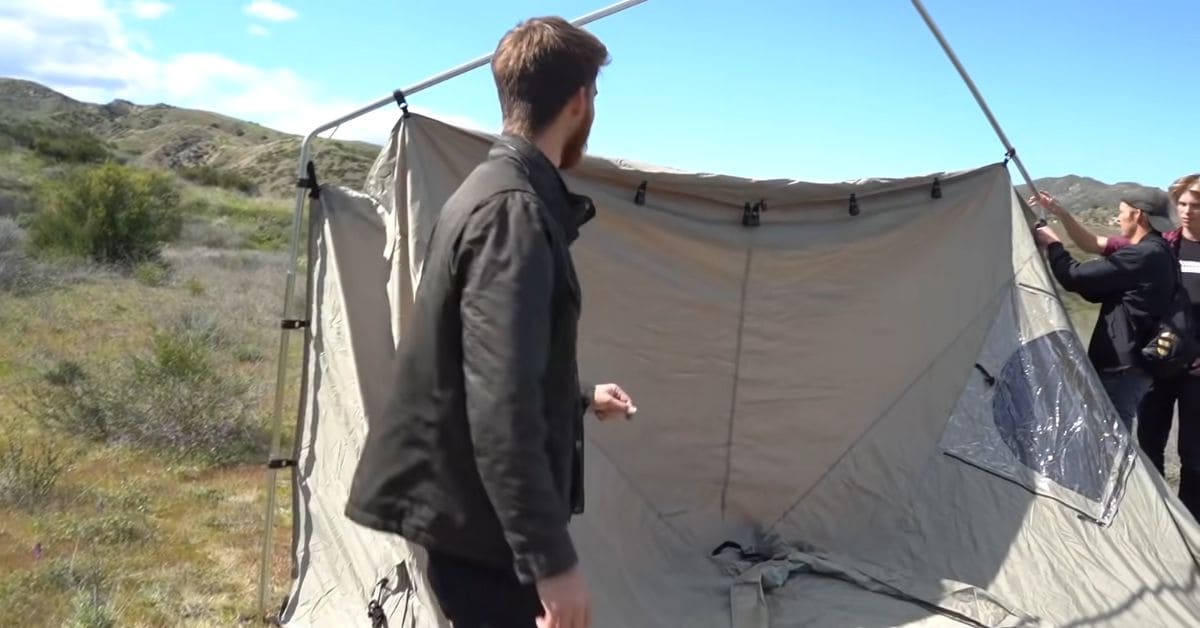
Use a Canopy:
A canopy can provide shade on hot summer days and create a cozy spot for relaxation. You can find a variety of canopy options, including ones with curtains for added privacy. Be sure to choose a sturdy canopy that can withstand outdoor elements and attach it securely to the trampoline frame.
Make a Ball Pit:
Creating a ball pit on your trampoline fort can provide hours of fun and entertainment for kids. You can purchase plastic balls in bulk and fill a portion of the trampoline with them.
Make sure to evenly distribute the balls and choose a spot away from the edges of the trampoline. Be sure to supervise children while they play to prevent accidental falls or injuries.
Create a Slide:
A slide attached to the side of the trampoline can provide an exciting way to enter and exit the fort. You can purchase a slide or make your own using a sturdy board and PVC pipe. Be sure to securely attach the slide to the trampoline and supervise children while they use it.
Remember, safety should always be a top priority when using a trampoline fort. Make sure the trampoline is securely anchored to the ground and supervise children at all times. With these creative ideas, you can provide a fun and safe play area for your children to enjoy.
How to make a Trampoline Fort Without a Net?
Creating a trampoline fort without a net is still possible and can be an enjoyable project. Here’s a step-by-step guide on how to make a trampoline fort without a net:
Materials you’ll need:
- Trampoline
- Tarp or large fabric sheet
- Bungee cords or zip ties
- PVC pipes (optional)
- Duct tape or cable ties
- Cushions, pillows, or blankets (for the fort interior)
Step 1: Choose a Suitable Location
Select a flat and open area in your backyard where you can set up the trampoline. Ensure there is enough space around it for the fort structure.
Step 2: Set up the Trampoline
Assemble and set up the trampoline according to the manufacturer’s instructions. Make sure it is properly secured and the springs are attached securely.
Step 3: Attach the Tarp or Fabric
Drape the tarp or fabric sheet over the trampoline, ensuring it covers the entire surface area. You can use bungee cords or zip ties to fasten the edges of the fabric to the trampoline frame. This will create a roof for your fort.
Step 4: Create Walls (optional)
If you want to have walls for your fort, you can use PVC pipes to create a frame around the trampoline. Insert the pipes into the ground around the trampoline, forming a square or rectangular shape. Secure the pipes together at the corners using duct tape or cable ties.
Step 5: Attach the Tarp or Fabric to the Walls (optional)
If you build walls using PVC pipes, attach the tarp or fabric sheet to the frame using bungee cords or zip ties. Make sure the fabric is pulled taut and securely fastened to the frame.
Step 6: Access the Fort
Create an entrance or doorway by leaving an opening in one of the walls or the tarp. You can use clips or Velcro strips to hold the opening in place, allowing easy access to the fort.
Step 7: Customize the Fort
Now it’s time to make the fort comfortable and inviting. Add cushions, pillows, and blankets inside the fort to create a cozy space for relaxation or play. You can also hang fairy lights or decorations to make it more appealing.
Step 8: Safety Precautions
Ensure the trampoline fort is set up in a safe manner. Make sure the trampoline is in good condition, with no damaged springs or tears in the mat. Always supervise children when they are using the trampoline fort to prevent accidents.
Remember, safety should be a priority when using a trampoline, so make sure to follow the manufacturer’s guidelines and supervise anyone using the fort.
How to Make a Blanket Fort on a Trampoline?
Creating a blanket fort on a trampoline can be a fun and unique experience. Here’s a step-by-step guide on how to make a blanket fort on a trampoline:
Materials you’ll need:
- Trampoline
- Blankets or sheets
- Bungee cords or zip ties
- Clothespins or clips
- Cushions, pillows, or blankets (for the fort interior)
Step 1: Set up the Trampoline
Ensure that the trampoline is properly set up and in good condition. Make sure the springs are attached securely and the trampoline is safely assembled.
Step 2: Drape the Blankets/Sheets over the Trampoline
Spread out the blankets or sheets over the trampoline surface. Make sure they cover the entire surface area, leaving some excess material hanging over the edges.
Step 3: Secure the Blankets/Sheets
Use bungee cords or zip ties to fasten the blankets or sheets to the trampoline frame. Attach them at regular intervals along the outer edge of the trampoline, ensuring a secure hold.
Step 4: Create walls and Roof
Pull the excess material from the blankets or sheets up towards the center of the trampoline to create walls. Use clothespins or clips to attach the blankets or sheets together, forming the walls and a roof. Be sure to leave an opening for entry and exit.
Step 5: Customize the Fort
Now it’s time to make the fort cozy and comfortable. Add cushions, pillows, and blankets inside the fort to create a soft seating area. You can also add string lights or other decorations to create a cozy ambiance.
Step 6: Access the Fort
Ensure there is an easy and safe way to access the fort. Leave an opening in one of the walls or create a doorway using clips or pins. Make sure it’s secure but easily accessible.
Step 7: Safety Precautions
Always prioritize safety when using the trampoline fort. Make sure the trampoline is in good condition, and the fort is stable and secure. Be cautious of any potential hazards and ensure that adult supervision is provided, especially for young children.
Remember, trampolines can be inherently risky, so ensure that safety precautions are taken, and never leave children unattended while using the fort. Enjoy your unique blanket fort on the trampoline!
Enjoying the Trampoline Fort
Enjoying the trampoline fort is all about exciting games and activities like bouncing around, playing card games, and telling stories inside. Encourage imaginative play with props, role-playing, arts and crafts, and even a mini theater.
If you’re hosting a trampoline fort sleepover, send creative invitations, ensure safety, set up comfy sleeping arrangements, plan midnight snacks, entertainment, and storytelling, and don’t forget to enjoy morning activities like a sunrise bounce and breakfast.
This trampoline fort promises fun, creativity, and unforgettable memories.
FAQs:
Q:1 What are the steps to turn a trampoline into a den?
Hang curtains from the top bar to give the space some privacy. String up fairy lights to light up the “room” for evenings “out” in the yard. Last, but not least, add in some comfy pillows and blankets to complete the space.
Q:2 What is the process of making a trampoline bed?
Here are the steps to create a DIY trampoline swing bed:
- Remove the legs from your used trampoline.
- Cover the metal frame with a split pool noodle or foam padding to protect it from any sharp edges.
- Wrap high-tensile strength ropes around the frame.
Q:3 What is a trampoline sleepover, and how does it work?
First, let’s define the perfect sleepover: it’s an event where you spend the night away from home or have guests spend the night in your home. A trampoline sleepover is similar, except instead of sleeping in a bed or a tent, guests will sleep ON the trampoline in the backyard.
Q:4 At what age is it appropriate for a child to have a trampoline?
Trampolining can be a great physical activity for kids. However, it can also pose a risk of injury, so it’s crucial to follow safety guidelines. It’s recommended that children should be at least six years old before using a trampoline.
Q:5 What are the factors that can cause a trampoline to fly away, and how can it be prevented?
Trampolines have a broad surface area and ‘may’ shift during high winds or, even worse, be blown away and land in trees, neighboring gardens, or worse, on a train track. Thankfully, such incidents don’t happen too frequently.
Q:6 Can trampoline enclosures effectively prevent accidents and injuries?
While nets won’t make trampolines entirely safe, they provide an additional layer of protection that can be critical. “The netting reduces the likelihood of falling off the trampoline while jumping and can help prevent some of the more severe injuries.
Q:7 What are some ways to hide a trampoline from view?
One simple way to keep your trampoline out of sight is to conceal it by wrapping it in gift wrap as soon as you receive it in its packaging. Use wrapping paper with festive designs, and even if others come across the wrapped trampoline in your home, they may not realize what it is.
Conclusion:
In conclusion, building a trampoline fort is a fun and exciting activity that can provide endless hours of entertainment for both kids and adults. With some simple materials and creativity, you can easily transform your trampoline into a cozy and inviting hideaway for all to enjoy.
From adding curtains and fairy lights for privacy and ambiance to incorporating pillows and blankets for comfort, there are many ways to personalize your trampoline fort to suit your needs and preferences.
However, safety should always be a top priority when using a trampoline, and it is essential to follow all the recommended guidelines for a safe and secure experience.
By following the steps outlined in this guide and using your imagination, you can create a unique and memorable trampoline fort that will delight and impress all who experience it.
So gather your supplies, grab some friends or family members, and get ready to embark on an exciting trampoline fort-building adventure!
We hope you will be well aware of how to make a trampoline fort after reading this comprehensive article. If you have any questions, feel free to comment below!